How to Capture Weather Forecast from web using Raspberry Pi’s Python Program

Introduction

We can use python to develop a program to capture any city’s weather forecast from openweathermap.org web site under our Raspberry Pi computer. I list our program and screen capture result in the following for your reference.

Program Source Code under Python ver 3 as below:

import urllib.request,json

city = input(“Enter City: “)

def getForecast(city) :
    #url = “http://api.openweathermap.org/data/2.5/forecast/daily?cnt=7&units=meteric&mode=json&q=”
    #url = “http://api.openweathermap.org/data/2.5/forecast/city?id=524901&APPID=42443ecbdcad3d01842205e3745895cd”
    #url = “http://api.openweathermap.org/data/2.5/forecast/daily?cnt=7&units=meteric&mode=json&q=LONDON&lang=zh_cn&APPID=42443ecbdcad3d01842205e3745895cd”
    url = “http://api.openweathermap.org/data/2.5/forecast/daily?cnt=7&units=meteric&mode=json&q=”
    url = url + city + “&lang=zh_cn&APPID=42443ecbdcad3d01842205e3745895cd”
    req = urllib.request.Request(url)
    response=urllib.request.urlopen(req)
    return json.loads(response.read().decode(“UTF-8”))

forecast = getForecast(city)

print(“Forecast for “, city, forecast[‘city’][‘country’])

day_num=1
for day in forecast[‘list’]:
    print(“Day : “, day_num)
    print(day[‘weather’][0][‘description’])
    print(“Cloud Cover : “, day[‘clouds’])
    print(“Temp Min : “, round(day[‘temp’][‘min’]-273.15, 1), “degrees C”)
    print(“Temp Max : “, round(day[‘temp’][‘max’]-273.15, 1), “degrees C”)
    print(“Humidity : “, day[‘humidity’], “%”)
    print(“Wind Speed : “, day[‘speed’], “m/s”)
    print()
    day_num = day_num+1

Screen Dump Result as below:

weather-pi

Further Development:

This function can be further developed to save weather forecast data to database, and then display in a chart format on screen. I may do it if I have time in future.

Network Communication Script for Raspberry Pi

Introduction

We can use python programs to start a server side and client side network communication service and allow them to transmit message  to each other under a Raspberry Pi. For example, we start two LXTerminal Sessions under a Raspberry Pi (or two difference Pi), and then run the following script.

In Server Side, run the following script:

import socket
comms_socket = socket.socket()
comms_socket.bind((‘localhost’, 50000))
comms_socket.listen(10)
connection, address = comms_socket.accept()
while True:
    print(connection.recv(4096).decode(“UTF-8”))
    send_data = input(“Reply: “)
    connection.send(bytes(send_data, “UTF-8”))

In Client Side, run the following script:

import socket
comms_socket = socket.socket()
comms_socket.connect((‘localhost’, 50000))
while True:
    send_data = input(“message: “)
    comms_socket.send(bytes(send_data, “UTF-8”))
    print(comms_socket.recv(4096).decode(“UTF-8”))

The testing result is shown as below screen dump for your reference:

network-communicate-pi

Setup to upload & access Dropbox on Raspberry Pi

Introduction

If you want to upload file from or to DropBox through Raspberry Pi, it is easy to do so. The following will show you a a installation program and its setup steps.

Step 1. Setup DropBox account and apps from web

First of all you need a DropBox account and apps account through the following links. Hop on over to dropbox is free.

http://www.dropbox.com

You then need to visit this link https://www.dropbox.com/developers/apps, login to DropBox and create an “app” by clicking the “create app” button.

Then choose “Dropbox API app”, “Files and Datastores”, and answer the final question “Can your app be limited to its own, private folder?” – either answer is OK, depending on your needs. The result will be as below:

raspberrypi-dropbox0

Step 2. Set Up DropBox Uploader in Raspberry Pi

Get Dropbox Uploader onto your Pi

$ cd ~    (this ensures you are in /home/pi)
$ git clone https://github.com/andreafabrizi/Dropbox-Uploader.git
$ ls

(If this fails, you may need to install git with sudo apt-get install git-core)

You should be able to see a directory called Dropbox-Uploader

$ cd Dropbox-Uploader
$ ls

You should now see three files, one of which is called dropbox_uploader.sh. This is the script we’re going to use.

$ ./dropbox_uploader.sh

Run the script with ./dropbox_uploader.sh (if it fails, try chmod +x dropbox_uploader.sh)

If access right problem still occurs, run the following command:

$ sudo ./dropbox_upload.sh

Sorting out the DropBox API keys and authorization. You need to give your app a unique name, and you will be assigned some keys to go with the name. Now you need to enter your app’s DropBox API keys and secret. Once you’ve entered your keys and answered the question “app” or “full”, your Pi will request an authorisation token and you will be given a web URL you need to visit to activate it…

The following is the whole setup screen dump from my Raspberry Pi for your reference:

pi@gopi2:~ $ git clone https://github.com/andreafabrizi/Dropbox-Uploader.git
Cloning into ‘Dropbox-Uploader’…
remote: Counting objects: 718, done.
remote: Total 718 (delta 0), reused 0 (delta 0), pack-reused 718
Receiving objects: 100% (718/718), 213.12 KiB | 190.00 KiB/s, done.
Resolving deltas: 100% (369/369), done.
Checking connectivity… done.

pi@gopi2:~ $ cd Dropbox-Uploader

pi@gopi2:~/Dropbox-Uploader $ ls
CHANGELOG.md dropbox_uploader.sh dropShell.sh LICENSE README.md

pi@gopi2:~/Dropbox-Uploader $ ./dropbox_uploader.sh
This is the first time you run this script.
1) Open the following URL in your Browser, and log in using your account: https://www.dropbox.com/developers/apps
2) Click on “Create App”, then select “Dropbox API app”
3) Now go on with the configuration, choosing the app permissions and access restrictions to your DropBox folder
4) Enter the “App Name” that you prefer (e.g. MyUploader271401743117612)
Now, click on the “Create App” button.
When your new App is successfully created, please type the
App Key, App Secret and the Permission type shown in the confirmation page:
# App key: 0pmq2laok7xxxxx
# App secret: d5fh2kgyd2xxxxx
Permission type:
App folder [a]: If you choose that the app only needs access to files it creates
Full Dropbox [f]: If you choose that the app needs access to files already on Dropbox
# Permission type [a/f]: a
App key is 0pmq2laok7tinna, App secret is d5fh2kgyd2uyftx and Access level is App Folder. Looks ok? [y/n]: y
Token request… OK
Please open the following URL in your browser, and allow Dropbox Uploader to access your DropBox folder:
https://www.dropbox.com/1/oauth/authorize?oauth_token=qH829qJuKZpxxxxx
Press enter when done…
Access Token request… OK

Finally, your DropBox account connected to your “app”

Besides Raspberry Pi operation, you also need to allow the access of Dropbox from Raspberry Pi as below two screens:

raspberrypi-dropbox1

raspberrypi-dropbox2

Step 3. Now you can test to upload from Raspberry Pi to DropBox

$ cd home/pi/Dropbox-Uploader
$ ./dropbox_uploader.sh upload /home/pi/upload_file_fr name_of_upload_file_to

This will upload the file you choose to your DropBox account.

…or use it in a Python script like this…

from subprocess import call  
photofile = “/home/pi/Dropbox-Uploader/dropbox_uploader.sh upload /home/pi/photo00001.jpg photo00001.jpg” 
call ([photofile], shell=True)

If we upload “license” & “license1” files to Dropbox, it will show the result as below:

raspberrypi-dropbox3

Finally, if you look at the DropBox Uploader documentation, there’s a lot more commands you can make use of…

  • upload
  • download
  • delete
  • move
  • list
  • share
  • mkdir


Sound Control on Raspberry Pi

Introduction

Raspberry Pi has a build-in sound card, HDMI and phone jack output to play sound. If you connect to HDMI display or plug-in a headphone to it, you can play sound. The setup of sound feature is easy as described below.

raspberrypi-phone

Step 1. Install PiAUISuite sound software

$ sudo apt-get install git-core

$ git clone git://github.com/StevenHickson/PiAUISuite.git

$ ./InstallAUISite.sh

(be aware to answer pop-up question to continue installation)

Step 2. Setup Sound Device

$ modprobe snd_bcm2835

$ amixer controls
numid=3,iface=MIXER,name=’PCM Playback Route’
numid=2,iface=MIXER,name=’PCM Playback Switch’
numid=1,iface=MIXER,name=’PCM Playback Volume’

$ amixer cset numid=3 1

where 0 for auto-select, 1 for headphone, 2 for HDMI.

$ sudo amixer cset numid=1 60%

to set the volume between 0 – 100%, 0 for mute.

$ sudo amixer set PCM – 60%

Step 3. To Play Sound

$ sudo omxplayer voice.mp3

If omxplayer’s auto-detection of the correct audio output device fails, you can force output over hdmi with:

$ sudo omxplayer-o hdmivoice.mp3

or you can force output over the headphone jack with:

$ sudo omxplayer-o localvoice.mp3

Note: you should be able to play sound on VLC connection, too.

Reference Link:

Bonus:

You can install alsa to control sound. Make sure alsa-utils is installed and run alsamixer as below:

$ sudo apt-get install -y alsa-utils

$ alsamixer

Then use the F1-F6 keys and UI to push up the volume.

sound-control

Use the arrow keys to jack up the volume and quit.

To save what you changed in alsamixer as defaults, do:

sudo alsactl store 0

Pls consider to buy Headphone from Amazon as below link:

Build a Raspberry Pi Webcam Server for Motion Detection

Introduction

Raspberry Pi can be connected to a camera to capture picture and video in order to use it as a CCTV motion detection device, which I have described in my previous post. To further enhance the motion detection feature, we can build a Raspberry Pi Webcam Video Server for browsing from web. It is more effective to monitor environment from outside. In the following, I will describe the installation steps of a application call motionPie to build a web server.

The MotionPie Logo

1. Download & Format the SD Card

  1. Download the Motion Pie SD Card Image from the Motion Pie GitHub repository or my link <<HERE>>.
  2. You will need a formatting tool. Visit the SD Association’s website and download SD Formatter 4.0 for either Windows or Mac.
  3. Follow the instructions to install the formatting software.
  4. Insert your SD card into the computer or laptop’s SD card reader and check the drive letter allocated to it, e.g. I:/
  5. In SD Formatter, select the drive letter for your SD card (eg. I:/) and format

2. Install the Motion Pie Image onto the SD Card

  1. Download the Win32DiskImager.
  2. Now unzip the MotionPie ISO file so you can install it onto the Pi safely.
  3. Select the MotionPie ISO file and the drive letter your SD card is assigned (Eg. I:/)
  4. Confirm you have the correct details and click on Write.
  5. Once done you can safely remove your SD card from the computer.
win32diskimager-motionpie

Booting/Setting up MotionPie

Now we’re ready for boot up, so insert the SD Card, an Ethernet cord and the power cord. We will need to communicate to the Pi over the network rather than directly like I have done in most of the previous tutorials.

So now go ahead and boot the PI up and then we can move onto getting it setup correctly.

Setting up the Raspberry Pi Security Camera

Once the Pi has booted you will need to do the following:

  1. First we will need the IP or host name so we’re able to connect to the Pi.
    • If you’re using Windows simply go to network on the right hand side in the File Explorer.
    • You should see a computer names something like MP-xxxxxxx
    • Go to your browser and add this to your browser bar eg. http://MP-xxxxxxx
    • You should now have the Motion Pie interface up.
  2. Alternatively you can find out the IP of the Pi by going to your router. Since all routers are different I will not go into how this is done. Please refer to your manufactures manual.
  3. To login as the admin go to key symbol in the upper left corner. The username is admin and the password is blank, this can be changed later.
  4. You can access all the setting for the camera stream here. If you’re interested in altering these settings keep reading as I explain them as much as possible below.

picam_init

Now we should have a working security hub that we can configure! Require the security camera to be wireless? No problem! Require to alert you with an email? No problem! Read on more to find out what the settings do in Motion Pie.

How to setup multiple network Raspberry Pi security cameras.

If you want to run more than one Pi cameras it is pretty easy to set this up so you have all the streams under in one window. You can even add a stream that has been setup using the Raspberry Pi Webcam server tutorial.

  1. First click on the 3 lines with dots on them in the upper left hand corner.
  2. Now up in the upper left hand corner and click on the dropdown box and select add camera.
  3. In here you have four settings to set up.
  4. Device: This is allows you to select where the camera is located(network/local) and type. (Eg. motionEye, MJEPG camera)
  5. URL: This is the URL to the other network camera. Eg. http://othercamera:8080
  6. Username: This is the username to the camera device. (If no username/password required leave the fields blank)
  7. Password: This is the password for the username chosen above.
  8. Camera: Select the camera you wish to add.
motionpie-setup

Connecting to the surveillance outside your network

Now that you have your Raspberry Pi security cameras setup it might be worth considering allowing access to the central Pi so you can monitor your cameras elsewhere.

To do this simply head over to my guide on how to setup port forwarding and also how to setup dynamic DNS, you can find the guide at Raspberry Pi Dynamic DNS & Port Forwarding.

A few important bits of information you will need for the setting up the port forwarding.

  • The IP of your Raspberry Pi for example mine is 192.168.5.78
  • Internal port is 80.

Ensure you have also setup passwords on both the admin and the surveillance user to help avoid unwanted visitors.

Once setup should now be able to connect using your external IP address such as XX.XXX.XXX.XXX:80 (80 should be changed to something else, I would recommended changing it to avoid easy access for unwanted visitors)

Configuring the Settings in MotionPie

General Settings

In here you are able to set the administrator username and password. This account will have access to all the settings you’re seeing at the moment.

Surveillance username and password can also be set in here this can be used to just access the camera interface.

To view all the settings available to set turn the show advanced settings to on.

Wireless Network

Turn this on if you plan on connecting to the network via a wireless dongle. There are two things you will need to fill in here.

  1. Network Name – Enter the network name/SSID you wish to connect to in here.
  2. Network Key – Enter the network password/network key in here for the network you’re connecting to.

Once done you should be a able to disconnect the Ethernet cord and remain connected to the network.

Video Device

Under this menu you’re able to set certain settings regarding the Raspberry Pi camera device.

  1. Camera Name: Set this to whatever you would like the camera to be named. For example kitchen would work well for a camera in a kitchen.
  2. Camera Device: You’re unable to edit this one but this is the device name of the camera.
  3. Light Switch Detection: Enable this if you want sudden changes such as a light being switched on to not be treated as motion. (This will help prevent false positives)
  4. Automatic Brightness: This will enable software automatic brightness, this means the camera software will make adjustments for the brightness. You don’t need to activate this if your camera already handles this.
    • In here you change the brightness, contrast and saturation of the video of the camera.
  5. Video Resolution: Here you can set the video resolution of the camera. The higher the resolution the more room it will take up and the more bandwidth it will need to use in order to stream the footage. I set mine to 1280×800 and that seems to work perfectly fine.
  6. Video Rotation: You can rotate your video from the Raspberry Pi security if you’re finding that it is looking the wrong way.
  7. Frame Rate: This sets the amount of frames that will be sent be every second. The higher this is the smoother the video but again this will increase the storage used and bandwidth.

File Storage

Under this menu you can specify where you would like the files stored for the Raspberry Pi Security Camera. This can be a custom path on the Pi, the predetermined path or the network path.

Text Overlay

In here you can set the text overlay on the output of the camera. By default the left text reads the camera name and the right read the time stamp (Todays date and current time).

Video Streaming

This menu you’re able to set the video streaming options, this is the video you see in the browser.

  • Streaming Frame Rate: This is exactly the same as mentioned above under video device.
  • Streaming Quality: You can reduce the video streaming quality. This is good to reduce if you need to access the camera on a low bandwidth device often.
  • Streaming Image Resizing: Enable this if you want MotionPie to resize the images before being sent to a browser. (Not recommended on a Pi)
  • Streaming Port: This is the port that the device will listen to for connections looking to view the stream. Eg. http://motionpie:8081
  • Motion Optimization: This will reduce the frame rate whenever no motion is detected. This will save you bandwidth.

You can also see three URLs that can be used to access different footage. These URLs are very important if you have multiple cameras per Pi as each camera will have a unique port that you listen to the stream on.

Still Images

Here you can set the Raspberry Pi security camera to take still images whenever motion is triggered, during specific intervals or all the time.

Motion Detection

In here you activate the Raspberry Pi security camera motion detection that is included in the software. You are able to make adjustments to the settings here so that you can get better motion detection.

Motion Movies

In you here you can set the Pi to record movies whenever motion is detected

Motion Notifications

You’re able to set up email notifications, web hook notifications or even run a command whenever motion is detected. This will allow you to be notified whenever activity is detected on the cameras, perfect if they are monitoring areas with low traffic.

Working Schedule

Here you can set the days and the hours of operation you would like the system to be monitoring (If you leave this off then it is 24/7). This option is perfect if you only need it running during specific hours.

Summary

The Raspberry Pi security camera system is a great way to have multiple cameras hooked up both locally and over a network. All the extra setting motion pie provides allows you to have a  strong functioning security hub for your home, office or wherever you’re setting this up.

Information Source:

http://pimylifeup.com/raspberry-pi-security-camera/

Note:

In past, we often used “Motion” package (“sudo apt-get install motion”) for webserver, but this method doesn’t work on the Raspberry Pi 2.

Python Motion Detection Program on Raspberry Pi

Introduction

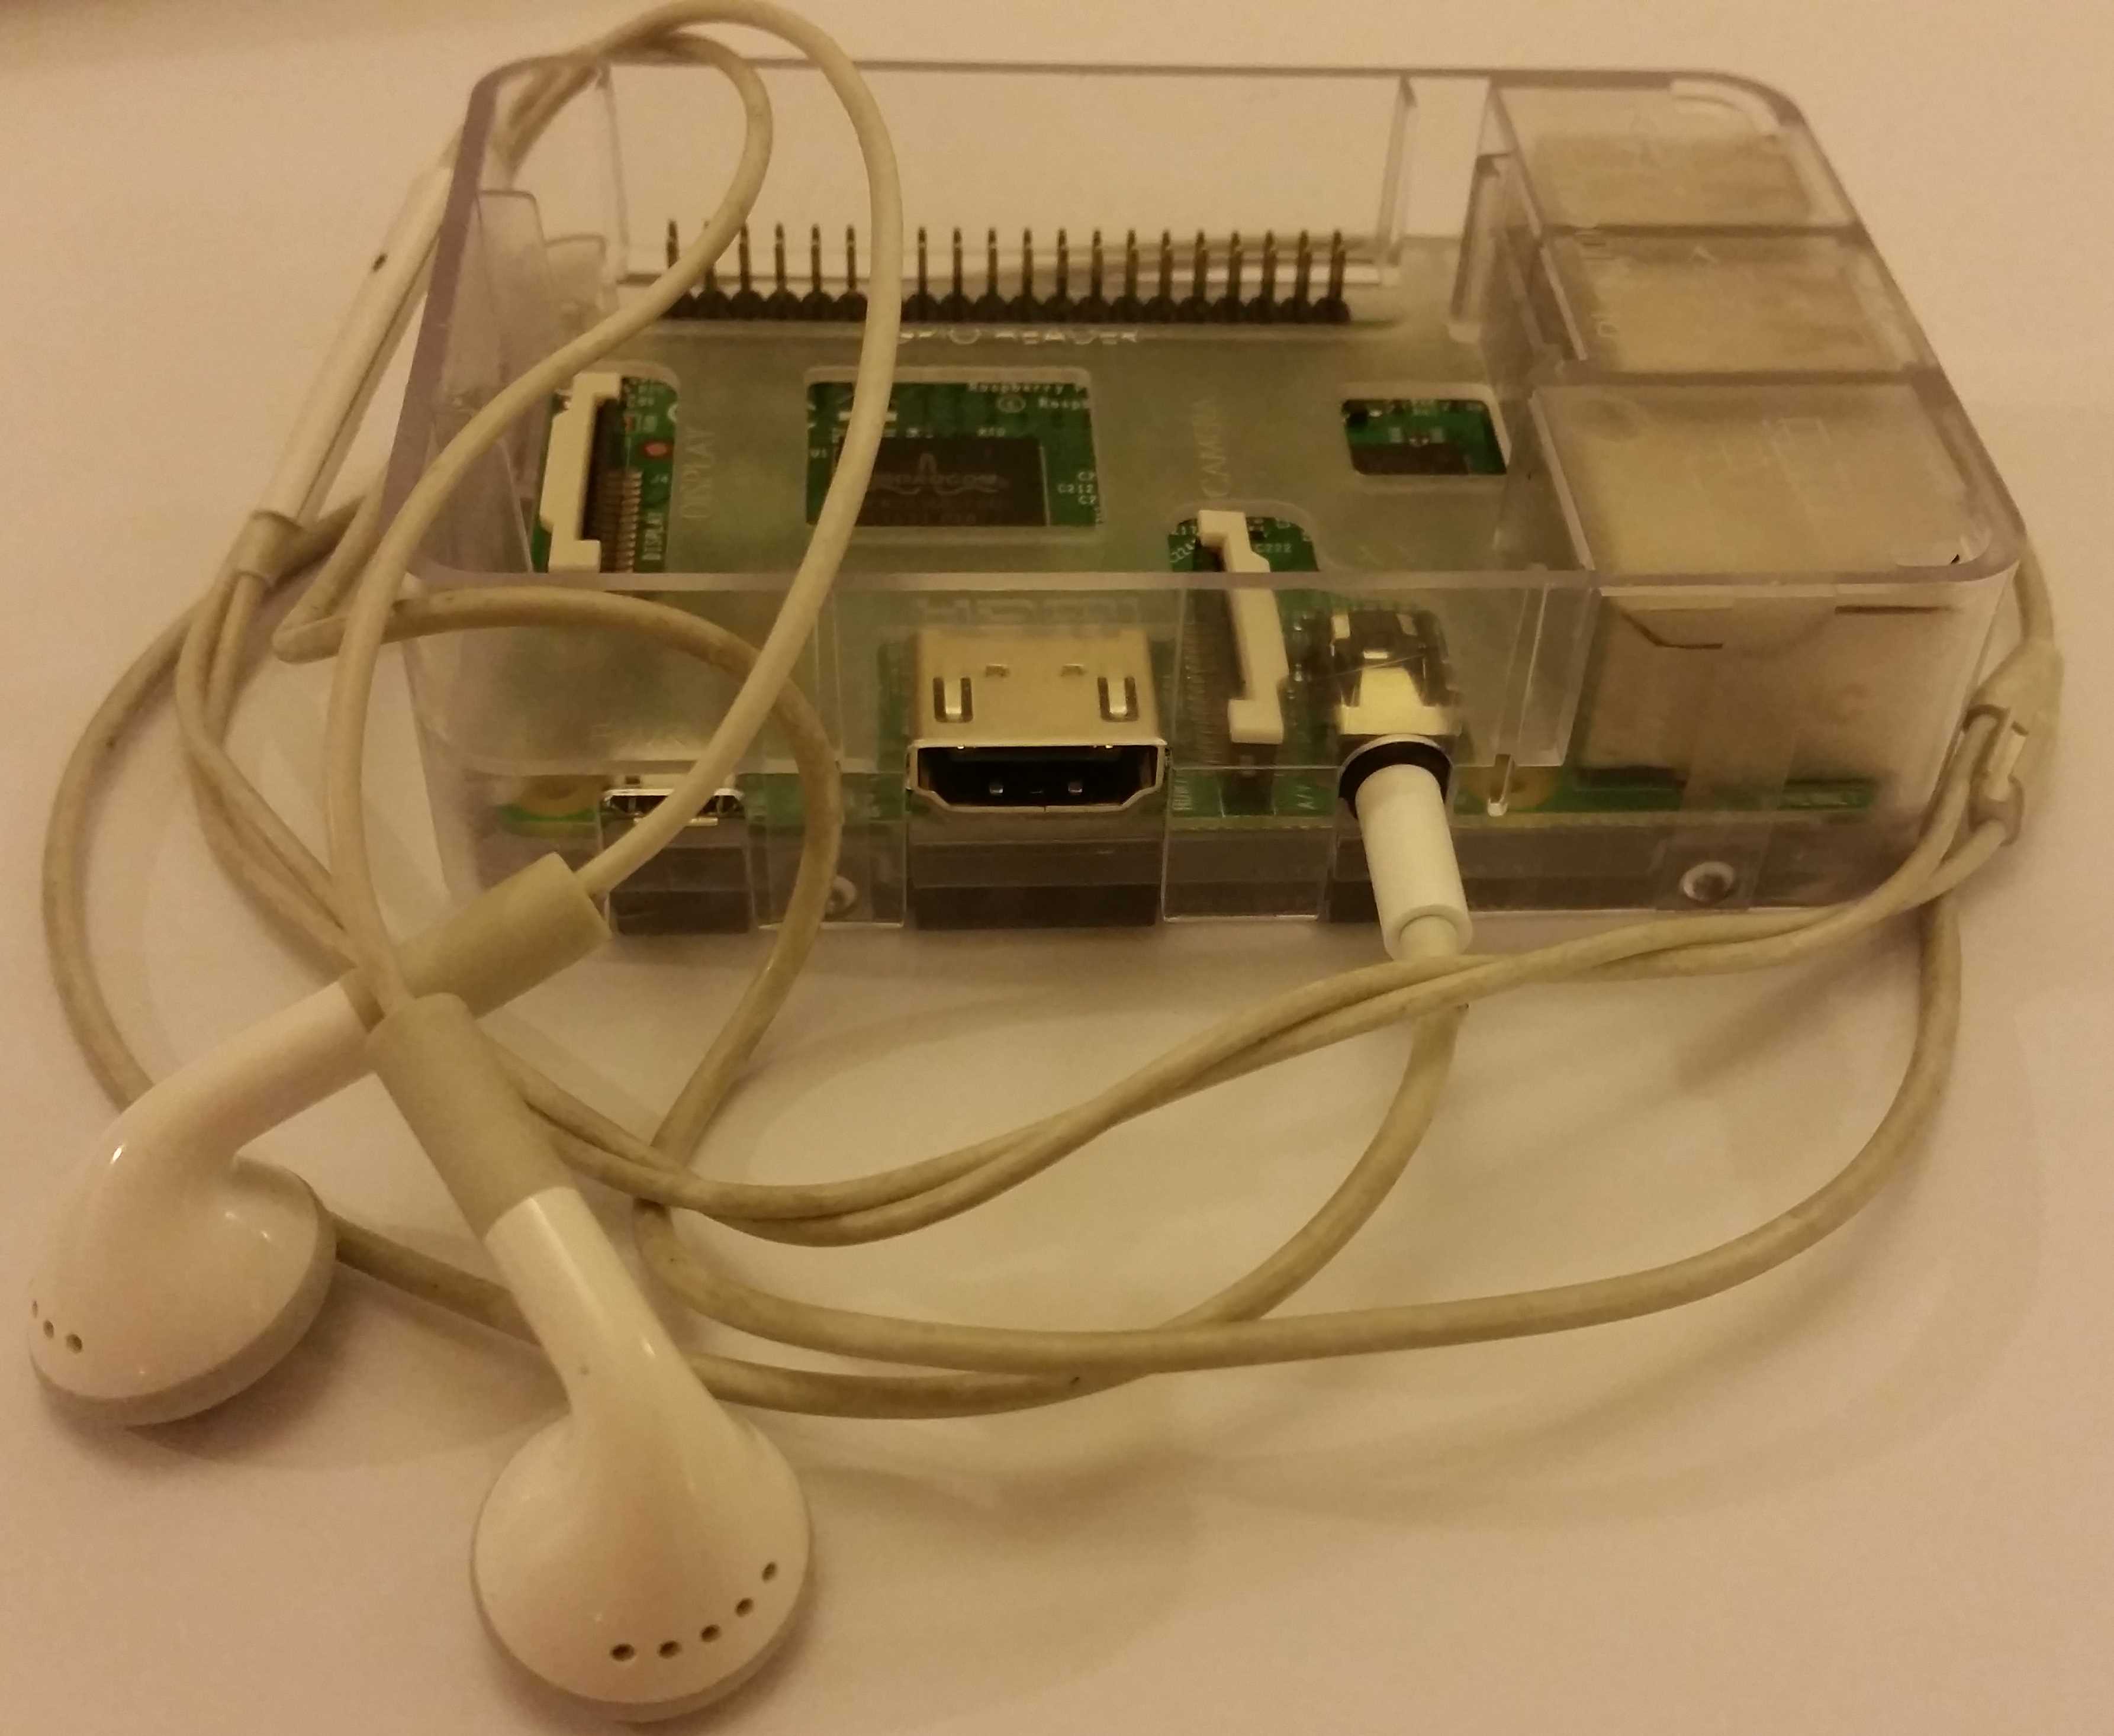
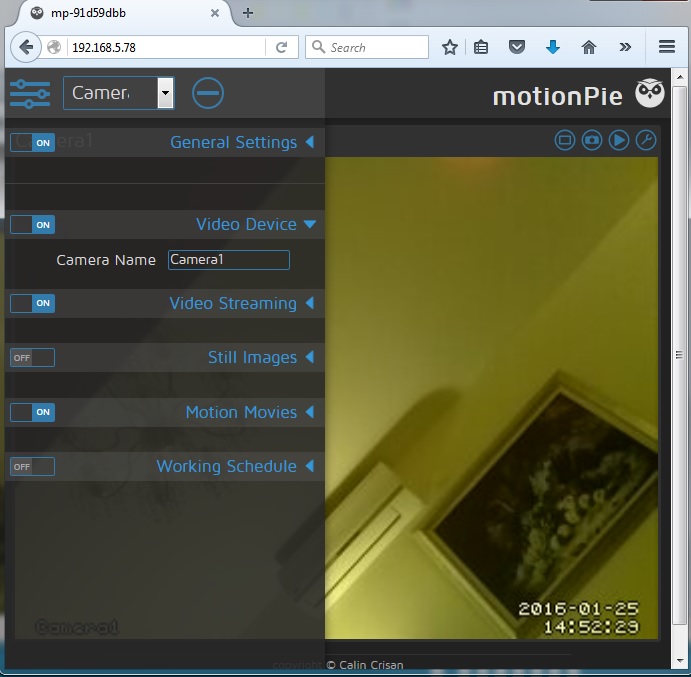
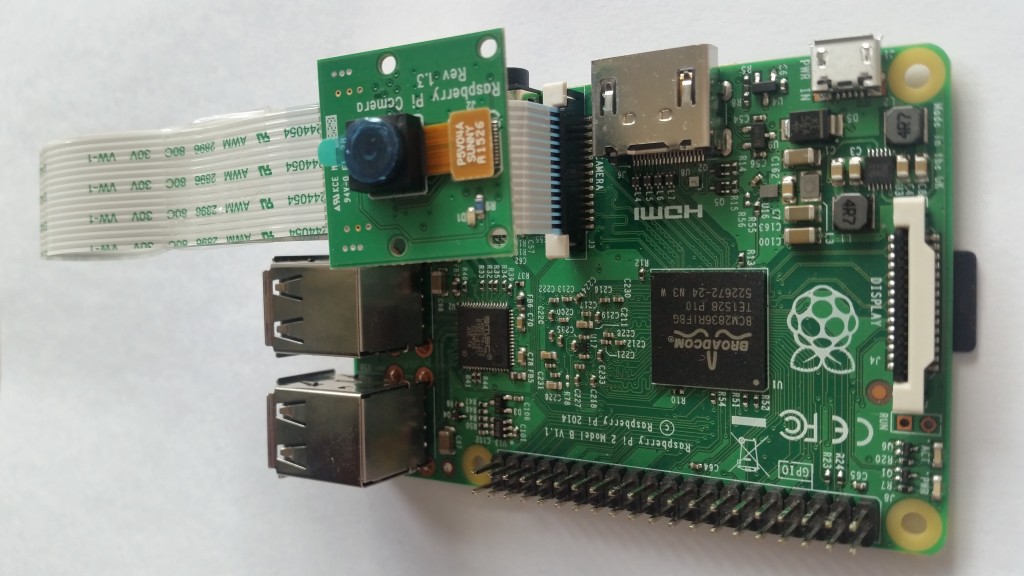
Raspberry Pi can connect to a camera to capture picture and video. As an advance feature, it can be used as a CCTV to monitor the environment. For example, from official Raspberry Pi web site “https://www.raspberrypi.org/forums/viewtopic.php?t=45235”, there shows a simple and efficient motion detection script in Python using PIL.

While watching for motion it pipes a thumbnail image from raspistill at around 1fps to analyse (it keeps everything in memory to avoid wearing out the SD card). Once motion is detected it calls raspistill again to write a high-res jpeg to disk. It also checks free disk space and if under a set limit it starts to delete the oldest images to make sure there is always enough free space for new images. While running on my rev1 B it consumes around 12% CPU / 4% ram and manages to capture a full size image once ever 2-3 secs.

picamera

picamera

In the following, I will show you the step of of installation of this motion detection python script.

Step 1. Install PIL by running “sudo aptitude install python-imaging-tk”

Step 2. Create a python script with file name “picam.py” as below:

#!/usr/bin/python

# original script by brainflakes, improved by pageauc, peewee2 and Kesthal
# www.raspberrypi.org/phpBB3/viewtopic.php?f=43&t=45235

# You need to install PIL to run this script
# type “sudo apt-get install python-imaging-tk” in an terminal window to do this

import StringIO
import subprocess
import os
import time
from datetime import datetime
from PIL import Image

# Motion detection settings:
# Threshold          – how much a pixel has to change by to be marked as “changed”
# Sensitivity        – how many changed pixels before capturing an image, needs to be higher if noisy view
# ForceCapture       – whether to force an image to be captured every forceCaptureTime seconds, values True or False
# filepath           – location of folder to save photos
# filenamePrefix     – string that prefixes the file name for easier identification of files.
# diskSpaceToReserve – Delete oldest images to avoid filling disk. How much byte to keep free on disk.
# cameraSettings     – “” = no extra settings; “-hf” = Set horizontal flip of image; “-vf” = Set vertical flip; “-hf -vf” = both horizontal and vertical flip
threshold = 10
sensitivity = 20
forceCapture = True
forceCaptureTime = 60 * 60 # Once an hour
filepath = “/home/pi/picam”
filenamePrefix = “capture”
diskSpaceToReserve = 40 * 1024 * 1024 # Keep 40 mb free on disk
cameraSettings = “”

# settings of the photos to save
saveWidth   = 1296
saveHeight  = 972
saveQuality = 15 # Set jpeg quality (0 to 100)

# Test-Image settings
testWidth = 100
testHeight = 75

# this is the default setting, if the whole image should be scanned for changed pixel
testAreaCount = 1
testBorders = [ [[1,testWidth],[1,testHeight]] ]  # [ [[start pixel on left side,end pixel on right side],[start pixel on top side,stop pixel on bottom side]] ]
# testBorders are NOT zero-based, the first pixel is 1 and the last pixel is testWith or testHeight

# with “testBorders”, you can define areas, where the script should scan for changed pixel
# for example, if your picture looks like this:
#
#     ….XXXX
#     ……..
#     ……..
#
# “.” is a street or a house, “X” are trees which move arround like crazy when the wind is blowing
# because of the wind in the trees, there will be taken photos all the time. to prevent this, your setting might look like this:

# testAreaCount = 2
# testBorders = [ [[1,50],[1,75]], [[51,100],[26,75]] ] # area y=1 to 25 not scanned in x=51 to 100

# even more complex example
# testAreaCount = 4
# testBorders = [ [[1,39],[1,75]], [[40,67],[43,75]], [[68,85],[48,75]], [[86,100],[41,75]] ]

# in debug mode, a file debug.bmp is written to disk with marked changed pixel an with marked border of scan-area
# debug mode should only be turned on while testing the parameters above
debugMode = False # False or True

# Capture a small test image (for motion detection)
def captureTestImage(settings, width, height):
    command = “raspistill %s -w %s -h %s -t 200 -e bmp -n -o -” % (settings, width, height)
    imageData = StringIO.StringIO()
    imageData.write(subprocess.check_output(command, shell=True))
    imageData.seek(0)
    im = Image.open(imageData)
    buffer = im.load()
    imageData.close()
    return im, buffer

# Save a full size image to disk
def saveImage(settings, width, height, quality, diskSpaceToReserve):
    keepDiskSpaceFree(diskSpaceToReserve)
    time = datetime.now()
    filename = filepath + “/” + filenamePrefix + “-%04d%02d%02d-%02d%02d%02d.jpg” % (time.year, time.month, time.day, time.hour, time.minute, time.second)
    subprocess.call(“raspistill %s -w %s -h %s -t 200 -e jpg -q %s -n -o %s” % (settings, width, height, quality, filename), shell=True)
    print “Captured %s” % filename

# Keep free space above given level
def keepDiskSpaceFree(bytesToReserve):
    if (getFreeSpace() < bytesToReserve):
        for filename in sorted(os.listdir(filepath + “/”)):
            if filename.startswith(filenamePrefix) and filename.endswith(“.jpg”):
                os.remove(filepath + “/” + filename)
                print “Deleted %s/%s to avoid filling disk” % (filepath,filename)
                if (getFreeSpace() > bytesToReserve):
                    return

# Get available disk space
def getFreeSpace():
    st = os.statvfs(filepath + “/”)
    du = st.f_bavail * st.f_frsize
    return du

# Get first image
image1, buffer1 = captureTestImage(cameraSettings, testWidth, testHeight)

# Reset last capture time
lastCapture = time.time()

while (True):

    # Get comparison image
    image2, buffer2 = captureTestImage(cameraSettings, testWidth, testHeight)

    # Count changed pixels
    changedPixels = 0
    takePicture = False

    if (debugMode): # in debug mode, save a bitmap-file with marked changed pixels and with visible testarea-borders
        debugimage = Image.new(“RGB”,(testWidth, testHeight))
        debugim = debugimage.load()

    for z in xrange(0, testAreaCount): # = xrange(0,1) with default-values = z will only have the value of 0 = only one scan-area = whole picture
        for x in xrange(testBorders[z][0][0]-1, testBorders[z][0][1]): # = xrange(0,100) with default-values
            for y in xrange(testBorders[z][1][0]-1, testBorders[z][1][1]):   # = xrange(0,75) with default-values; testBorders are NOT zero-based, buffer1[x,y] are zero-based (0,0 is top left of image, testWidth-1,testHeight-1 is botton right)
                if (debugMode):
                    debugim[x,y] = buffer2[x,y]
                    if ((x == testBorders[z][0][0]-1) or (x == testBorders[z][0][1]-1) or (y == testBorders[z][1][0]-1) or (y == testBorders[z][1][1]-1)):
                        # print “Border %s %s” % (x,y)
                        debugim[x,y] = (0, 0, 255) # in debug mode, mark all border pixel to blue
                # Just check green channel as it’s the highest quality channel
                pixdiff = abs(buffer1[x,y][1] – buffer2[x,y][1])
                if pixdiff > threshold:
                    changedPixels += 1
                    if (debugMode):
                        debugim[x,y] = (0, 255, 0) # in debug mode, mark all changed pixel to green
                # Save an image if pixels changed
                if (changedPixels > sensitivity):
                    takePicture = True # will shoot the photo later
                if ((debugMode == False) and (changedPixels > sensitivity)):
                    break  # break the y loop
            if ((debugMode == False) and (changedPixels > sensitivity)):
                break  # break the x loop
        if ((debugMode == False) and (changedPixels > sensitivity)):
            break  # break the z loop

    if (debugMode):
        debugimage.save(filepath + “/debug.bmp”) # save debug image as bmp
        print “debug.bmp saved, %s changed pixel” % changedPixels
    # else:
    #     print “%s changed pixel” % changedPixels

    # Check force capture
    if forceCapture:
        if time.time() – lastCapture > forceCaptureTime:
            takePicture = True

    if takePicture:
        lastCapture = time.time()
        saveImage(cameraSettings, saveWidth, saveHeight, saveQuality, diskSpaceToReserve)

    # Swap comparison buffers
    image1 = image2
    buffer1 = buffer2

Step 3: Change execute mode of picam.py by running the command “sudo chmod 755 picam.py

Step 4: Make a directory by running the command “mkdir /home/pi/picam” which is a hard code path in the picam.py script.

Step 5: Run the picam.py script by execute the command “sudo python picam.py

Step 6: You will see that a series of picture files will be created under the /home/pi/picam directory.

Step 7: If you want to auto-start this program at boot-up, you should create the following script by download a file to directory “/etc/init.d/picam_init” as below link –> https://infotechmanagefactory.com/wp-content/uploads/2016/01/picam_init.zip.

Step 8. change its mode as: sudo chmod 755 /etc/init.d/picam_init

Step 9: make the boot system aware of this script as “sudo update-rc.d picam_init defaults

Step 10: This script will now start and shutdown along with the Raspberry Pi. You can also manually control it like any other daemon. Running “/etc/init.d/picam_init stop" will stop the script and “/etc/init.d/picam_init start" will start it.

Reference Doc Link : https://www.maketecheasier.com/raspberry-pi-as-surveillance-camera/

Installation of Riak Cluster on Raspberry Pi

Introduction

Actually Raspberry Pi is a low performance computer board, however, we can use cluster technology to build of a powerful Raspberry Pi computer by combining several pi. It is very scalable. We can use “Riak” software to build the cluster function on Raspberry Pi. It can improve the data process power to speed-up the data upload and download process. I will introduce the installation of Riak in the following.

RPiImage3

Step 1 Prerequisite Requirement – Installation of mysql & esl-erlang

1.0 Install mysql by running the following command:

$ sudo apt-get install mysql-server mysql-clietn php5-mysql

$ sudo apt-get install phpmyadmin

$ sudo nano /etc/apache2/apache2.conf

add the following line to the end:

 Include /etc/phpmyadmin/apache.conf

1.1 Add the following line to your /etc/apt/sources.list:

deb http://binaries.erlang-solutions.com/debian wheezy contrib

(you may remove all other lines in the file)

1.2 Add erlang Key:

$ cd ~$ sudo wget –o – http://binaries.erlang_solutions.com/debian/erlang_solutions.asc | sudo apt-key add –

1.3 Installation of esl-erlang

$ sudo apt-get update

$ sudo apt-get install esl-erlang

$ sudo reboot

Tips: If you have problem to install esl-erlang, you can try to install erlang-mini.

Step 2: Download the riak-1.2.1 version from the web site

http://s3.amazonaws.com/downloads.basho.com/riak/1.2/1,2.1/riak-1.2.1.tar.gz

$ tar zxvf riak-1.2.1.tar.gz$ mv riak-1.2.1 ~

$ cd ~/riak-1.2.1

Tips: I tried the latest version, but could not succeed to install; so I referred to use version 1.2.1)

Step 3: Installation of Riak

$ sudo make

$ sudo make rel

Tips: If you meet error message “Unable to generate spec: read file info /usr/lib/erlang/man/man3/cerfcl.3.gzfailed make: *** [generate] Error 1”, you can remove those cert* files to solve the problem as below, and then re-run “sudo make rel” command :

$ sudo mv /usr/lib/erlang/man/man3/cerfcl.3.gz ~

$ sudo mv /usr/lib/erlang/man/man3/cerfl.3.gz ~

$ sudo mv /usr/lib/erlang/man/man3/cerff.3.gz ~

$ sudo mv /usr/lib/erlang/man/man3/cerfcf.3.gz ~

Step 4: Test Riak

4.1. start Riak process

$ cd ./rel/riak$ sudo ./bin/riak start

4.2 Test Riak process

4.2.1 First Test:

pi@gopi1:~/riak-1.2.1/rel/riak/bin $ curl http://192.168.5.78:8098/ping
OKpi@gopi1:~/riak-1.2.1/rel/riak/bin $

You will see OK display after run curl command as red highlight above.

4.2.2 Second Test on Speed:

pi@gopi1:~/riak-1.2.1/rel/riak/bin $ curl http://192.168.5.78:8098/riak/druple?keys=true | json_pp
% Total % Received % Xferd Average Speed Time Time Time Current
Dload Upload Total Spent Left Speed
100 436 100 436 0 0 1153 0 –:–:– –:–:– –:–:– 1159
{
“keys” : [],
“props” : {
“young_vclock” : 20,
“postcommit” : [],
“dw” : “quorum”,
“basic_quorum” : false,
“allow_mult” : false,
“w” : “quorum”,
“linkfun” : {
“mod” : “riak_kv_wm_link_walker”,
“fun” : “mapreduce_linkfun”
},
“name” : “druplets”,
“notfound_ok” : true,
“chash_keyfun” : {
“fun” : “chash_std_keyfun”,
“mod” : “riak_core_util”
},
“pr” : 0,
“old_vclock” : 86400,
“last_write_wins” : false,
“big_vclock” : 50,
“rw” : “quorum”,
“pw” : 0,
“precommit” : [],
“small_vclock” : 50,
“r” : “quorum”,
“n_val” : 3
}
}

Step 5: Setup Cluster on Two Raspberry Pi

5.1. Ensure a static ip address was setup in /etc/network/interfaces

5.2. edit ~/riak-1.2.1/rel/riak/etc/vm.args file by changing the following line to assign ip as:

-name riak@127.0.0.1 –> -name riak@192.168.5.78

5.3. edit ~/riak-1.2.1/rel/riak/etc/app.config file by changing the following lines to assign ip as:

{pb_ip, “127.0.0.1” }, –> {pb_ip, “192.168.5.78” },

{http, [ {“127.0.0.1”, 8098 } ]}, –> {http, [ {“192.168.5.78”, 8098 } ]},

%{https, [{ “127.0.0.1”, 8098 }]}, –> %{https, [{ “192.168.5.78”, 8098 }]},

Do the 5.1, 5.2, and 5.3 for other Raspberry Pi, for example, setup another pi with ip 192.168.5.88.

5.4. Start the Riak in all Raspberry Pi by the following command: ~/riak-1.2.1/rel/riak/bin $ sudo ./riak start

5.5 Setup Cluster Process by adding salve to master, by running the command in master raspberry pi:

~/riak-1.2.1/rel/riak/bin $ sudo ./riak-admin cluster join riak@192.168.5.88

5.6 Test Cluster Process

pi@gopi1:~/riak-1.2.1/rel/riak/bin $ sudo ./riak-admin member-status
================================= Membership ==================================
Status Ring Pending Node
——————————————————————————-
joining 0.0% — ‘riak@192.168.5.88’
valid 100.0% — ‘riak@192.168.5.78’
——————————————————————————-
Valid:1 / Leaving:0 / Exiting:0 / Joining:1 / Down:0

Will Change to below after success:

——————————————————————————-
valid 50.0% — ‘riak@192.168.5.78’
valid 50.0% — ‘riak@192.168.5.88’
——————————————————————————-
Valid:2 / Leaving:0 / Exiting:0 / Joining:0 / Down:0

5.7 Check the Process Speed:

pi@gopi1:~/riak-1.2.1/rel/riak/bin $ curl http://192.168.5.78:8098/riak/druplets?keys=true | json_pp
% Total % Received % Xferd Average Speed Time Time Time Current
Dload Upload Total Spent Left Speed
100 436 100 436 0 0 5119 0 –:–:– –:–:– –:–:– 5190
{
“keys” : [],
“props” : {
“name” : “druplets”,
“chash_keyfun” : {
“mod” : “riak_core_util”,
“fun” : “chash_std_keyfun”
},
“postcommit” : [],
“big_vclock” : 50,
“small_vclock” : 50,
“allow_mult” : false,
“linkfun” : {
“mod” : “riak_kv_wm_link_walker”,
“fun” : “mapreduce_linkfun”
},
“last_write_wins” : false,
“old_vclock” : 86400,
“precommit” : [],
“r” : “quorum”,
“w” : “quorum”,
“basic_quorum” : false,
“pr” : 0,
“pw” : 0,
“rw” : “quorum”,
“young_vclock” : 20,
“n_val” : 3,
“notfound_ok” : true,
“dw” : “quorum”
}
}

Bonus:

You can install “Siege” Software to test the web speed performance, and its installation procedure is as below:

sudo apt-get install siege

(If cannot auto-install, try the following manual-install)

Download from https://www.joedog.org/2015/11/siege-3.1.3/

tar xvf siege-3.1.3.tar.gz

cd siege-3.1.3

sudo ./configure

sudo make

sudo make install

sudo make uninstall

(Testing as below command)

siege –c200 –d1 –r1 –v http://localhost/index.html

Installation Edimax Dongle for Wifi Receiver & Access Point on Raspberry Pi

Introduction

Recently, I bought an Edimax Wifi Dongle and used it on my Raspberry Pi. It selected Edimax because it is 100% compatible with Raspberry Pi, and can works out of the box. Moreover, it is cheap, and it can be used as a WiFi Receiver and an Access Point to share out WiFi. The features of Edimax are as below:

  • It supports 150 MBPS speed at an 802.11n wireless data rate, which is the latest wireless standard. It provides the fastest range and widest coverage area.
  • The Raspberry Pi Wifi dongle also supports Wifi Multimedia (WMM)  standard, which allows better streaming of real-time data.
  • It has a multi-language EZmax setup wizard
  • Nano size design helps you to connect it with any USB port without  blocking other USB ports
  • Supports Windows 10
  • Ideal wifi adapter for Raspberry P

In the following, I will talk about how to set it up as a WiFi receiver and Access Point.

EdimaxDongle

Setup Edimax as WiFi Receiver

Step 1. Connect the Edimax to USB port

Step 2. Edit the /etc/network/interfaces files as below:

# Please note that this file is written to be used with dhcpcd
# For static IP, consult /etc/dhcpcd.conf and ‘man dhcpcd.conf’

# Include files from /etc/network/interfaces.d:
source-directory /etc/network/interfaces.d

auto lo
iface lo inet loopback

iface eth0 inet dhcp

allow-hotplug wlan0
auto wlan0
iface wlan0 inet manual
    wpa-conf /etc/wpa_supplicant/wpa_supplicant.conf

allow-hotplug wlan1
iface wlan1 inet manual
    wpa-conf /etc/wpa_supplicant/wpa_supplicant.conf

Step 2. Edit the /etc/wpa_supplicant/wpa_supplicant.conf files to add the SSID and its passphrase as below:

ctrl_interface=DIR=/var/run/wpa_supplicant GROUP=netdev
update_config=1

network={
        ssid=”SSID Name”
        psk=”SSID Passphrase”
}

Bonus:

If you do not familiar with editor to edit wpa_supplicant.conf file, you can setup SSID via “wpa-cli” command as below:

Setup SSID command:

$ ifup -force wlan0
$ wpa_cli
> scan
> scan_result
> add_network
0
> set_network 0 ssid “SSID Name”
> set_network 0 psk “SSID Passphrase”
> enable_network 0
> save_config
> quit
$ sudo /etc/init.d/networking restart

Monitor command:

$ lsusb
$ lsmod
$ ifconfig
$iwconfig

Setup Edimax WiFi as Access Point

Now, we share our network card internet and share the internet via Edimax WiFi dongle with bridge mode as below:

Step 1. Install the following packages.

sudo apt-get install bridge-utils hostapd

Step 2. Download the installed binary version of hostapd with the following commands:

wget https://infotechmanagefactory.com/wp-content/uploads/2016/01/hostapd.zip

unzip hostapd.zip

sudo mv /usr/sbin/hostapd /usr/sbin/hostapd.bak

sudo mv hostapd /usr/sbin/hostapd.edimax

sudo ln -sf /usr/sbin/hostapd.edimax /usr/sbin/hostapd

sudo chown root.root /usr/sbin/hostapd

sudo chmod 755 /usr/sbin/hostapd

Step 3. Bridge the Network Connection – to edit interfaces file as below:

$ sudo nano /etc/network/interfaces

# interfaces(5) file used by ifup(8) and ifdown(8)

# Please note that this file is written to be used with dhcpcd
# For static IP, consult /etc/dhcpcd.conf and ‘man dhcpcd.conf’

# Include files from /etc/network/interfaces.d:
source-directory /etc/network/interfaces.d

auto lo
iface lo inet loopback

allow-hotplug eth0

auto eth0
iface eth0 inet dhcp

#bridge
auto br0
iface br0 inet dhcp
bridge_ports eth0 wlan0

Step 4. Configure Hostapd by creating the hostapd.conf file as below:

sudo nano /etc/hostapd/hostapd.conf

interface=wlan0
driver=rtl871xdrv
bridge=br0
ssid=YourSsidHere
channel=1
wmm_enabled=0
wpa=1
wpa_passphrase=YourPassPhraseHere
wpa_key_mgmt=WPA-PSK
wpa_pairwise=TKIP
rsn_pairwise=CCMP
auth_algs=1
macaddr_acl=0

Step 5. Test the Hostapd

$ sudo reboot

$ sudo hostapd -dd /etc/hostapd/hostapd.conf

Now, you should be able to search its SSID via another WiFi device, and test to connect it. Good Luck !

Pls consider to buy Edimax WiFi Adaptor from Amazon as below link:

Setup Honeyport on Raspberry Pi

Introduction

glastopf-logoA honey pot is a computer system on the Internet that is expressly set up to attract and “trap” people who attempt to penetrate other people’s computer systems. To set up a honey pot on Paspberry Pi, I recommend to use Glastopf. Glastopf is a web application honeypot project lead by Lukas Rist a.k.a glaslos of the Honeynet Project. The Glastopf project started in the year 2009. It is a simple and minimalistic web server written in Python that records information of web-based application attacks like Structured Query Language Injection (SQLI), Remote Code Execution (RCE), Local File Inclusion (LFI), Remote File Inclusion (RFI), and many more, because it emulates web application vulnerabilities tricking attackers or scanners that it is a vulnerable web server.

Step 1. Installation the dependencies of Glastopf

Prerequisite:  Your system should install apache, mysql, python.

For example, let show of mysql Installation by running below commend:

1.0 $sudo  apt-get install mysql-server mysql-client php5-mysql

      $sudo apt-get install phpmyadmin

      $sudo vi /etc/apache2/apache2.conf to include below line:

             Include /etc/phpmyadmin/apache.conf

SSH into your console then install the dependencies for the web honeypot.

1.1. Add the backports repository to your sources list file, which can be found under the /etc/apt directory:

sudo echo “deb http://backports.debian.org/debian-backports squeeze-backports main” >> /etc/apt/sources.list

1.2. Now let’s install the dependencies:

sudo apt-get update
sudo apt-get install python python-openssl python-gevent libevent-dev python-dev build-essential make

sudo apt-get install python-argparse python-chardet python-requests python-sqlalchemy python-lxml   ( Error for python-argparse, so run the following)

sudo apt-get install python-argparse python-chardet python-requests python-sqlalchemy python-lxml

sudo apt-get install python-beautifulsoup python-pip python-dev python-numpy python-setuptools
sudo apt-get install python-numpy-dev python-scipy libatlas-dev g++ git php5 php5-dev liblapack-dev gfortran

sudo apt-get install libxml2-dev libxslt-dev

sudo pip install –upgrade distribute   (Error to upgrade)

Step 2. Install and configure the PHP sandbox

The next thing that we should do is to configure the PHP sandbox.

2.1. First, we download BFR (Better Function Replacer) by using git:

$ sudo apt-get install git-core
$ cd /opt
$ sudo git clone git://github.com/glastopf/BFR.git
$ cd BFR
$ sudo phpize
$ sudo ./configure –enable-bfr
$ sudo make && make install

It should have this following message after the make install:

Build complete.
Don’t forget to run ‘make test’.
Installing shared extensions: /usr/lib/php5/20100525/

2.2. Copy or append the search path to bfr.so and add it to php.ini file:

$ sudo echo “zend_extension = /usr/lib/php5/20100525/bfr.so” >> /etc/php5/cli/php.ini

2.3. You should see the extension on the output by using the php –version command in the terminal:

$ php –version
PHP 5.6.14-0+deb8u1 (cli) (built: Oct 28 2015 00:02:05)
Copyright (c) 1997-2015 The PHP Group
Zend Engine v2.6.0, Copyright (c) 1998-2015 Zend Technologies
    with Zend OPcache v7.0.6-dev, Copyright (c) 1999-2015, by Zend Technologies

2.4. Install the latest stable release of Glastopf from pip:

$ sudo pip install glastopf

Step 3. Configuration and Preparation for the Glastopf environment

3.1. Prepare the environment:

$ cd /opt
$ sudo mkdir glastopf

3.2. Stop the apache service so that the web application honeypot could listen to port 80:

$ sudo service apache2 stop

3.3. Now, run the web application honeypot:

$ sudo glastopf-runner

2016-01-02 00:58:34,570 (glastopf.glastopf) Initializing Glastopf 3.1.2 using “/home/pi” as work directory.
2016-01-02 00:58:34,587 (glastopf.glastopf) Connecting to main database with: sqlite:///db/glastopf.db
2016-01-02 00:58:34,738 (glastopf.modules.handlers.emulators.dork_list.dork_page_generator) Bootstrapping dork database.
2016-01-02 00:58:34,790 (urllib3.connectionpool) Starting new HTTPS connection (1): mnemosyne.honeycloud.net
2016-01-02 00:58:39,378 (glastopf.modules.handlers.emulators.dork_list.mnem_service) Error while communication with mnemosyne: (‘Connection aborted.’, error(113, ‘No route to host’))
2016-01-02 00:59:15,225 (glastopf.glastopf) Generating initial dork pages – this can take a while.

3.4. A new default /usr/bin/glastopf.cfg will be created in the glastopfpi directory, which can be customized to your liking just like what port you want the application to listen on. (In my case, I choose port 80 and that’s why I stopped the Apache service).

3.5. You should see the following output from your terminal as shown by my screenshot result below:

glastopf-browser

Learn More Raspberry Pi from Amazon as below link:


Bonus: Error Fixing Case

If you cannot run “sudo” command and get an error message of

“/usr/bin/sudo must be owned by uid 0 and have the setuid bit set”, you can execute the following command to solve:

$ chown root:root /usr/bin/sudo && chmod 4755 /usr/bin/sudo

VPN Server Setup for Raspberry Pi

Introduction

Pi-VPN-TunnelRaspberry Pi can be used as a VPN server to allow users to setup a secure tunnel from a remote client to the local network. Once a VPN tunnel is established between the Raspberry Pi and the client device, such as laptop, mobile device, ipad, itab, etc; if the port forward of router and access right is setup probably, then, the device can be accessed from local network or vice verse. I can successfully use pttpd software to setup VPN feature, and I will explain the setup step in the following.

Step 1. To make the latest update of the System:

$ sudo apt-get update

$ sudo apt-get upgrade

Step 2. Install the pttpd program:

$ sudo apt-get install pptpd

Step 3. Configure the pptpd:

3.1 Edit the pptpd.conf file by removing the “#” and place there the IP-address of the Raspberry Pi, for example 192.168.178.28 (which you should use your device’s ip address in your case):

$ sudo nano /etc/pptpd.conf

#localip 192.168.0.1 change to localip 192.168.178.28

3.2 Edit the pptpd-options file:

$ sudo nano /etc/ppp/pptpd-options

Add following at the end of the file (DNS-servers):

ms-dns 8.8.8.8

noipx

mtu 1490

mru 1490

Instead of 8.8.8.8 also 208.67.222.222 or 213.73.91.35 should work.

3.3 Configure internet traffic forwarding in your Pi to get access to your local network:

$ sudo nano /etc/sysctl.conf

Remove the “#”:

#net.ipv4.ip_forward=1     change to     net.ipv4.ip_forward=1

3.4 Change the firewall entry:

$ sudo iptables -t nat -A POSTROUTING -o eth0 -j MASQUERADE

3.5 Make it permanent in case of a reboot:

$ sudo crontab –e

Add following line at the lower end:

@reboot sudo iptables -t nat -A POSTROUTING -o eth0 -j MASQUERADE

3.6 add a user and password in “chap-secrets”. Both have to be the same as later on used in the smartphone client configuration. It is recommended to use a password longer than 13 characters:

sudo nano /etc/ppp/chap-secrets

Username[TAB]*[TAB]password[TAB]*

Example:

loginname     *       password   *

3.7 Restart the VPN server:

$ sudo service pptpd restart

Client Connection Setup on Android Device

  1. Select ‘Settings’ -> ‘More Network’ -> VPN -> + (to Add VPN Configuration)
  2. Input VPN Name, Login Account, Password, and Select Type -> ‘PPTP’ Type
  3. Press ‘Connect’

Note: One port-forwarding in the router is still necessary. Enter your router menu and configure port-forwarding for your VPN-server IP address with port 1723 to port 1723,

Reference Information for pptpd VPN Setup

Bonus Information (OpenVPN Server Setup)

Many people use another VPN server software called OpenVPN to install on Raspberry Pi device. It is more secure than pttpd because it can use ssl for VPN connection, however, its setup is a little bit more difficult than pttpd. If you are interested in the OpenVPN setup on Raspberry Pi, I suggest you to take a look on the following web page: https://www.raspberrypi.org/forums/viewtopic.php?t=81657

Learn More Raspberry Pi from Amazon as below link: