Source: http://docs.aws.amazon.com/AmazonVPC/latest/UserGuide/VPC_VPN.html
AWS Managed VPN Connections
By default, instances that you launch into a virtual private cloud (VPC) can’t communicate with your own network. You can enable access to your network from your VPC by attaching a virtual private gateway to the VPC, creating a custom route table, updating your security group rules, and creating an AWS managed VPN connection.
Although the term VPN connection is a general term, in the Amazon VPC documentation, a VPN connection refers to the connection between your VPC and your own network. AWS supports Internet Protocol security (IPsec) VPN connections.
Your AWS managed VPN connection is either an AWS Classic VPN or an AWS VPN. For more information, see AWS Managed VPN Categories.
Important
We currently do not support IPv6 traffic through a VPN connection.
Topics
For information about how you’re charged for using a VPN connection with your VPC, see the Amazon VPC product page.
Components of Your VPN
A VPN connection consists of the following components. For more information about VPN limits, see Amazon VPC Limits.
Virtual Private Gateway
A virtual private gateway is the VPN concentrator on the Amazon side of the VPN connection. You create a virtual private gateway and attach it to the VPC from which you want to create the VPN connection.
When you create a virtual private gateway, you can specify the private Autonomous System Number (ASN) for the Amazon side of the gateway. If you don’t specify an ASN, the virtual private gateway is created with the default ASN (64512). You cannot change the ASN after you’ve created the virtual private gateway. To check the ASN for your virtual private gateway, view its details in the Virtual Private Gateways screen in the Amazon VPC console, or use the describe-vpn-gateways AWS CLI command.
Note
If you create your virtual private gateway before 2018-06-30, the default ASN is 17493 in the Asia Pacific (Singapore) region, 10124 in the Asia Pacific (Tokyo) region, 9059 in the EU (Ireland) region, and 7224 in all other regions.
Customer Gateway
A customer gateway is a physical device or software application on your side of the VPN connection.
To create a VPN connection, you must create a customer gateway resource in AWS, which provides information to AWS about your customer gateway device. The following table describes the information you’ll need to create a customer gateway resource.
| Item | Description |
|---|---|
| Internet-routable IP address (static) of the customer gateway’s external interface. | The public IP address value must be static. If your customer gateway is behind a network address translation (NAT) device that’s enabled for NAT traversal (NAT-T), use the public IP address of your NAT device, and adjust your firewall rules to unblock UDP port 4500. |
| The type of routing—static or dynamic. | For more information, see VPN Routing Options. |
| (Dynamic routing only) Border Gateway Protocol (BGP) Autonomous System Number (ASN) of the customer gateway. | You can use an existing ASN assigned to your network. If you don’t have one, you can use a private ASN (in the 64512–65534 range).If you use the VPC wizard in the console to set up your VPC, we automatically use 65000 as the ASN. |
To use Amazon VPC with a VPN connection, you or your network administrator must also configure the customer gateway device or application. When you create the VPN connection, we provide you with the required configuration information and your network administrator typically performs this configuration. For information about the customer gateway requirements and configuration, see the Your Customer Gateway in the Amazon VPC Network Administrator Guide.
The VPN tunnel comes up when traffic is generated from your side of the VPN connection. The virtual private gateway is not the initiator; your customer gateway must initiate the tunnels. If your VPN connection experiences a period of idle time (usually 10 seconds, depending on your configuration), the tunnel may go down. To prevent this, you can use a network monitoring tool to generate keepalive pings; for example, by using IP SLA.
For a list of customer gateways that we have tested with Amazon VPC, see Amazon Virtual Private Cloud FAQs.
AWS Managed VPN Categories
Your AWS managed VPN connection is either an AWS Classic VPN connection or an AWS VPN connection. Any new VPN connection that you create is an AWS VPN connection. The following features are supported on AWS VPN connections only:
- NAT traversal
- 4-byte ASN (in addition to 2-byte ASN)
- CloudWatch metrics
- Reusable IP addresses for your customer gateways
- Additional encryption options; including AES 256-bit encryption, SHA-2 hashing, and additional Diffie-Hellman groups
- Configurable tunnel options
- Custom private ASN for the Amazon side of a BGP session
You can find out the category of your AWS managed VPN connection by using the Amazon VPC console or a command line tool.
To identify the VPN category using the console
- Open the Amazon VPC console at https://console.aws.amazon.com/vpc/.
- In the navigation pane, choose VPN Connections.
- Select the VPN connection, and check the value for Category in the details pane. A value of
VPNindicates an AWS VPN connection. A value ofVPN-Classicindicates an AWS Classic VPN connection.
To identify the VPN category using a command line tool
- You can use the describe-vpn-connections AWS CLI command. In the output that’s returned, take note of the
Categoryvalue. A value ofVPNindicates an AWS VPN connection. A value ofVPN-Classicindicates an AWS Classic VPN connection.In the following example, the VPN connection is an AWS VPN connection.aws ec2 describe-vpn-connections --vpn-connection-idsvpn-1a2b3c4d{ "VpnConnections": [ { "VpnConnectionId": "vpn-1a2b3c4d", ... "State": "available", "VpnGatewayId": "vgw-11aa22bb", "CustomerGatewayId": "cgw-ab12cd34", "Type": "ipsec.1", "Category": "VPN" } ] }
Alternatively, use one of the following commands:
- DescribeVpnConnections (Amazon EC2 Query API)
- Get-EC2VpnConnection (Tools for Windows PowerShell)
Migrating to AWS VPN
If your existing VPN connection is an AWS Classic VPN connection, you can migrate to an AWS VPN connection by creating a new virtual private gateway and VPN connection, detaching the old virtual private gateway from your VPC, and attaching the new virtual private gateway to your VPC.
If your existing virtual private gateway is associated with multiple VPN connections, you must recreate each VPN connection for the new virtual private gateway. If there are multiple AWS Direct Connect private virtual interfaces attached to your virtual private gateway, you must recreate each private virtual interface for the new virtual private gateway. For more information, see Creating a Virtual Interface in the AWS Direct Connect User Guide.
If your existing AWS managed VPN connection is an AWS VPN connection, you cannot migrate to an AWS Classic VPN connection.
Note
During this procedure, connectivity over the current VPC connection is interrupted when you disable route propagation and detach the old virtual private gateway from your VPC. Connectivity is restored when the new virtual private gateway is attached to your VPC and the new VPN connection is active. Ensure that you plan for the expected downtime.
To migrate to an AWS VPN connection
- Open the Amazon VPC console at https://console.aws.amazon.com/vpc/.
- In the navigation pane, choose Virtual Private Gateways, Create Virtual Private Gateway and create a virtual private gateway.
- In the navigation pane, choose VPN Connections, Create VPN Connection. Specify the following information, and choose Yes, Create.
- Virtual Private Gateway: Select the virtual private gateway that you created in the previous step.
- Customer Gateway: Choose Existing, and select the existing customer gateway for your current AWS Classic VPN connection.
- Specify the routing options as required.
- Select the new VPN connection and choose Download Configuration. Download the appropriate configuration file for your customer gateway device.
- Use the configuration file to configure VPN tunnels on your customer gateway device. For examples, see the Amazon VPC Network Administrator Guide. Do not enable the tunnels yet. Contact your vendor if you need guidance on keeping the newly configured tunnels disabled.
- (Optional) Create test VPC and attach the virtual private gateway to the test VPC. Change the encryption domain/source destination addresses as required, and test connectivity from a host in your local network to a test instance in the test VPC.
- If you are using route propagation for your route table, choose Route Tables in the navigation pane. Select the route table for your VPC, and choose Route Propagation, Edit. Clear the check box for the old virtual private gateway and choose Save.
Note
From this step onwards, connectivity is interrupted until the new virtual private gateway is attached and the new VPN connection is active.
- In the navigation pane, choose Virtual Private Gateways. Select the old virtual private gateway and choose Detach from VPC, Yes, Detach. Select the new virtual private gateway, and choose Attach to VPC. Specify the VPC for your VPN connection, and choose Yes, Attach.
- In the navigation pane, choose Route Tables. Select the route table for your VPC and do one of the following:
- If you are using route propagation, choose Route Propagation, Edit. Select the new virtual private gateway that’s attached to the VPC and choose Save.
- If you are using static routes, choose Routes, Edit. Modify the route to point to the new virtual private gateway, and choose Save.
- Enable the new tunnels on your customer gateway device and disable the old tunnels. To bring the tunnel up, you must initiate the connection from your local network.If applicable, check your route table to ensure that the routes are being propagated. The routes propagate to the route table when the status of the VPN tunnel is
UP.Note
If you need to revert to your previous configuration, detach the new virtual private gateway and follow steps 8 and 9 to re-attach the old virtual private gateway and update your routes.
- If you no longer need your AWS Classic VPN connection and do not want to continue incurring charges for it, remove the previous tunnel configurations from your customer gateway device, and delete the VPN connection. To do this, go to VPN Connections, select the VPN connection, and choose Delete.
Important
After you’ve deleted the AWS Classic VPN connection, you cannot revert or migrate your new AWS VPN connection back to an AWS Classic VPN connection.
VPN Configuration Examples
The following diagrams illustrate single and multiple VPN connections. The VPC has an attached virtual private gateway, and your network includes a customer gateway, which you must configure to enable the VPN connection. You set up the routing so that any traffic from the VPC bound for your network is routed to the virtual private gateway.
When you create multiple VPN connections to a single VPC, you can configure a second customer gateway to create a redundant connection to the same external location. You can also use it to create VPN connections to multiple geographic locations.
Single VPN Connection

Multiple VPN connections

VPN Routing Options
When you create a VPN connection, you must do the following:
- Specify the type of routing that you plan to use (static or dynamic)
- Update the route table for your subnet
Static and Dynamic Routing
The type of routing that you select can depend on the make and model of your VPN devices. If your VPN device supports Border Gateway Protocol (BGP), specify dynamic routing when you configure your VPN connection. If your device does not support BGP, specify static routing. For a list of static and dynamic routing devices that have been tested with Amazon VPC, see the Amazon Virtual Private Cloud FAQs.
When you use a BGP device, you don’t need to specify static routes to the VPN connection because the device uses BGP to advertise its routes to the virtual private gateway. If you use a device that doesn’t support BGP, you must select static routing and enter the routes (IP prefixes) for your network that should be communicated to the virtual private gateway.
We recommend that you use BGP-capable devices, when available, because the BGP protocol offers robust liveness detection checks that can assist failover to the second VPN tunnel if the first tunnel goes down. Devices that don’t support BGP may also perform health checks to assist failover to the second tunnel when needed.
Route Tables and VPN Route Priority
Route tables determine where network traffic is directed. In your route table, you must add a route for your network and specify the virtual private gateway as the target. This enables traffic destined for your network to route via the virtual private gateway and over one of the VPN tunnels. You can enable route propagation for your route table to automatically propagate your network routes to the table for you.
Only IP prefixes that are known to the virtual private gateway, whether through BGP advertisements or static route entry, can receive traffic from your VPC. The virtual private gateway does not route any other traffic destined outside of received BGP advertisements, static route entries, or its attached VPC CIDR.
When a virtual private gateway receives routing information, it uses path selection to determine how to route traffic to your network. Longest prefix match applies; otherwise, the following rules apply:
- If any propagated routes from a VPN connection or AWS Direct Connect connection overlap with the local route for your VPC, the local route is most preferred even if the propagated routes are more specific.
- If any propagated routes from a VPN connection or AWS Direct Connect connection have the same destination CIDR block as other existing static routes (longest prefix match cannot be applied), we prioritize the static routes whose targets are an Internet gateway, a virtual private gateway, a network interface, an instance ID, a VPC peering connection, a NAT gateway, or a VPC endpoint.
If you have overlapping routes within a VPN connection and longest prefix match cannot be applied, then we prioritize the routes as follows in the VPN connection, from most preferred to least preferred:
- BGP propagated routes from an AWS Direct Connect connection
- Manually added static routes for a VPN connection
- BGP propagated routes from a VPN connection
In this example, your route table has a static route to an internet gateway (that you added manually), and a propagated route to a virtual private gateway. Both routes have a destination of 172.31.0.0/24. In this case, all traffic destined for 172.31.0.0/24 is routed to the internet gateway — it is a static route and therefore takes priority over the propagated route.
| Destination | Target |
|---|---|
| 10.0.0.0/16 | Local |
| 172.31.0.0/24 | vgw-1a2b3c4d (propagated) |
| 172.31.0.0/24 | igw-11aa22bb |
Configuring the VPN Tunnels for Your VPN Connection
You use a VPN connection to connect your network to a VPC. Each VPN connection has two tunnels, with each tunnel using a unique virtual private gateway public IP address. It is important to configure both tunnels for redundancy. When one tunnel becomes unavailable (for example, down for maintenance), network traffic is automatically routed to the available tunnel for that specific VPN connection.
The following diagram shows the two tunnels of the VPN connection.

When you create a VPN connection, you download a configuration file specific to your customer gateway device that contains information for configuring the device, including information for configuring each tunnel. You can optionally specify some of the tunnel options yourself when you create the VPN connection. Otherwise, AWS provides default values.
The following table describes the tunnel options that you can configure.
| Item | Description | AWS-provided default value |
|---|---|---|
| Inside tunnel CIDR | The range of inside IP addresses for the VPN tunnel. You can specify a size /30 CIDR block from the 169.254.0.0/16range. The CIDR block must be unique across all VPN connections that use the same virtual private gateway.The following CIDR blocks are reserved and cannot be used:
|
A size /30 CIDR block from the 169.254.0.0/16range. |
| Pre-shared key (PSK) | The pre-shared key (PSK) to establish the initial IKE Security Association between the virtual private gateway and customer gateway.The PSK must be between 8 and 64 characters in length and cannot start with zero (0). Allowed characters are alphanumeric characters, periods (.), and underscores (_). | A 32-character alphanumeric string. |
You cannot modify tunnel options after you create the VPN connection. To change the inside tunnel IP addresses or the PSKs for an existing connection, you must delete the VPN connection and create a new one. You cannot configure tunnel options for an AWS Classic VPN connection.
Using Redundant VPN Connections to Provide Failover
As described earlier, a VPN connection has two tunnels to help ensure connectivity in case one of the VPN connections becomes unavailable. To protect against a loss of connectivity in case your customer gateway becomes unavailable, you can set up a second VPN connection to your VPC and virtual private gateway by using a second customer gateway. By using redundant VPN connections and customer gateways, you can perform maintenance on one of your customer gateways while traffic continues to flow over the second customer gateway’s VPN connection. To establish redundant VPN connections and customer gateways on your network, you need to set up a second VPN connection. The customer gateway IP address for the second VPN connection must be publicly accessible.
The following diagram shows the two tunnels of each VPN connection and two customer gateways.

Dynamically routed VPN connections use the Border Gateway Protocol (BGP) to exchange routing information between your customer gateways and the virtual private gateways. Statically routed VPN connections require you to enter static routes for the network on your side of the customer gateway. BGP-advertised and statically entered route information allow gateways on both sides to determine which tunnels are available and reroute traffic if a failure occurs. We recommend that you configure your network to use the routing information provided by BGP (if available) to select an available path. The exact configuration depends on the architecture of your network.
Source: http://docs.aws.amazon.com/AmazonVPC/latest/UserGuide/SetUpVPNConnections.html
Setting Up an AWS VPN Connection
Use the following procedures to manually set up the VPN connection. Alternatively, you can let the VPC creation wizard take care of many of these steps for you. For more information about using the VPC creation wizard to set up the virtual private gateway, see Scenario 3: VPC with Public and Private Subnets and AWS Managed VPN Access or Scenario 4: VPC with a Private Subnet Only and AWS Managed VPN Access.
To set up a VPN connection, you need to complete the following steps:
These procedures assume that you have a VPC with one or more subnets.
Create a Customer Gateway
A customer gateway provides information to AWS about your customer gateway device or software application. For more information, see Customer Gateway.
To create a customer gateway using the console
- Open the Amazon VPC console at https://console.aws.amazon.com/vpc/.
- In the navigation pane, choose Customer Gateways, and then Create Customer Gateway.
- Complete the following and then choose Create Customer Gateway:
- (Optional) For Name, type a name for your customer gateway. Doing so creates a tag with a key of
Nameand the value that you specify. - For Routing, select the routing type.
- For dynamic routing, for BGP ASN, type the Border Gateway Protocol (BGP) Autonomous System Number (ASN).
- For IP Address, type the static, internet-routable IP address for your customer gateway device. If your customer gateway is behind a NAT device that’s enabled for NAT-T, use the public IP address of the NAT device.
- (Optional) For Name, type a name for your customer gateway. Doing so creates a tag with a key of
To create a customer gateway using the command line or API
- CreateCustomerGateway (Amazon EC2 Query API)
- create-customer-gateway (AWS CLI)
- New-EC2CustomerGateway (AWS Tools for Windows PowerShell)
Create a Virtual Private Gateway
When you create a virtual private gateway, you can optionally specify the private Autonomous System Number (ASN) for the Amazon side of the gateway. The ASN must be different from the BGP ASN specified for the customer gateway.
After you create a virtual private gateway, you must attach it to your VPC.
To create a virtual private gateway and attach it to your VPC
- In the navigation pane, choose Virtual Private Gateways, Create Virtual Private Gateway.
- (Optional) Type a name for your virtual private gateway. Doing so creates a tag with a key of
Nameand the value that you specify. - For ASN, leave the default selection to use the default Amazon ASN. Otherwise, choose Custom ASN and type a value. For a 16-bit ASN, the value must be in the 64512 to 65534 range. For a 32-bit ASN, the value must be in the 4200000000 to 4294967294 range.
- Choose Create Virtual Private Gateway.
- Select the virtual private gateway that you created, and then choose Actions, Attach to VPC.
- Select your VPC from the list and choose Yes, Attach.
To create a virtual private gateway using the command line or API
- CreateVpnGateway (Amazon EC2 Query API)
- create-vpn-gateway (AWS CLI)
- New-EC2VpnGateway (AWS Tools for Windows PowerShell)
To attach a virtual private gateway to a VPC using the command line or API
- AttachVpnGateway (Amazon EC2 Query API)
- attach-vpn-gateway (AWS CLI)
- Add-EC2VpnGateway (AWS Tools for Windows PowerShell)
Enable Route Propagation in Your Route Table
To enable instances in your VPC to reach your customer gateway, you must configure your route table to include the routes used by your VPN connection and point them to your virtual private gateway. You can enable route propagation for your route table to automatically propagate those routes to the table for you.
For static routing, the static IP prefixes that you specify for your VPN configuration are propagated to the route table when the status of the VPN connection is UP. Similarly, for dynamic routing, the BGP-advertised routes from your customer gateway are propagated to the route table when the status of the VPN connection is UP.
Note
If your connection is interrupted, any propagated routes in your route table are not automatically removed. You may have to disable route propagation to remove the propagated routes; for example, if you want traffic to fail over to a static route.
To enable route propagation using the console
- In the navigation pane, choose Route Tables, and then select the route table that’s associated with the subnet; by default, this is the main route table for the VPC.
- On the Route Propagation tab in the details pane, choose Edit, select the virtual private gateway that you created in the previous procedure, and then choose Save.
Note
For static routing, if you do not enable route propagation, you must manually enter the static routes used by your VPN connection. To do this, select your route table, choose Routes, Edit. For Destination, add the static route used by your VPN connection . For Target, select the virtual private gateway ID, and choose Save.
To disable route propagation using the console
- In the navigation pane, choose Route Tables, and then select the route table that’s associated with the subnet.
- Choose Route Propagation, Edit. Clear the Propagate check box for the virtual private gateway, and choose Save.
To enable route propagation using the command line or API
- EnableVgwRoutePropagation (Amazon EC2 Query API)
- enable-vgw-route-propagation (AWS CLI)
- Enable-EC2VgwRoutePropagation (AWS Tools for Windows PowerShell)
To disable route propagation using the command line or API
- DisableVgwRoutePropagation (Amazon EC2 Query API)
- disable-vgw-route-propagation (AWS CLI)
- Disable-EC2VgwRoutePropagation (AWS Tools for Windows PowerShell)
Update Your Security Group
To allow access to instances in your VPC from your network, you must update your security group rules to enable inbound SSH, RDP, and ICMP access.
To add rules to your security group to enable inbound SSH, RDP and ICMP access
- In the navigation pane, choose Security Groups, and then select the default security group for the VPC.
- On the Inbound tab in the details pane, add rules that allow inbound SSH, RDP, and ICMP access from your network, and then choose Save. For more information about adding inbound rules, see Adding, Removing, and Updating Rules.
For more information about working with security groups using the AWS CLI, see Security Groups for Your VPC.
Create a VPN Connection and Configure the Customer Gateway
After you create the VPN connection, download the configuration information and use it to configure the customer gateway device or software application.
To create a VPN connection and configure the customer gateway
- In the navigation pane, choose VPN Connections, Create VPN Connection.
- Complete the following information, and then choose Create VPN Connection:
- (Optional) For Name tag, type a name for your VPN connection. Doing so creates a tag with a key of
Nameand the value that you specify. - Select the virtual private gateway that you created earlier.
- Select the customer gateway that you created earlier.
- Select one of the routing options based on whether your VPN router supports Border Gateway Protocol (BGP):
- If your VPN router supports BGP, choose Dynamic (requires BGP).
- If your VPN router does not support BGP, choose Static. For Static IP Prefixes, specify each IP prefix for the private network of your VPN connection.
- Under Tunnel Options, you can optionally specify the following information for each tunnel:
- A size /30 CIDR block from the
169.254.0.0/16range for the inside tunnel IP addresses. - The IKE pre-shared key (PSK).
For more information about these options, see Configuring the VPN Tunnels for Your VPN Connection.
- A size /30 CIDR block from the
It may take a few minutes to create the VPN connection. When it’s ready, select the connection and choose Download Configuration.
- (Optional) For Name tag, type a name for your VPN connection. Doing so creates a tag with a key of
- In the Download Configuration dialog box, select the vendor, platform, and software that corresponds to your customer gateway device or software, and then choose Yes, Download.
- Give the configuration file to your network administrator, along with this guide:Amazon VPC Network Administrator Guide. After the network administrator configures the customer gateway, the VPN connection is operational.
To create a VPN connection using the command line or API
- CreateVpnConnection (Amazon EC2 Query API)
- create-vpn-connection (AWS CLI)
- New-EC2VpnConnection (AWS Tools for Windows PowerShell)
Editing Static Routes for a VPN Connection
For static routing, you can add, modify, or remove the static routes for your VPN configuration.
To add, modify, or remove a static route
- Open the Amazon VPC console at https://console.aws.amazon.com/vpc/.
- In the navigation pane, choose VPN Connections.
- Choose Static Routes, Edit.
- Modify your existing static IP prefixes, or choose Remove to delete them. Choose Add Another Rule to add a new IP prefix to your configuration. When you are done, choose Save.
Note
If you have not enabled route propagation for your route table, you must manually update the routes in your route table to reflect the updated static IP prefixes in your VPN connection. For more information, see Enable Route Propagation in Your Route Table.
To add a static route using the command line or API
- CreateVpnConnectionRoute (Amazon EC2 Query API)
- create-vpn-connection-route (AWS CLI)
- New-EC2VpnConnectionRoute (AWS Tools for Windows PowerShell)
To delete a static route using the command line or API
- DeleteVpnConnectionRoute (Amazon EC2 Query API)
- delete-vpn-connection-route (AWS CLI)
- Remove-EC2VpnConnectionRoute (AWS Tools for Windows PowerShell)
Replacing Compromised Credentials
If you believe that the tunnel credentials for your VPN connection have been compromised, you can change the IKE pre-shared key. To do so, delete the VPN connection, create a new one using the same virtual private gateway, and configure the new keys on your customer gateway. You can specify your own pre-shared keys when you create the VPN connection. You also need to confirm that the tunnel’s inside and outside addresses match, because these might change when you recreate the VPN connection. While you perform the procedure, communication with your instances in the VPC stops, but the instances continue to run uninterrupted. After the network administrator implements the new configuration information, your VPN connection uses the new credentials, and the network connection to your instances in the VPC resumes.
Important
This procedure requires assistance from your network administrator group.
To change the IKE pre-shared key
- Delete the VPN connection. For more information, see Deleting a VPN Connection. You don’t need to delete the VPC or the virtual private gateway.
- Create a new VPN connection and specify your own pre-shared keys for the tunnels or let AWS generate new pre-shared keys for you. For more information, see Create a VPN Connection and Configure the Customer Gateway.
- Download the new configuration file.
Source: http://docs.aws.amazon.com/AmazonVPC/latest/UserGuide/VPC_Scenario4.html
Scenario 4: VPC with a Private Subnet Only and AWS Managed VPN Access
The configuration for this scenario includes a virtual private cloud (VPC) with a single private subnet, and a virtual private gateway to enable communication with your own network over an IPsec VPN tunnel. There is no Internet gateway to enable communication over the Internet. We recommend this scenario if you want to extend your network into the cloud using Amazon’s infrastructure without exposing your network to the Internet.
This topic assumes that you’ll use the VPC wizard in the Amazon VPC console to create the VPC and the VPN connection.
This scenario can also be optionally configured for IPv6—you can use the VPC wizard to create a VPC and subnet with associated IPv6 CIDR blocks. Instances launched into the subnet can receive IPv6 addresses. Currently, we do not support IPv6 communication over a VPN connection; however, instances in the VPC can communicate with each other via IPv6. For more information about IPv4 and IPv6 addressing, see IP Addressing in Your VPC.
Overview
The following diagram shows the key components of the configuration for this scenario.

Important
For this scenario, the Amazon VPC Network Administrator Guide describes what your network administrator needs to do to configure the Amazon VPC customer gateway on your side of the VPN connection.
The configuration for this scenario includes the following:
- A virtual private cloud (VPC) with a size /16 CIDR (example: 10.0.0.0/16). This provides 65,536 private IP addresses.
- A VPN-only subnet with a size /24 CIDR (example: 10.0.0.0/24). This provides 256 private IP addresses.
- A VPN connection between your VPC and your network. The VPN connection consists of a virtual private gateway located on the Amazon side of the VPN connection and a customer gateway located on your side of the VPN connection.
- Instances with private IP addresses in the subnet range (examples: 10.0.0.5, 10.0.0.6, and 10.0.0.7), which enables the instances to communicate with each other and other instances in the VPC.
- A custom route table associated with the subnet. The route table contains a route that enables instances in the subnet to communicate with other instances in the VPC, and a route that enables instances in the subnet to communicate directly with your network.
For more information about subnets, see VPCs and Subnets and IP Addressing in Your VPC. For more information about your VPN connection, see AWS Managed VPN Connections. For more information about configuring a customer gateway, see the Amazon VPC Network Administrator Guide.
Overview for IPv6
You can optionally enable IPv6 for this scenario. In addition to the components listed above, the configuration includes the following:
- A size /56 IPv6 CIDR block associated with the VPC (example: 2001:db8:1234:1a00::/56). AWS automatically assigns the CIDR; you cannot choose the range yourself.
- A size /64 IPv6 CIDR block associated with the VPN-only subnet (example: 2001:db8:1234:1a00::/64). You can choose the range for your subnet from the range allocated to the VPC. You cannot choose the size of the IPv6 CIDR.
- IPv6 addresses assigned to the instances from the subnet range (example: 2001:db8:1234:1a00::1a).
- A route table entry in the custom route table that enable instances in the private subnet to use IPv6 to communicate with each other.

Routing
Your VPC has an implied router (shown in the configuration diagram for this scenario). In this scenario, the VPC wizard creates a route table that routes all traffic destined for an address outside the VPC to the VPN connection, and associates the route table with the subnet.
The following describes the route table for this scenario. The first entry is the default entry for local routing in the VPC; this entry enables the instances in this VPC to communicate with each other. The second entry routes all other subnet traffic to the virtual private gateway (for example, vgw-1a2b3c4d).
| Destination | Target |
|---|---|
| 10.0.0.0/16 | local |
| 0.0.0.0/0 | vgw-id |
The VPN connection is configured either as a statically-routed VPN connection or as a dynamically routed VPN connection (using BGP). If you select static routing, you’ll be prompted to manually enter the IP prefix for your network when you create the VPN connection. If you select dynamic routing, the IP prefix is advertised automatically to your VPC through BGP.
The instances in your VPC can’t reach the Internet directly; any Internet-bound traffic must first traverse the virtual private gateway to your network, where the traffic is then subject to your firewall and corporate security policies. If the instances send any AWS-bound traffic (for example, requests to Amazon S3 or Amazon EC2), the requests must go over the virtual private gateway to your network and then to the Internet before reaching AWS. Currently, we do not support IPv6 for VPN connections.
Routing for IPv6
If you associate an IPv6 CIDR block with your VPC and subnets, your route table includes separate routes for IPv6 traffic. The following describes the custom route table for this scenario. The second entry is the default route that’s automatically added for local routing in the VPC over IPv6.
| Destination | Target |
|---|---|
| 10.0.0.0/16 | local |
| 2001:db8:1234:1a00::/56 | local |
| 0.0.0.0/0 | vgw-id |
Security
AWS provides two features that you can use to increase security in your VPC: security groups and network ACLs. Security groups control inbound and outbound traffic for your instances, and network ACLs control inbound and outbound traffic for your subnets. In most cases, security groups can meet your needs; however, you can also use network ACLs if you want an additional layer of security for your VPC. For more information, see Security.
For scenario 4, you’ll use the default security group for your VPC but not a network ACL. If you’d like to use a network ACL, see Recommended Rules for Scenario 4.
Your VPC comes with a default security group whose initial settings deny all inbound traffic, allow all outbound traffic, and allow all traffic between the instances assigned to the security group. For this scenario, we recommend that you add inbound rules to the default security group to allow SSH traffic (Linux) and Remote Desktop traffic (Windows) from your network.
Important
The default security group automatically allows assigned instances to communicate with each other, so you don’t have to add a rule to allow this. If you use a different security group, you must add a rule to allow this.
The following table describes the inbound rules that you should add to the default security group for your VPC.
Default Security Group: Recommended Rules
| Inbound | |||
| Source | Protocol | Port Range | Comments |
| Private IPv4 address range of your network | TCP | 22 | (Linux instances) Allow inbound SSH traffic from your network. |
| Private IPv4 address range of your network | TCP | 3389 | (Windows instances) Allow inbound RDP traffic from your network. |
Security for IPv6
If you associate an IPv6 CIDR block with your VPC and subnets, you must add separate rules to your security group to control inbound and outbound IPv6 traffic for your instances. In this scenario, the database servers cannot be reached over the VPN connection using IPv6; therefore, no additional security group rules are required.
Implementing Scenario 4
To implement scenario 4, get information about your customer gateway, and create the VPC using the VPC wizard, The VPC wizard creates a VPN connection for you with a customer gateway and virtual private gateway.
To prepare your customer gateway
- Determine the device you’ll use as your customer gateway. For information about the devices that we’ve tested, see Amazon Virtual Private Cloud FAQs. For more information about the requirements for your customer gateway, see the Amazon VPC Network Administrator Guide.
- Obtain the Internet-routable IP address for the customer gateway’s external interface. The address must be static and may be behind a device performing network address translation (NAT).
- If you want to create a statically-routed VPN connection, get the list of internal IP ranges (in CIDR notation) that should be advertised across the VPN connection to the virtual private gateway. For more information, see VPN Routing Options.
Use the VPC wizard to create your VPC and a VPN connection.
To create a VPC using the VPC wizard
- Open the Amazon VPC console at https://console.aws.amazon.com/vpc/.
- On the dashboard, choose Start VPC Wizard.
- Select the fourth option, VPC with a Private Subnet Only and Hardware VPN Access, and then choose Select.
- On the first page of the wizard, confirm the details for your VPC and private subnet. Naming your VPC and subnet helps you identify them later in the console.
- (Optional, IPv6-only) For IPv6 CIDR block, choose Amazon-provided IPv6 CIDR block. For Private subnet’s IPv6 CIDR, choose Specify a custom IPv6 CIDR. Specify the hexadecimal pair value for the IPv6 subnet or leave the default value (
00). - Choose Next.
- On the Configure your VPN page, do the following, and then choose Create VPC:
- In Customer Gateway IP, specify the public IP address of your VPN router.
- Optionally specify a name for your customer gateway and VPN connection.
- In Routing Type, select one of the routing options as follows:
- If your VPN router supports Border Gateway Protocol (BGP), select Dynamic (requires BGP).
- If your VPN router does not support BGP, choose Static. In IP Prefix, add each IP range for your network in CIDR notation.
For more information, see VPN Routing Options.
- When the wizard is done, choose VPN Connections in the navigation pane. Select the VPN connection that the wizard created, and choose Download Configuration. In the dialog box, select the vendor for the customer gateway, the platform, and the software version, and then choose Yes, Download.
- Save the text file containing the VPN configuration and give it to the network administrator along with this guide: Amazon VPC Network Administrator Guide. The VPN won’t work until the network administrator configures the customer gateway.
For this scenario, you need to update the default security group with new inbound rules that allow SSH and Remote Desktop (RDP) access from your network. If you don’t want instances to initiate outbound communication, you can also remove the default outbound rule.
To update the rules for the default security group
- Open the Amazon VPC console at https://console.aws.amazon.com/vpc/.
- Choose Security Groups in the navigation pane, and then select the default security group for the VPC. The details pane displays the details for the security group, plus tabs for working with its inbound and outbound rules.
- On the Inbound Rules tab, choose Edit and add rules for inbound traffic as follows:
- Select SSH from the Type list, and enter your network’s private IP address range in the Source field; for example,
172.0.0.0/8. - Choose Add another rule, then select RDP from the Type list, and enter your network’s private IP address range in the Source field.
- Choose Save.
- Select SSH from the Type list, and enter your network’s private IP address range in the Source field; for example,
- (Optional) On the Outbound Rules tab, choose Edit, locate the default rule that enables all outbound traffic, choose Remove, and then choose Save.
After your network administrator configures your customer gateway, you can launch instances into your VPC. If you’re already familiar with launching instances outside a VPC, then you already know most of what you need to know to launch an instance into a VPC.
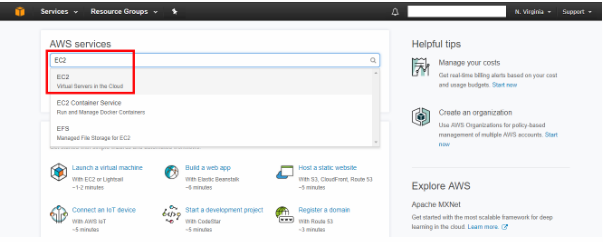
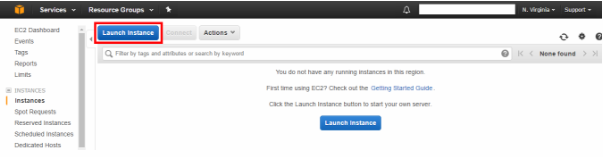
To launch an instance
- Open the Amazon EC2 console at https://console.aws.amazon.com/ec2/.
- Choose Launch Instance on the dashboard.
- Follow the directions in the wizard. Choose an AMI, choose an instance type, and then choose Next: Configure Instance Details.
Note
If you intend to use your instance for IPv6 communication, you must choose a supported instance type; for example, T2. For more information, see Amazon EC2 Instance Types.
- On the Configure Instance Details page, select the VPC that you created earlier from the Network list, and then select the subnet. Choose Next: Add Storage.
- On the next two pages of the wizard, you can configure storage for your instance, and add tags. On the Configure Security Group page, select the Select an existing security group option, and select the default security group. Choose Review and Launch.
- Review the settings that you’ve chosen. Make any changes that you need, and then choose Launch to choose a keypair and launch your instance.
In scenario 4, you need a DNS server that enables your VPN-only subnet to communicate with servers in your network. You must create a new set of DHCP options that includes your DNS server and then configure the VPC to use that set of options.
Note
Your VPC automatically has a set of DHCP options with domain-name-servers=AmazonProvidedDNS. This is a DNS server that Amazon provides to enable any public subnets in your VPC to communicate with the Internet over an Internet gateway. Scenario 4 doesn’t have any public subnets, so you don’t need this set of DHCP options.
To update the DHCP options
- Open the Amazon VPC console at https://console.aws.amazon.com/vpc/.
- In the navigation pane, choose DHCP Options Sets.
- Choose Create DHCP Options Set.
- In the Create DHCP Options Set dialog box, in the Domain name servers box, enter the address of your DNS server, and then choose Yes, Create. In this example, your DNS server is 192.0.2.1.
- In the navigation pane, choose Your VPCs.
- Select the VPC, and then choose Edit in the Summary tab.
- Select the ID of the new set of options from the DHCP options set list and then choose Save.
- (Optional) The VPC now uses this new set of DHCP options and therefore uses your DNS server. If you want, you can delete the original set of options that the VPC used.
You can now use SSH or RDP to connect to your instance in the VPC. For information about how to connect to a Linux instance, see Connect to Your Linux Instance in the Amazon EC2 User Guide for Linux Instances. For information about how to connect to a Windows instance, see Connect to Your Windows Instance in the Amazon EC2 User Guide for Windows Instances.