
Convert between xls and xlsx by python and compile python
1. To convert xls to xlsx:
$ pip install pyexcel pyexcel-xls pyexcel-xlsxRun Python Script as:
import pyexcel as p

p.save_book_as(file_name='your-file-in.xls',
               dest_file_name='your-new-file-out.xlsx')
If you do not need a program, you could install one additinal package pyexcel-cli::
$ pip install pyexcel-cli
$ pyexcel transcode your-file-in.xls your-new-file-out.xlsx
The transcoding procedure above uses xlrd and openpyxl.
2. To convert between xlsx and xls vice and versa:
import win32com.client as win32
fname = "full+path+to+xls_file"
excel = win32.gencache.EnsureDispatch('Excel.Application')
wb = excel.Workbooks.Open(fname)

wb.SaveAs(fname+"x", FileFormat = 51)    #FileFormat = 51 is for .xlsx extension
wb.Close()                               #FileFormat = 56 is for .xls extension
excel.Application.Quit()
3. Compile via py2exe
3.1. Create your setup script (setup.py)
py2exe extends Distutils with a new “command”. If you’ve installed third party Python modules then there’s a good chance you’ve seen at least one distutils command:
C:Tutorial>python setup.py install
“install” is a Distutils command that installs something (typically a Python module or package). The details Distutils needs to do that installation are contained in setup.py (and sometimes other associated files).
“py2exe” is a new Distutils command that is added when you import py2exe. To use py2exe you need to create a setup.py file to tell Distutils and py2exe what you want to do. Here’s a setup.py whose simplicity is appropriate for our sample program…
3.2. Run your setup script
The next step is to run your setup script. Make sure to give the py2exe command and expect to see lots and lots of output:
C:Tutorial>python setup.py py2exe
3.3. Test your executable
Now that the package has been created it is ready to test:
C:Tutorial>cd dist

C:Tutorialdist>hello.exe
Hello World
4. Compile via pyinstaller
[Anaconda3] C:Usersgoldmanau>pip install pyinstaller

[Anaconda3] C:Usersgoldmanau>pyinstaller --version
3.3.1

[Anaconda3] C:Usersgoldmanau>pyinstaller --onefile conv.py
418 INFO: PyInstaller: 3.3.1
418 INFO: Python: 3.5.1
418 INFO: Platform: Windows-7-6.1.7601-SP1
420 INFO: wrote C:Usersgoldmanauconv.spec
424 INFO: UPX is not available.
428 INFO: Extending PYTHONPATH with paths
['C:\Users\goldmanau', 'C:\Users\goldmanau']
428 INFO: checking Analysis
429 INFO: Building Analysis because out00-Analysis.toc is non existent
429 INFO: Initializing module dependency graph...
434 INFO: Initializing module graph hooks...
438 INFO: Analyzing base_library.zip ...
12259 INFO: running Analysis out00-Analysis.toc
14333 INFO: Caching module hooks...
14347 INFO: Analyzing C:Usersgoldmanauconv.py
14350 INFO: Processing pre-safe import module hook win32com
15341 INFO: Loading module hooks...
15342 INFO: Loading module hook "hook-pydoc.py"...
15343 INFO: Loading module hook "hook-pythoncom.py"...
15913 INFO: Loading module hook "hook-pywintypes.py"...
16460 INFO: Loading module hook "hook-win32com.py"...
16770 INFO: Loading module hook "hook-encodings.py"...
16970 INFO: Loading module hook "hook-xml.py"...
17803 INFO: Looking for ctypes DLLs
17879 INFO: Analyzing run-time hooks ...
17884 INFO: Including run-time hook 'pyi_rth_win32comgenpy.py'
17897 INFO: Looking for dynamic libraries
19407 INFO: Looking for eggs
19407 INFO: Using Python library c:usersgoldmanauappdatalocalcontinuumanac
onda3python35.dll
19408 INFO: Found binding redirects:
[]
19415 INFO: Warnings written to C:Usersgoldmanaubuildconvwarnconv.txt
19520 INFO: Graph cross-reference written to C:Usersgoldmanaubuildconvxref-
conv.html
19587 INFO: checking PYZ
19587 INFO: Building PYZ because out00-PYZ.toc is non existent
19588 INFO: Building PYZ (ZlibArchive) C:Usersgoldmanaubuildconvout00-PYZ.p
yz
21378 INFO: Building PYZ (ZlibArchive) C:Usersgoldmanaubuildconvout00-PYZ.p
yz completed successfully.
21402 INFO: checking PKG
21403 INFO: Building PKG because out00-PKG.toc is non existent
21404 INFO: Building PKG (CArchive) out00-PKG.pkg
21752 INFO: Updating manifest in C:UsersgoldmanauAppDataRoamingpyinstaller
bincache00_py35_64bitpython35.dll
21753 INFO: Updating resource type 24 name 2 language 1033
27241 INFO: Building PKG (CArchive) out00-PKG.pkg completed successfully.
27253 INFO: Bootloader c:usersgoldmanauappdatalocalcontinuumanaconda3lib
site-packagesPyInstallerbootloaderWindows-64bitrun.exe
27254 INFO: checking EXE
27255 INFO: Building EXE because out00-EXE.toc is non existent
27256 INFO: Building EXE from out00-EXE.toc
27258 INFO: Appending archive to EXE C:Usersgoldmanaudistconv.exe
27345 INFO: Building EXE from out00-EXE.toc completed successfully.

Compile program in    C:Usersgoldmanaudistconv.exe
SQLite database management tool
SQLite is the primary database of python. SQLite is a simple and easy to use database. We can also easy to manage SQLite database by using SQLite Studio, which is a freeware and you can download from https://sqlitestudio.pl/index.rvt?act=download.
SQLiteStudio is a SQLite database manager with the following features:
- Portable – no need to install or uninstall. Just download, unpack and run.
- Intuitive interface,
- Powerful, yet light and fast,
- All SQLite3 and SQLite2 features wrapped within simple GUI,
- Cross-platform – runs on Windows 9x/2k/XP/2003/Vista/7, Linux, MacOS X and should work on other Unixes (not tested yet).
- Exporting to various formats (SQL statements, CSV, HTML, XML, PDF, JSON),
- Importing data from various formats (CSV, custom text files [regular expressions]),
- Numerous small additions, like formatting code, history of queries executed in editor windows, on-the-fly syntax checking, and more,
- Unicode support,
- Skinnable (interface can look native for Windows 9x/XP, KDE, GTK, Mac OS X, or draw widgets to fit for other environments, WindowMaker, etc),
- Configurable colors, fonts and shortcuts.
- Open source and free – Released under GPLv3 license.
Refresh to display a web page using Python
Python Program Example 1.
If you’re going to need a refresh on the same tab, you’ll need selenium webdriver. After installing selenium using pip, you can use the following code:
from selenium import webdriver
from selenium.webdriver.common.keys import Keys
import time
driver = webdriver.Firefox()
driver.get("http://www.python.org")
while True:
   time.sleep(10)
   driver.refresh()

If you are browsing a static page, you can pass a parameter in it and run, for example passing "pycon" to search as below script:

from selenium import webdriver
from selenium.webdriver.common.keys import Keys
driver = webdriver.Firefox()
driver.get("http://www.python.org")
assert "Python" in driver.title
elem = driver.find_element_by_name("q")
elem.clear()
elem.send_keys("pycon")
elem.send_keys(Keys.RETURN)
assert "No results found." not in driver.page_source
driver.close()
Python Program Example 2.
from link http://geekinessthecoolway.blogspot.hk/2013/05/tired-of-refreshingscript-for-automatic.html
A script will automatically refresh the page after every few seconds,so that my keyboard’s F5 button is spared. But still there is redundancy, one has to keep looking at the same thing again and again to check if any change has happened. So,I added few more lines to the script. Now whenever the result will be declared (or there will be any new notification) a song will start playing automatically.
Here is the resultant script:
import urllib
import time
import os
import pygame
uri = “http://upresults.nic.in” #url where result will be declared
source = urllib.urlopen(uri).read()
nw_source=source
cntr=0
flg=True
while nw_source==source:
if flg:
time.sleep(5) #refresh every 5 seconds
try:
nw_source = urllib.urlopen(uri).read()
except IOError:
print “Error in reading url”
flg=False
continue
cntr+=1
print cntr,” times refreshed”flg=True
pygame.init()
pygame.mixer.music.load(“kar_chale _hum_vida.mp3”) #pass the path to the music file
pygame.mixer.music.play()
while True:
pass
Using Webdriver under Selenium:
WebDriver是主流Web应用自动化测试框架,具有清晰面向对象 API,能以最佳的方式与浏览器进行交互。
支持的浏览器:
- Mozilla Firefox
- Google Chrome
- Microsoft Internet Explorer
- Opera
- Safari
- Apple iPhone
- Android browsers
Selenium WebDriver 又称为 Selenium2。
Selenium 1 + WebDriver = Selenium 2
标准的安装步骤
- 选择Python的版本。Python主流的有两个大的版本,2.7和3.5(请注意,从Python的3.5版本开始,不再支持Windows XP操作系统,Windows XP用户请安装3.4版本)。我们的例子将会选用面向未来的3.5版本。
- 在Windows安装Selenium2.0,有两种途径。使用pip命令行或者源码安装。以下两种方法,使用任何一个均可。推荐pip的方式。
- 方法一:pip命令行安装,运行 | cmd,打开命令行,
-U其实就是--upgrade,升级安装。pip install -U selenium - 方法二:源码解压安装,前往https://pypi.python.org/pypi/selenium下载最新版的PyPI版本的Selenium,解压后执行
python setup.py install
- 方法一:pip命令行安装,运行 | cmd,打开命令行,
Source Information: http://www.jianshu.com/p/3ce95cbc65be
Selenium 3.0.1 出现的问题以及解决
3.0.1 更新以后,需要做两个操作:
- Geckodriver executable needs to be in PATH。Geckodirver的下载地址:https://github.com/mozilla/geckodriver/releases
报错内容:WebDriverException:Message:'geckodriver'executable needs to be in Pathgeckodriver是一原生态的第三方浏览器,对于selenium3.x版本都会使用geckodriver来驱动firefox,所以需要下载geckodriver.exe。放置在Path 环境变量可以访问到的地方。例如 C:python34
- 需要将火狐的安装路径放到path,然后重启(必须重启电脑)
报错内容:selenium.common.exceptions.WebDriverException: Message: 'geckodriver' executable needs to be in PATH.
Reference Info/Link for Python’s Django Development
A great document for more complex installations—those that host multiple Django Web sites (projects) using only one instance of Apache—can be found at –>
http://forum.webfaction.com/ -> search for ‘Django’
You can find out more about some of the possible Web server arrangements at –>
http://code.djangoproject.com/wiki/ServerArrangements.
More about Django and database installation at –>
http://docs.djangoproject.com/en/dev/topics/install/#database-installation.
You can download Django-nonrel from –> http://www.allbuttonspressed.com/projects/django-nonrel
followed by one of the adapters, –> https://github.com/FlaPer87/django-mongodb-engine (Django with MongoDB), or –> http://www.allbuttonspressed.com/projects/djangoappengine (Django on Google App Engine’s datastore).
Because Django-nonrel is (at the time of this writing) a fork of Django, you can just install it instead of a stock
Django package. The main reason for doing that is because you want to
use the same version for both development and production. As stated at
–> http://www.allbuttonspressed.com/projects/django-nonrel, “the modifications to Django are minimal (maybe less than 100 lines).” Django-nonrel is available as a Zip file,
You can find all of the runserver options at –>
http://docs.djangoproject.com/en/dev/ref/django-admin/#django-admin-runserver.
To learn more about templates and tags, check out the official documents page at –> http://docs.djangoproject.com/en/dev/ref/templates/api/
#basics.
To read more about using render_to_response(), check out these pages from the official documentation: –>
• http://docs.djangoproject.com/en/dev/intro/tutorial03/#ashortcut-render-to-response
• http://docs.djangoproject.com/en/dev/topics/http/shortcuts/#render-to-response
To find out when a QuerySet is evaluated, check out the official
documentation at –> http://docs.djangoproject.com/en/dev/ref/models/querysets/.
Explanations of CSRF are beyond the scope of this book, but you can read more about them here: –>
• http://docs.djangoproject.com/en/dev/intro/tutorial04/#writea-simple-form
• http://docs.djangoproject.com/en/dev/ref/contrib/csrf/
To learn more about testing in Django, check out the documentation at –>
http://docs. djangoproject.com/en/dev/topics/testing.
You can read more about how OAuthworks at the following locations: –>
http://hueniverse.com/oauth
http://oauth.net
http://en.wikipedia.org/wiki/Oauth
more details on this at –>
http://docs.djangoproject.com/en/dev/howto/deployment/modwsgi/#serving-the-admin-files
Twitter maintains a list of the most popular ones at –>
http://dev.twitter.com/pages/libraries#python.
To find out more about Django’s authentication system, check the documentation at –>
https://docs.djangoproject.com/en/dev/topics/auth/.
How to setup python 2.7 and 3.5 under same computer
Introduction
Conda treats Python the same as any other package, so it’s very easy to manage and update multiple python installations under one computer. For instance, if you want to install different version of python in the same window env but without wipe out the current version of python, you can create and activate a new virtual environment with specific name and install your required version of Python as follows instruction.
Install Python 3.5 under Python 2.7
1. install new python with command: $ conda create -n py35 python=3.5 anaconda
2. activate the new setup python with command: $ activate py35
3. deactivate with command: $ deactivate
4. Remove the created env: $ conda remove –name py35 –all
Install Python 2.7 under Python 3.5
1. install new python with command: $ conda create -n py27 python=2.7 anaconda
2. activate the new setup python with command: $ activate py27
3. deactivate with command: $ deactivate
Screen Dump of Deinstallation and Installation as below:
| C:Usergoldmanau>conda create -n py27 python=2.7 anaconda Fetching package metadata: …. Solving package specifications: …………………………. Package plan for installation in environment C:UsersgoldmanauAppDataLocalCo ntinuumAnaconda3envspy27:The following packages will be downloaded: package | build The following NEW packages will be INSTALLED: _nb_ext_conf: 0.2.0-py27_0 defaults Proceed ([y]/n)? y Fetching packages … |
| C:Usersgoldmanau>conda remove –name py27 –all Fetching package metadata: ….Package plan for package removal in environment C:UsersgoldmanauAppDataLocal ContinuumAnaconda3envspy27: The following packages will be REMOVED: menuinst: 1.4.1-py27_0 defaults Proceed ([y]/n)? y |
Reference Doc Link
http://conda.pydata.org/docs/py2or3.html
Installation of an Open Source Prometeo-ERP System
Introduction
Although Prometeo-ERP System was a phase-out project for any further development, its follow-up project was Django-ERP. However, Django-ERP is still under development, Its function is not ready, and most features are not ready for public use at this moment. Then, I step back to continue to test Prometeo-ERP System. Prometeo-ERP has already provide many useful features, its public release free version had the following features:
- Authentication & row-level permission system
- Notification system
- Custom widgets & dashboards
- Taxonomy system
- File browsing
- Event calendar
- User tasks & timesheets
- CRM (Customer Relationship Management)
- Products management
- Stock management
- Human resources management
- Sales management
- Project management
- Knowledge management
- DMS (Document Management System)
I installed the Prometeo-ERP system to my Raspberry Pi machine, i.e. free OS, free program tools, free application tools, … Great. It is still worth to study it, and I will show the installation installation in the following
Installation Steps:
1. Checkout sources from the GIT repository:
https://code.google.com/archive/p/prometeo-erp/
2. Follow the instructions in the README file as reference.
2.1 PREREQUISITES
Make sure you have the following prerequisites installed:
* python >= 2.6 (or 2.7 the public one)
$ pip install python==2.7
* pytz >= 2011h (required)
$ pip install pytz==2011h
* python-markdown >= 2.0 (required)
$ pip install markdown
* xhtml2pdf >= 0.0.3 (required)
$ pip install xhtml2pdf==0.0.3
* icalendar >= 2.2 (required)
$ pip install icalendar==2.2
* django >= 1.3.1 (required)
$ pip install django==1.3.1
* south >= 0.7.3 (optional)
$ pip install south
2.2 INSTALLATION
1. Rename the download folder to “prometeo” (It is necessary).
2. cp settings/base.py.tmpl settings/base.py, and edit several statement as below:
$ vi settings/base.py
….
ADMINS = (
# (‘Goldman’, ‘goldman.au168@gmail.com’),
)
MANAGERS = ADMINS
DATABASES = {
default’: {
‘ENGINE’: ‘django.db.backends.sqlite3’, # Add ‘postgresql_psycopg2’, ‘postgresql’, ‘mysql’, ‘sqlite3’ or ‘oracle’.
‘NAME’: ‘erp.db’, # Or path to database file if using sqlite3.
‘USER’: ”, # Not used with sqlite3.
‘PASSWORD’: ”, # Not used with sqlite3.
‘HOST’: ”, # Set to empty string for localhost. Not used with sqlite3.
‘PORT’: ”, # Set to empty string for default. Not used with sqlite3.
}
}
…
LANGUAGE_CODE = ‘en-us’
…
# List of installed applications.
INSTALLED_APPS = (
‘django.contrib.auth’,
‘django.contrib.contenttypes’,
‘django.contrib.sessions’,
‘django.contrib.sites’,
‘django.contrib.messages’,
‘django.contrib.admin’,
‘django.contrib.admindocs’,
‘django.contrib.comments’,
‘django.contrib.markup’,
‘django.contrib.redirects’,
‘django.contrib.staticfiles’,
#’south’,
‘prometeo.core’,
‘prometeo.core.filebrowser’,
‘prometeo.core.widgets’,
‘prometeo.core.menus’,
‘prometeo.core.taxonomy’,
‘prometeo.core.auth’,
‘prometeo.core.registration’,
‘prometeo.core.notifications’,
‘prometeo.core.calendar’,
‘prometeo.todo’,
‘prometeo.addressing’,
‘prometeo.partners’,
‘prometeo.documents’,
‘prometeo.products’,
‘prometeo.stock’,
‘prometeo.hr’,
‘prometeo.sales’,
‘prometeo.projects’,
‘prometeo.knowledge’,
)
…
3. It’s time to create the DB schema
$ python manage.py syncdb
4. Start the server:
$ python manage.py runserver
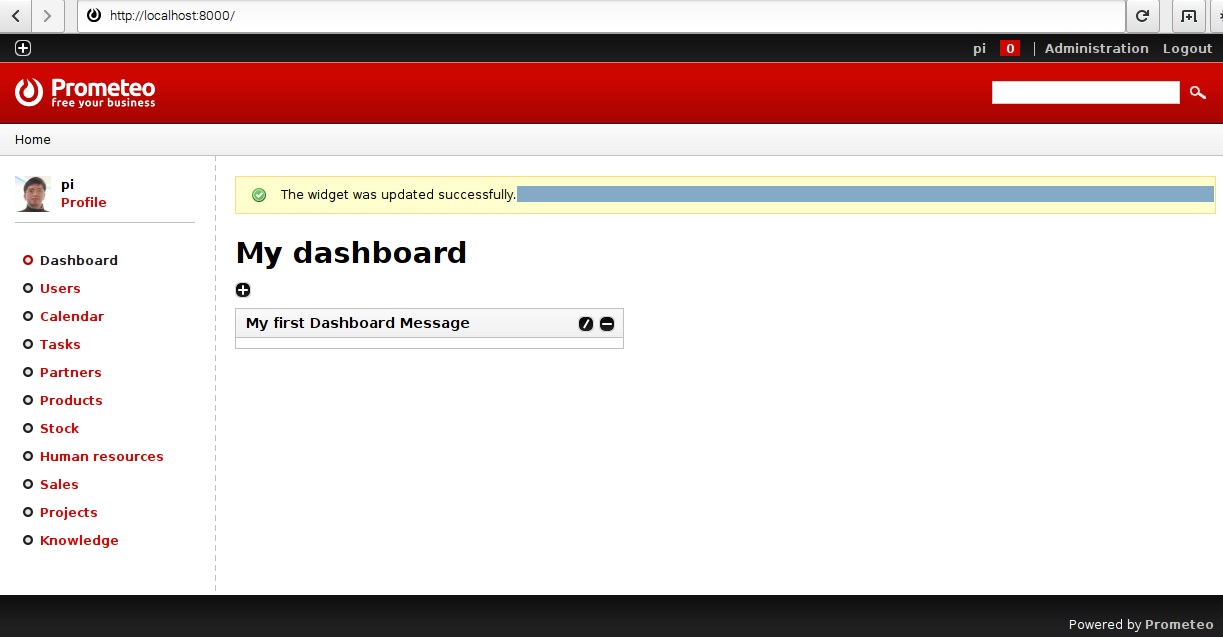
5. Test the application via link http://localhost:8000 as screen dump below:
Setup Raspberry pi Car camera with Android phone WiFi
Introduction
Raspberry Pi can be widely used for Car computer with many features, such as plays DVDs, GPS, displays TV, Bluetooth (phone calls + music), MP3/MPEG4 player, CD/radio, car camera, reversing camera (comes on automatically when I put the car in reverse gear), etc. This week, I test raspberry pi to connect to android phone’s wireless hotpot, and setup camera and display feature as below. It is interesting.
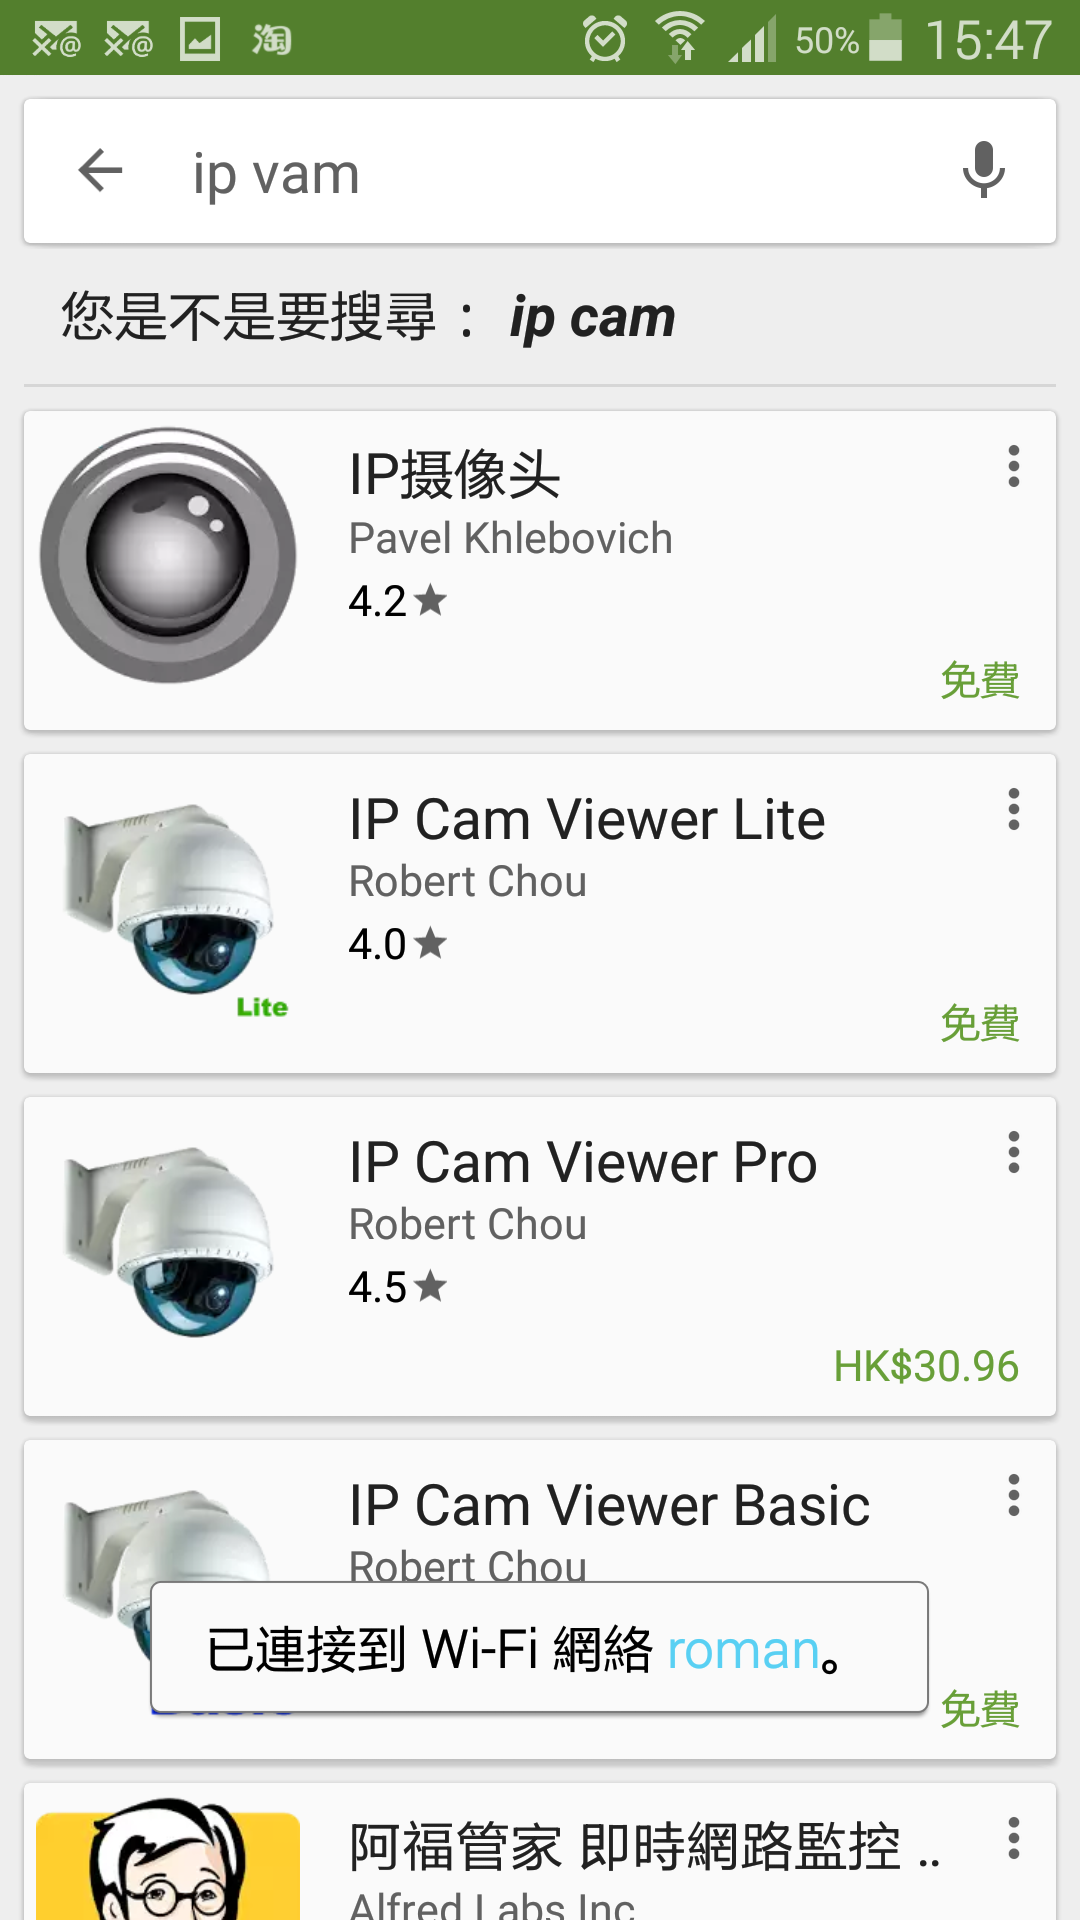
Connect Raspberry Pi to an Android phone’s camera
Step 1. Install Pi Camera Application in Android Phone, which you can find many from Google Play Store as below screen:
Step 2. Turn on the Android Phone’s Camera Application and active its web server feature, then it will display an ip address for your external browse connection.
Step 3. Turn on the Android Phone’s wireless sharing hotpot feature, then the ip address will be refresh to its own phone address for your external connection as below:
Step 4. Connect the Raspberry Pi to Android Phone Open the browser in your Raspberry Pi, and type in the ip address, then it will display the camera as below:
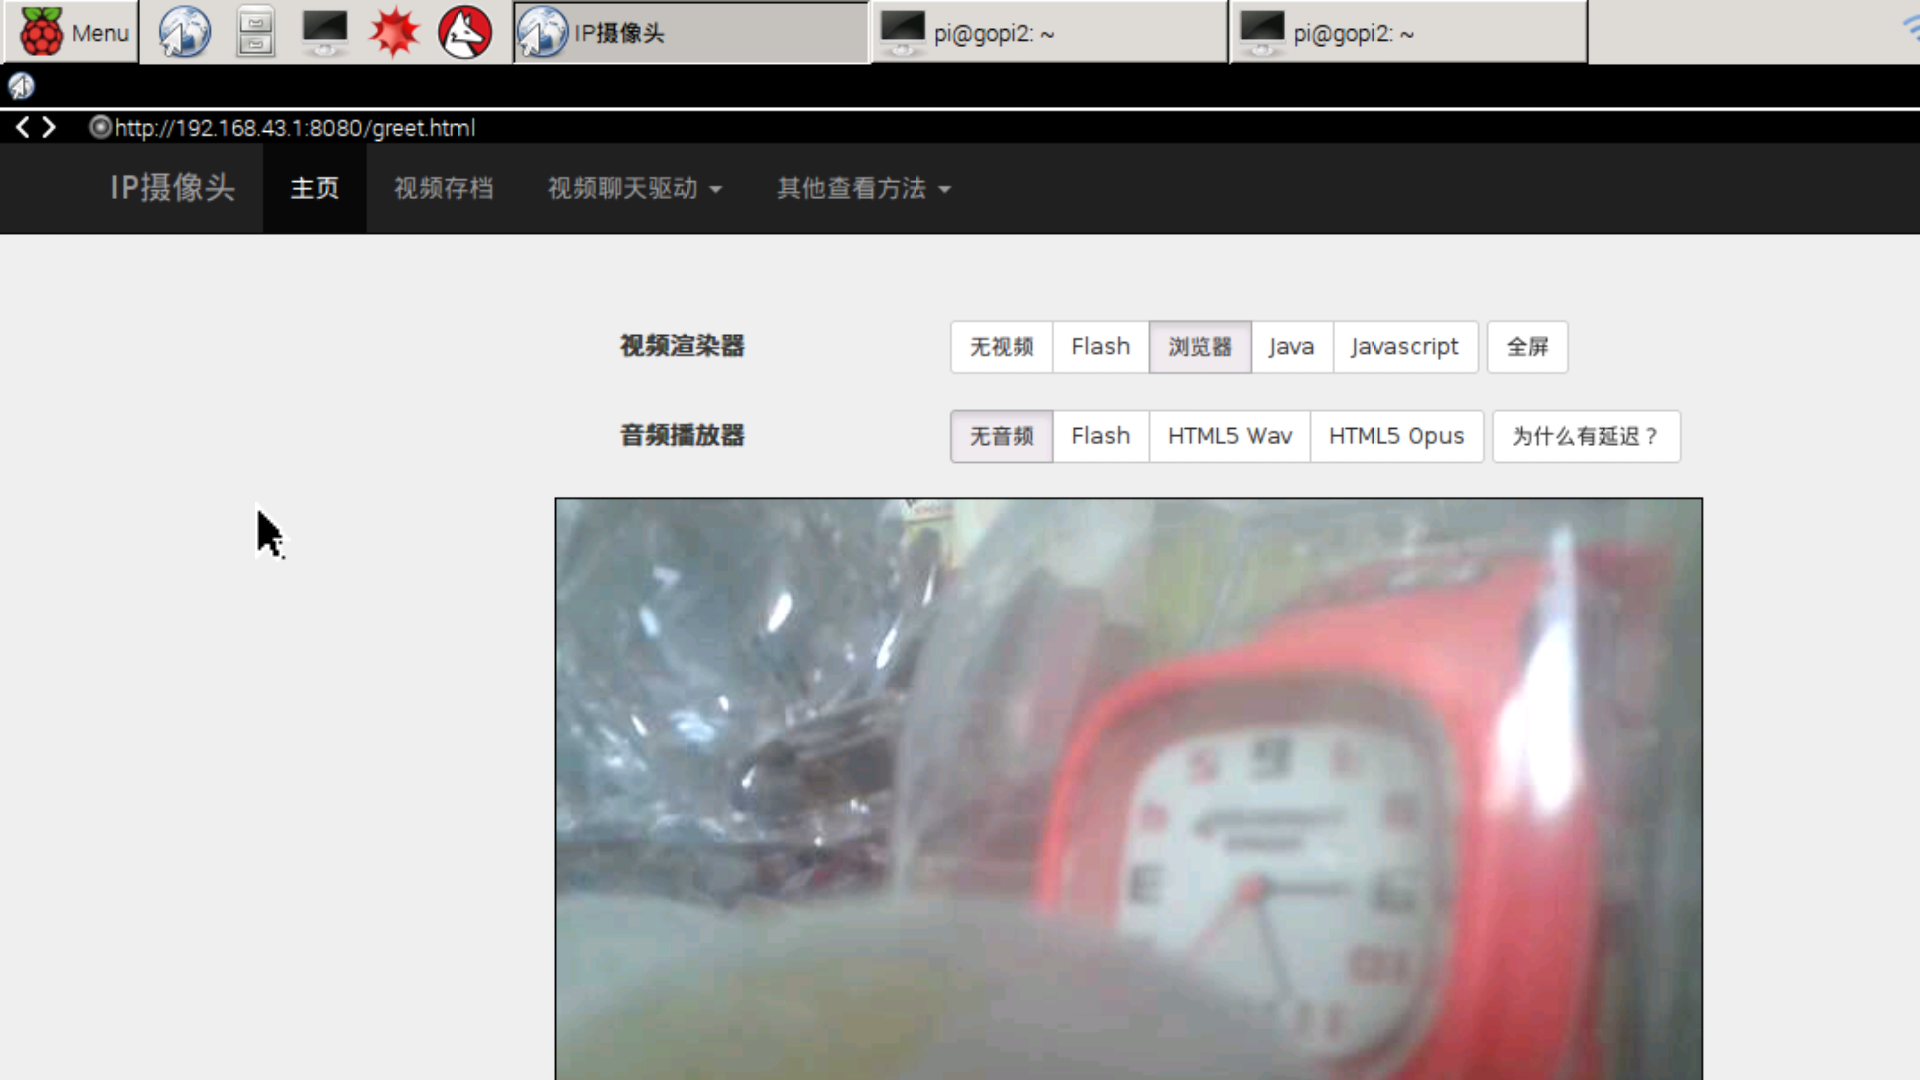
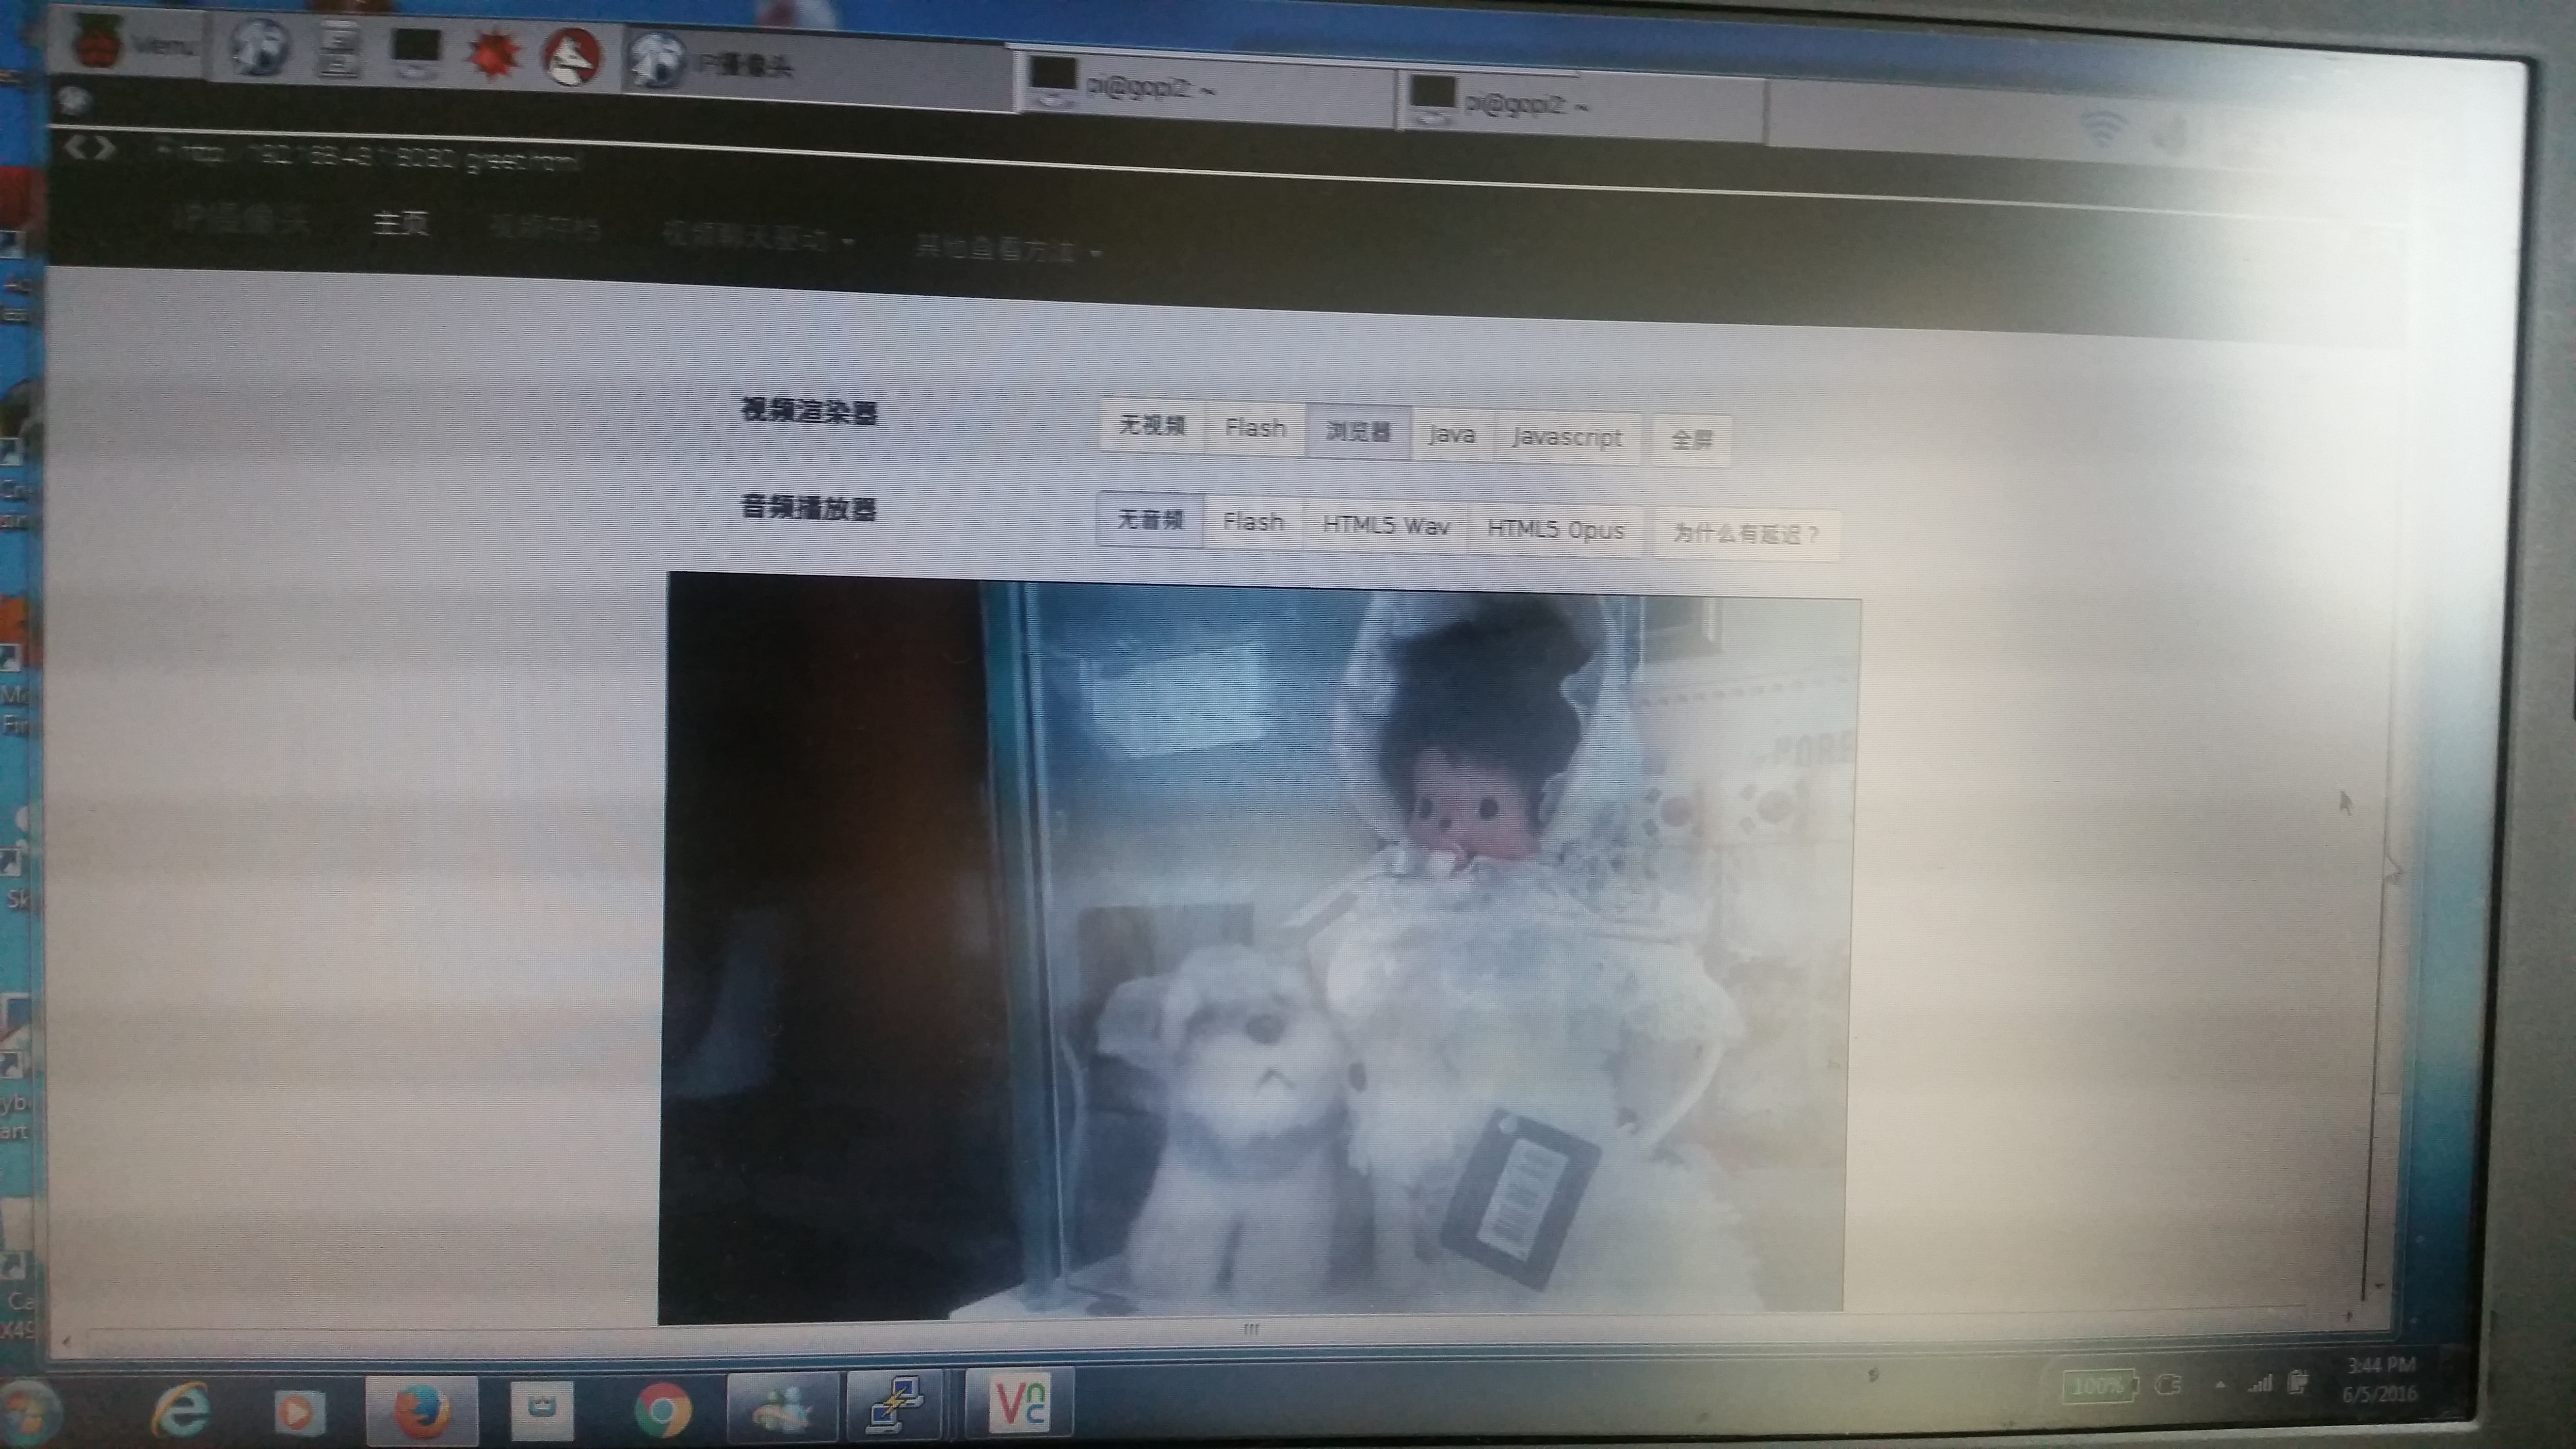
Screen Dump of Another Scene of Camera and Display as below two pictures:

Display Raspberry Pi Camera to Android phone
Step 1. Install Raspberry Pi Camera and vlc software as describe in my previous post “Installation of Raspberry Pi Camera”
Step 2. Start the video streaming function with command:
$ raspivid -w 640 -h 480 -o – -t 9999999 |cvlc -vvv stream:///dev/stdin –sout ‘#standard{access=http,mux=ts,dst=:8554}’ :demux=h264
Step 3. We can connect via browser with link http://ip-address:8554/.
Bonus:
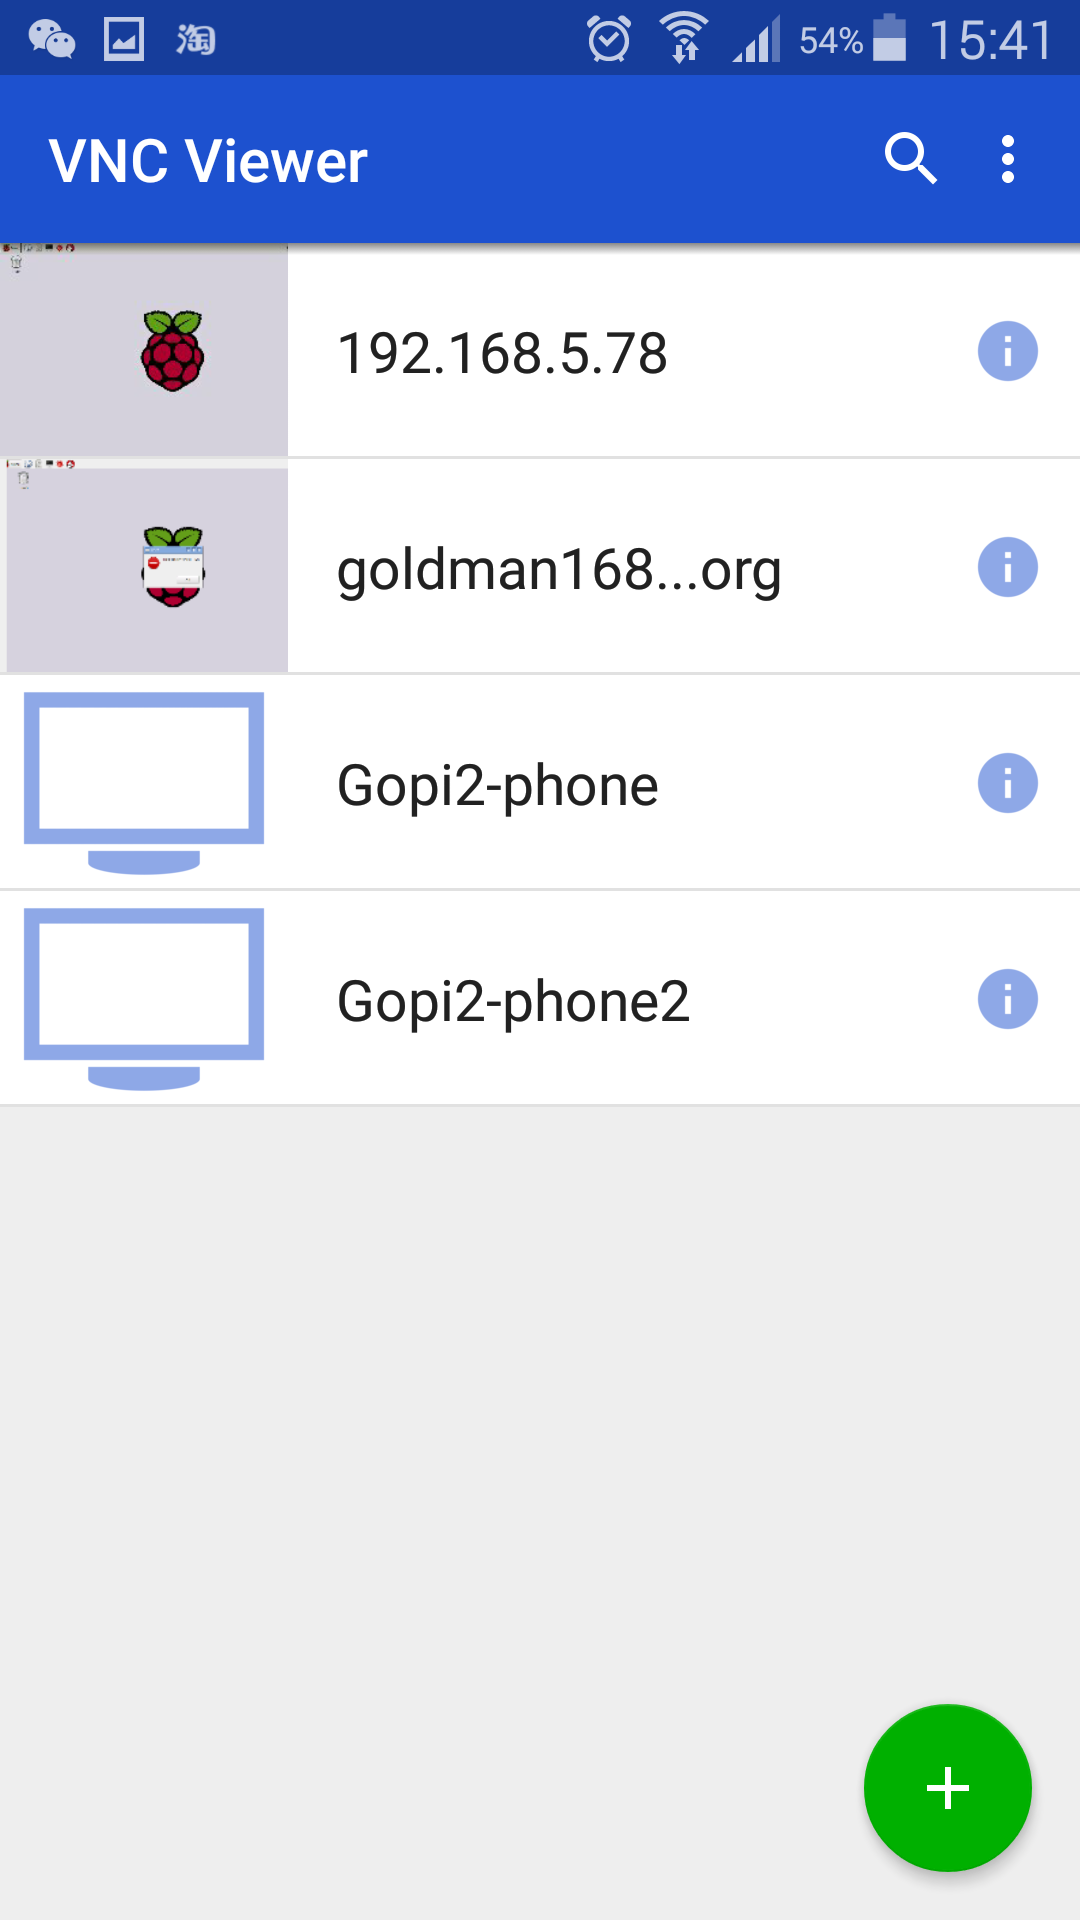
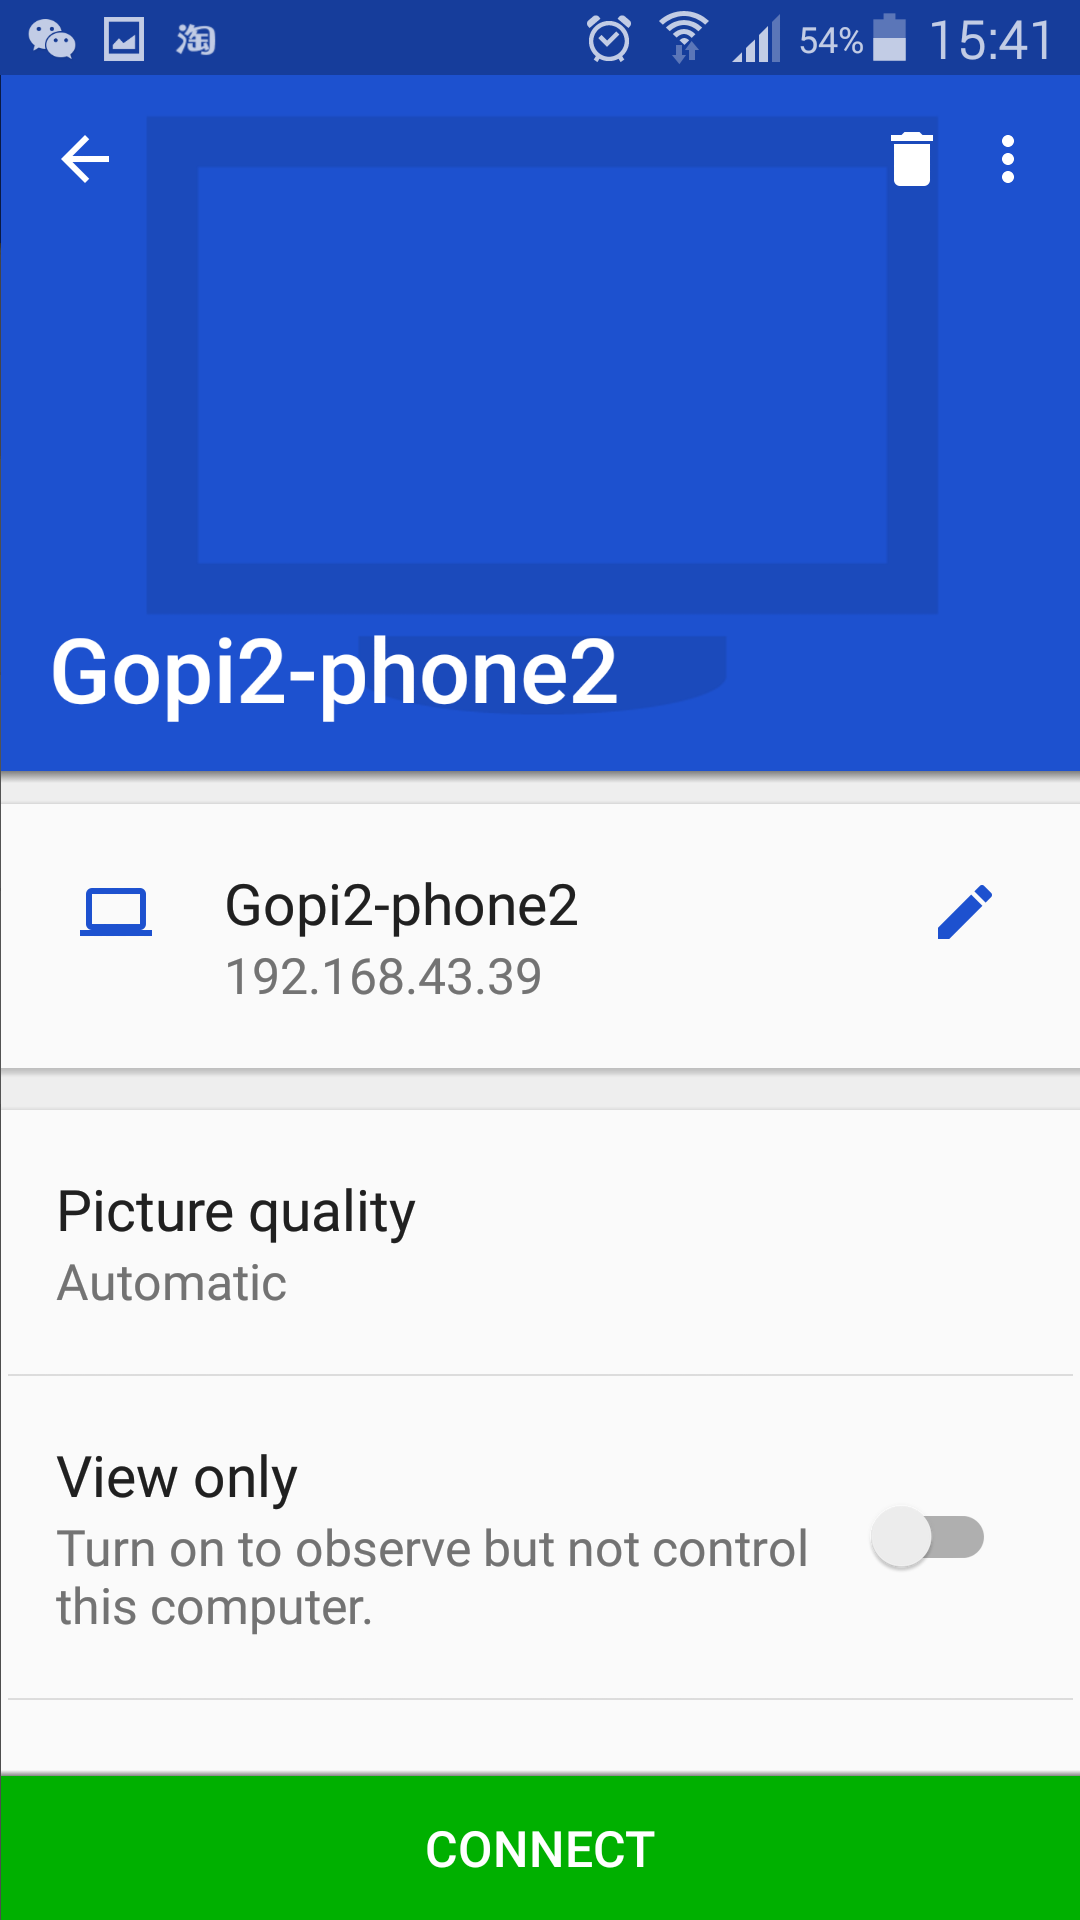
We can also use VNC to connect Raspberry Pi from Android Phone, provided that you start the VNC server function (as described in my previous post “Installation Raspberry Pi” Step 6, and then install VNC app from Google Play Store, and start VNC connection in Andriod Phone as below:
Setup Django WorkFlow Application
Introduction
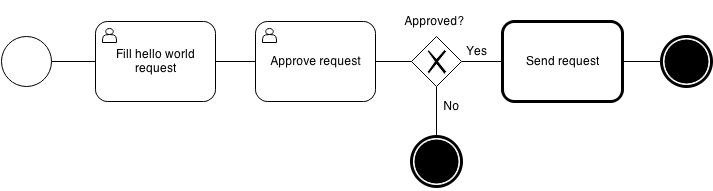
Recently, I studied how to setup a work flow program using python django. Believe me, Python Diango can provide you a high quality work flow web application. Let’s say I would like a simple workflow application as below diagram. I will show you how to setup the application as below instruction, and I will also show you the screen dump examples of running the application.
Step 1. Prerequisition
This Work Flow Program requires Python 3.3 or greater, and django 1.6 or 1.7. I recommend you to setup under virtual environment. Setup the following python plug-in by running the following command:
$ pip3 install Django==1.7.1
$ pip3 install WebOb==1.4
$ pip3 install WebTest==2.0.16
$ pip3 install amqp==1.4.6
$ pip3 install anyjson==0.3.3
$ pip3 install beautifulsoup4==4.3.2
$ pip3 install billiard==3.3.0.18
$ pip3 install celery==3.1.16
$ pip3 install django-fsm==2.2.0
$ pip3 install django-viewflow==0.7.0
$ pip3 install django-webtest==1.7.7
$ pip3 install kombu==3.0.23
$ pip3 install mock==1.0.1
$ pip3 install pytz==2014.9
$ pip3 install singledispatch==3.4.0.3
$ pip3 install six==1.8.0
$ pip3 install waitress==0.8.9
Step 2. Create a standard django project and application
Run the following command:
$ django-admin.py startproject demo .
$ ./manage.py startapp helloworld
$ mv helloworld/ demo/
Step 3. Edit or Create the following files
3.1 edit demo/settings.py
…
INSTALLED_APPS = (
‘django.contrib.admin’,
‘django.contrib.auth’,
‘django.contrib.contenttypes’,
‘django.contrib.sessions’,
‘django.contrib.messages’,
‘django.contrib.staticfiles’,
‘viewflow’,
‘demo.helloworld’
)
…
TEMPLATE_CONTEXT_PROCESSORS = (
‘django.contrib.auth.context_processors.auth’,
‘django.core.context_processors.request’,
)
3.2 edit demo/urls.py
from django.conf.urls import patterns, include, url
from django.contrib import admin
from viewflow import views as viewflow
from .helloworld.flows import HelloWorldFlow
urlpatterns = patterns(
”,
url(r’^helloworld/’,
include([
HelloWorldFlow.instance.urls,
url(‘^$’, viewflow.ProcessListView.as_view(), name=’index’),
url(‘^tasks/$’, viewflow.TaskListView.as_view(), name=’tasks’),
url(‘^queue/$’, viewflow.QueueListView.as_view(), name=’queue’),
url(‘^details/(?P<process_pk>d+)/$’,
viewflow.ProcessDetailView.as_view(), name=’details’)],
namespace=HelloWorldFlow.instance.namespace),
{‘flow_cls’: HelloWorldFlow}),
#url(r’^flows/’, include(viewflow.urls)),
url(r’^admin/’, include(admin.site.urls)),
url(r’^accounts/login/$’, ‘django.contrib.auth.views.login’, name=’login’),
url(r’^accounts/logout/$’, ‘django.contrib.auth.views.logout’, name=’logout’),
)
3.3 create demo/celery.py
import os
from celery import Celery
from django.conf import settings
os.environ.setdefault(‘DJANGO_SETTINGS_MODULE’, ‘demo.settings’)
app = Celery(‘tests’)
app.config_from_object(‘django.conf:settings’)
app.autodiscover_tasks(lambda: settings.INSTALLED_APPS)
3.4 create demo/helloworld/flows.py
from viewflow import flow
from viewflow.base import Flow, this
from viewflow.contrib import celery
from . import models, views, tasks
class HelloWorldFlow(Flow):
process_cls = models.HelloWorldProcess
start = flow.Start(views.CreateRequestView)
.Next(this.approve)
approve = flow.View(views.ApproveRequestView)
.Next(this.is_approved)
is_approved = flow.If(lambda p: p.approved)
.OnTrue(this.send)
.OnFalse(this.end)
send = celery.Job(tasks.send)
.Next(this.end)
end = flow.End()
3.5 edit demo/helloworld/models.py
from django.db import models
from viewflow.models import Process
class HelloWorldProcess(Process):
text = models.CharField(max_length=250)
approved = models.BooleanField(default=False)
3.6 edit demo/helloworld/tasks.py
from demo.celery import app as celery_app
from viewflow.flow import flow_job
@celery_app.task()
@flow_job()
def send(activation):
print(activation.process.text)
3.7 edit demo/helloworld/views.py
from django.views import generic
from viewflow import views as flow_views
class CreateRequestView(flow_views.StartViewMixin,
generic.UpdateView):
fields = [“text”]
def get_object(self):
return self.activation.process
class ApproveRequestView(flow_views.TaskViewMixin,
generic.UpdateView):
fields = [“approved”]
def get_object(self):
return self.activation.process
Step 4. Start the Application Server
Run the following Command:
./manage.py createsuperuser –username=admin –email=admin@admin.com
( setup admin password )
./manage.py makemigrations
./manage.py migrate
Start the following celery in another virtual env
celery -A demo worker -l info
Start the application server:
./manage.py runserver
Step 4. Run the Application from browser
Admin Logon
http://127.0.0.1:8000/admin/
WorkFlow Application Logon
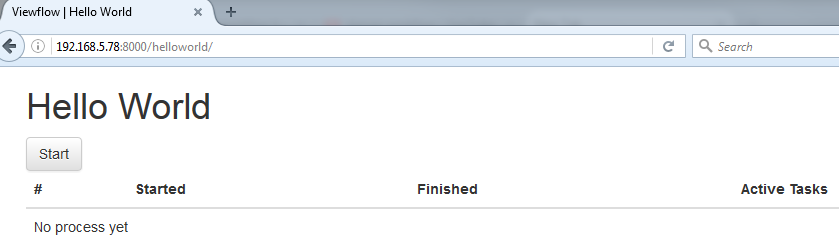
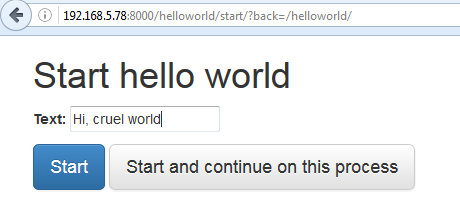
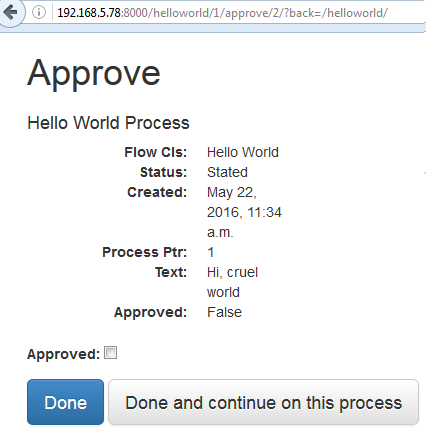
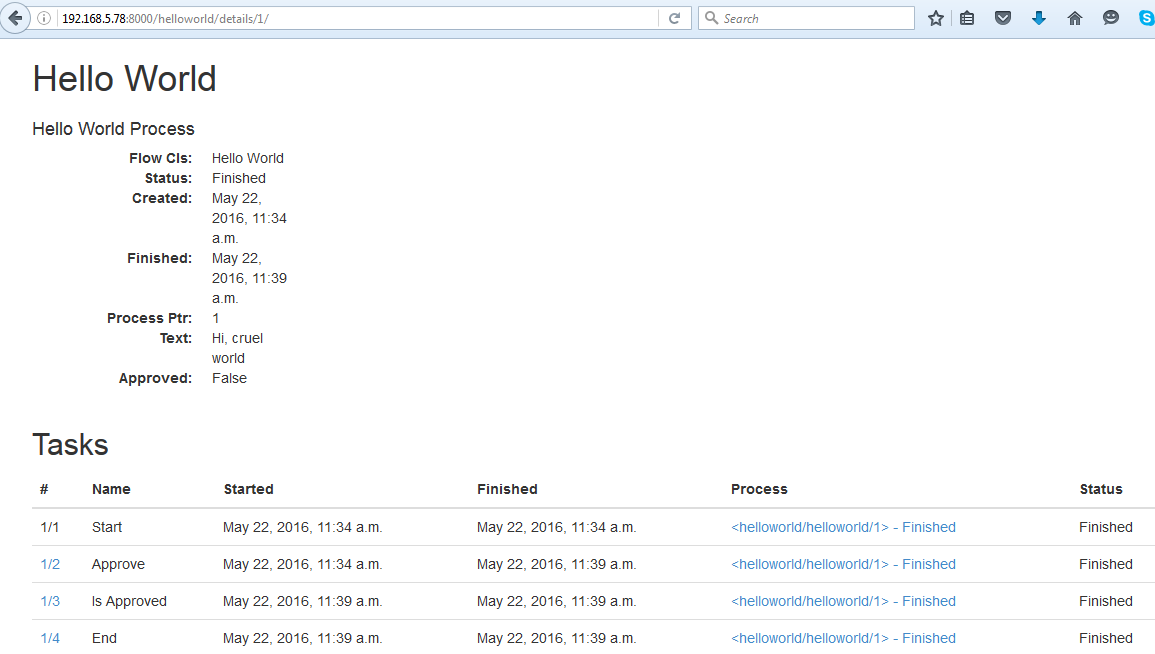
http://127.0.0.1:8000/helloworld/
Step 5. Screen Dump Example of running the WorkFlow Application

Reference Document Link:
http://viewflow.io/
http://docs.viewflow.io/material_admin.html
https://pypi.python.org/pypi/django-viewflow
Prometeo-ERP System (An Open Source ERP System)
Introduction
Recently, I found a open source ERP application project which was developed by python and django framework. Prometeo is absolutely an open-source and free of charge. It is very user friendly and user-oriented, too.
Installation
1. Checkout sources from the GIT repository:
git clone https://emanuele.bertoldi@code.google.com/p/prometeo-erp/ prometeo
http://code.google.com/p/prometeo-erp
https://code.google.com/archive/p/prometeo-erp/
https://code.google.com/archive/p/prometeo-erp/source/default/source
2. Follow the instructions in the README file from the download.
3. Test the installation at http://localhost:8000 running the development server:
python manage.py runserver
Further Development
This Prometeo-ERP project is no longer maintained nor supported! However, it is succeeded by another project called django ERP, which is still under developing. Its link is –> https://github.com/djangoERPTeam/django-erp