Introduction
Raspberry pi computer can be connected to a camera to take picture and video. We can use it as a CCTV to monitor facility and environment. In the following, we will talk about how to setup a camera in raspberry pi step by step.
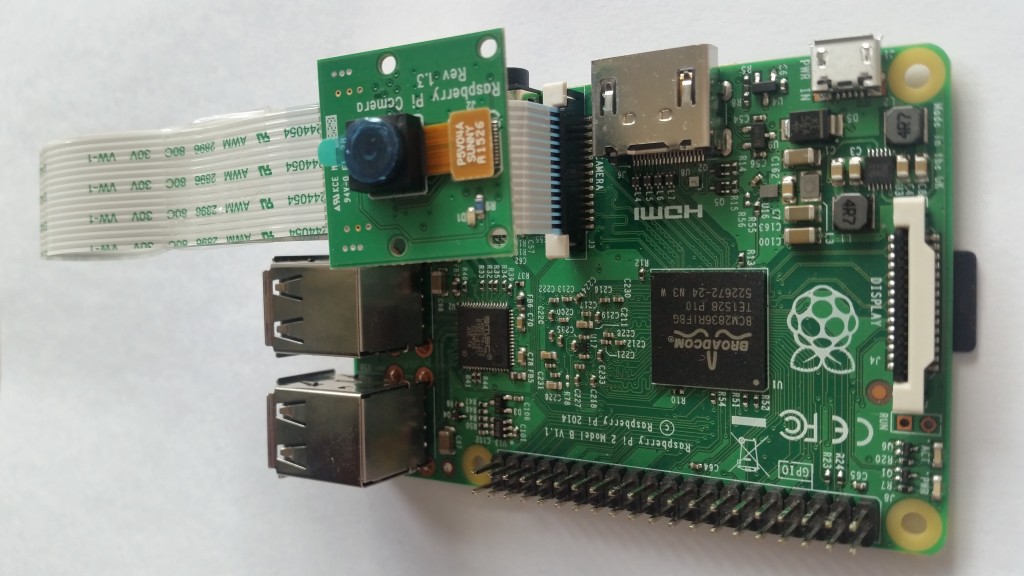
Step 1: Connect the Camera to Raspberry Pi as above picture, and enable the camera via raspi-config
Step 2: Capture Picture Command
$ raspistill -o image.jpg
Step 3: Capture Video Command
$ raspivid -o 5sec-video.h264
$ raspivid -o 10sec-video.h264 -t 10000
Note: You can’t view anything over VNC, and obviously you can’t do it via a ssh terminal. You need to be viewing the Pi directly over hdmi.
Step 4. Record raw video, convert to mp4, play:
The h264 video the camera records is “raw”. To make it easily viewable by the Pi or Mac (or other PC’s) it needs to be converted as below steps. First, you need to install gpac on the Pi, then run MP4Box (part of that install) to do the convert using below commands:
$ sudo apt-get update
$ sudo apt-get install -y gpac
$ MP4Box -fps 30 -add myvid.h264 myvid.mp4
To play video on the Pi, you need omxviewer. I think it may come installed iwth NOOBS now(?), but if not:
$ sudo apt-get install omxplayer
Then play in a window (again, this doesn’t work over VNC, need to be on a monitor connected to the Pi) or to the HDMI port:
$ omxplayer myvid.mp4
$ omxplayer -p -o hdmi myvid.mp4
Step 5. Broadcast video to the Internet:
Using VLC
Install VLC if no, with below command:
$ sudo apt-get install vlc
Sometimes, I need to go to the official web site to download as link <<here>>, installed the App that way, and it started working!
Port Forward the Router:
I accessed my routers web page 192.168.x.x and via the “virtual servers” option, opened up port 8554 for outside listening. I’m sure this process can vary widely per router.
Stream from the Pi:
After ssh’ing into the Pi, I executed this to start the video stream (note I knocked down the resolution from the default 1080p):
$ raspivid -w 640 -h 480 -o – -t 9999999 |cvlc -vvv stream:///dev/stdin –sout ‘#standard{access=http,mux=ts,dst=:8554}’ :demux=h264
View via VLC:
I accessed “What’s My Ip” to find the external IP of my router.
Launching VLC, I accessed “File -> Open Network…”, and entered:
http://<ip of my router>:8554
And hit “open” : Next popped up a (delayed by about 5 seconds) stream from my Pi’s cam. Awesome.
Using MJPG-Streamer
There is a tutorial shows how to broadcast video straight to a web page via MJPG-Streamer. It’s really easy to setup referring to “Raspberry Pi camera board video streaming”.
We firstly made two shell scripts, start_stream.sh & stop_stream.sh that handle all the heavy lifting of starting and stopping all the services, then make a copy of them to your home dir for easy execution.
Note, we changed them to up the resolution, jpg quality, and add a password to the site. We only made one change: Since we previously port-forwarded port 8554, we also changed their code to use that port, rather than 9000.
To add your own password, edit start_stream.sh and change the line including the block of code below to include the “-c” stuff shown here, changing myUserName:myPassword appropriately. Note, the -c argument must be inside the quotes, after the www, or things won’t work so well.
-o “output_http.so -p 8554 -w /opt/mjpg-streamer/www -c myUserName:myPassword”
Then browse to:
http://<ip of your router>:8554/stream_simple.html
To login and start watching from the auto-generated web page! Looks like I’m getting around 1fps.
raspistill Image Formats
–encoding <format>
The default is jpg, but you can change it, where <format> is jpg, bmp, gif, & png. From the docs: “Note that unaccelerated image types (gif, png, bmp) will take much longer to save than JPG which is hardware accelerated.”
If using jpg, you can set the quality via:
–quality #
Where # is a value from 1 -> 100. They say that 75 is a good number.
Reference Info:
- Raspberry Pi as a low-cost HD surveillance camera
- OpenCV and the Pi Camera Board!
- Install ‘picam’ with command $ sudo pip install https://github.com/ashtons/picam/zipball/master#egg=picam . Source on over on Github. It returns PIL Image objects.
- Reference Information source: http://www.akeric.com/blog/?p=2437
- Python Binding Programming Info for picamera setup as below:
Here on PyPi. Official documentation here. Source on Github here. Forum discussion here.
Easy to install with pip:
$ sudo pip install picamera
We can run the quickstarts via Adafruit WebIDE successfully (while having the Pi hooked up over HDMI to preview the results).

