Introduction
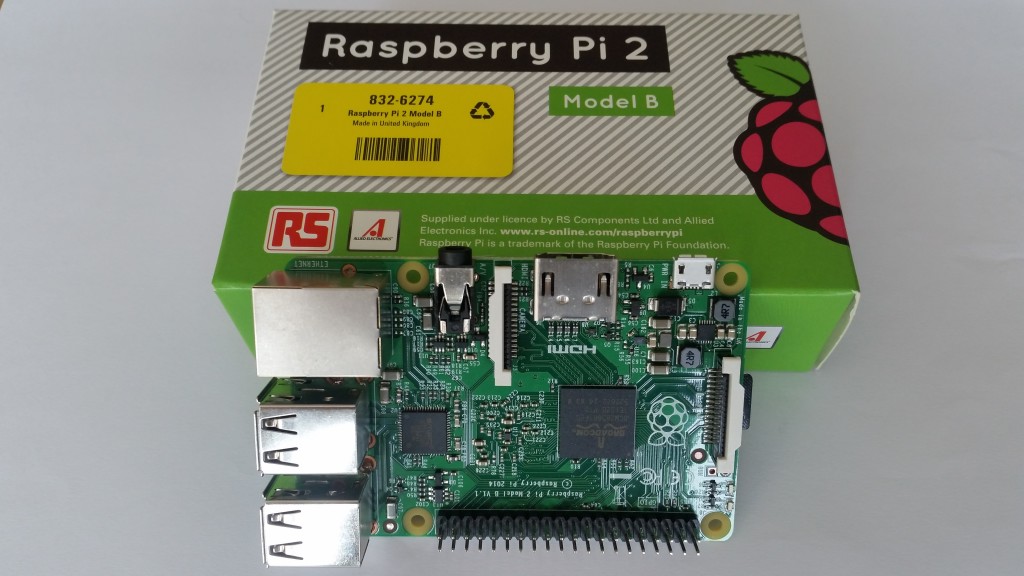
Recently, I bought a Raspberry Pi 2 B as my Christmas gift myself. Ha..Ha… It is a Good Stuff… Raspberry Pi is a very low cost Linux computer with pocket size. However, it is very powerful, and you can use it as a calculation processor, web hosting computer, network router, micro-controller for automatically, etc.Attractive… Right … To provide you information to start to use it, I would like to explain its installation as below. Hope it is help to you. If you are interested in it, feel free to check more information from amazon link click –> <<here>> .
Step 1: Format SD Card via SDFFormatter
Download SDFFormatter from https://www.sdcard.org/downloads/formatter4/
Step 2: Write NOOBS System to SD Card
Download NOOBS from https://www.raspberrypi.org/downloads/
Step 3: Connect Keyboard/Mouse/HDMI monitor/SD Card/Power to Raspberry Pi
Connect power and switch-on the device, then follow the screen display to install Raspbian O/S System.
Step 4: Install to local/keyboard/country/display Chinese Char
- raspi-config 先設定 locales, 如utf-8 等
- 安裝字型 sudo apt-get install ttf-wqy-microhei
- Select Midori font 選字型 文泉驛微米黑
- Select Raspberry Configuration
- Select keyboard as US (internation)
- Select your country
- Reboot the system
Step 5: Install program to update System Time via Internet
$ sudo apt-get update
$ sudo apt-get upgrade
$ sudo apt-get install ntpdate
$ sudo service ntp restart
Step 6: Install tightvncserver program
Reference Info –> https://www.raspberrypi.org/documentation/remote-access/vnc/README.md
- On your Pi (using a monitor or via SSH), install the TightVNC package:
$ sudo apt-get install tightvncserver
- Next, run TightVNC Server which will prompt you to enter a password and an optional view-only password:
$ sudo tightvncserver
- Start a VNC server from the terminal. This example starts a session on VNC display zero (:0) with full HD resolution:
$ sudo vncserver :0 -geometry 1920×1080 -depth 24
Automation and run at boot
You can create a simple file with the command to run the VNC server on the Pi, to save having to remember it:
$ sudo vi /etc/init.d/vncboot
- Create a file containing the following shell script:
#! /bin/sh
# /etc/init.d/vncboot
### BEGIN INIT INFO
# Provides: vncboot
# Required-Start: $remote_fs $syslog
# Required-Stop: $remote_fs $syslog
# Default-Start: 2 3 4 5
# Default-Stop: 0 1 6
# Short-Description: Start VNC Server at boot time
# Description: Start VNC Server at boot time.
### END INIT INFO
USER=pi
HOME=/home/pi
export USER HOME
case “$1” in
start)
echo “Starting VNC Server”
#Insert your favoured settings for a VNC session
su – pi -c “/usr/bin/vncserver :0 -geometry 1280×800 -depth 16 -pixelformat rgb565”
;;
stop)
echo “Stopping VNC Server”
/usr/bin/vncserver -kill :0
;;
*)
echo “Usage: /etc/init.d/vncboot {start|stop}”
exit 1
;;
esac
exit 0
- Save this file as vncboot (for example)
- Make this file executable:
$ sudo chmod 755 vncboot
- Enable dependency-based boot sequencing:
$ sudo update-rc.d vncboot defaults
In your client computer, use vnc client to connect to your ip address:5900 or Ip address:1
Step 7: Install Samba program to setup share folder
$ sudo apt-get install samba samba-common-bin
$ sudo adduser powenko
$ sudo usermod –a -G sambashare powenko
$ sudo pdbedit –a –u powenko
$ sudo mkdir /home/allusers
$ sudo chown root:sambashare /home/allusers/
$ sudo chmod 770 /home/allusers/
$ sudo chmod g+s /home/allusers/
$ sudo nano /etc/samba/smb.conf
Edit with the following:
security = user
read only = no
[allusers]
comment=Shared Folder
path=/home/allusers
read only=no
guest ok=no
browseable=yes
create mask=0700
Start Samba Server Automatically
$sudo /etc/init.d/samba restart
Connect Folder via Client Computer
\raspberrypiallusers
\raspberrypipowenko
Step 8: Install Cloud/Apache/php to setup share folder
Step 01 Install software
You’ll want Apache software and PHP for this. Install everything you need with:
$ sudo apt-get install apache2 php5 php5-json php5-gd php5-sqlite curl libcurl3 libcurl4-openssl-dev php5- curl php5-gd php5-cgi php-pear php5-dev build-essential libpcre3-dev libapache2-mod-php5 php-apc
Step 02 Setup PHP accelerator (optional: this step only works for php 5.4 or below)
Install your accelerator with $ sudo pecl install apc
But I’m getting this error: ^
make: *** [apc_cache.lo] Error 1
ERROR: `make’ failed
Remark: apc is no longer supported on PHP 5.5 and above. A quick search brought me to this;
http://grokbase.com/t/php/php-internals-win/145fj1qj14/compiling-memcache-and-apc-for-php-5-6, Which seems to confirm that it won’t work.
Then edit an ini file, use $sudo nano/etc/php5/cgi/conf.d/apc.ini and then add this to the file:
extension=apc.so
apc.enabled=1
apc.shm_size=30
Step 03 Configure file limits
Go into the Apache config file with $ sudo nano /etc/php5/apache2/php.ini. It’s a big file, but there are two filesize options you need to find, and a third extension option you need to add as below:
upload_max_filesize = 2048M
post_max_size = 2200M
extension = apc.so # optional
Step 04 Set up SSL
First of all, you need to enable SSL in Apache; do this by using sudo nano /etc/apache2/sites-enabled/000-default.conf and change ‘None’ to ‘All’ in the AllowOverride option. Follow this up with the following two commands:
$ sudo a2enmod rewrite
$ sudo a2enmod headers
Step 05 Finish up with Apache
You now need to do two sets of commands: a big one which requires some info and then a restart:
$ sudo openssl genrsa -des3 -out server.key 1024
$ sudo openssl rsa -in server.key -out server.key. insecure
$ sudo openssl req -new -key server.key -out server.csr
$ sudo openssl x509 -req -days 365 -in server.csr -signkey server.key -out server.crt
$ sudo cp server.crt /etc/ssl/certs;sudo cp server.key /etc/ssl/private;sudo a2enmod ssl
$ sudo a2ensite default-ssl
$ sudo service apache2 restart
Step 06 Download and install ownCloud
Here you have a series of commands to run that will download, unzip and install ownCloud to the right place:
$ wget https://download.owncloud.org/community/owncloud-7.0.0.tar.bz2
(option: find the latest update from https://owncloud.org/install/#instructions-server)
$ sudo tar -xjf owncloud-7.0.0.tar.bz2
$ sudo cp -r owncloud /var/www/html/
Step 07 ownCloud permissions
Make sure your hard drive is connected and mounted as you want it. First, give webserver permission to use ownCloud:
$ sudo chown -R www-data:www-data /var/www/html/owncloud/
Next, use sudo nano /var/www/owncloud/.htaccess and make the same changes you did in the php.ini file above.
php_value_upload_max_filesize 2000Mphp_value_post_max_size 2000Mphp_value_memory_limit 2000M
Finally, give permissions to the location you mounted the hard drive to with:
$ sudo chown -R www-data:www-data [mount]
Step 08 Set up ownCloud
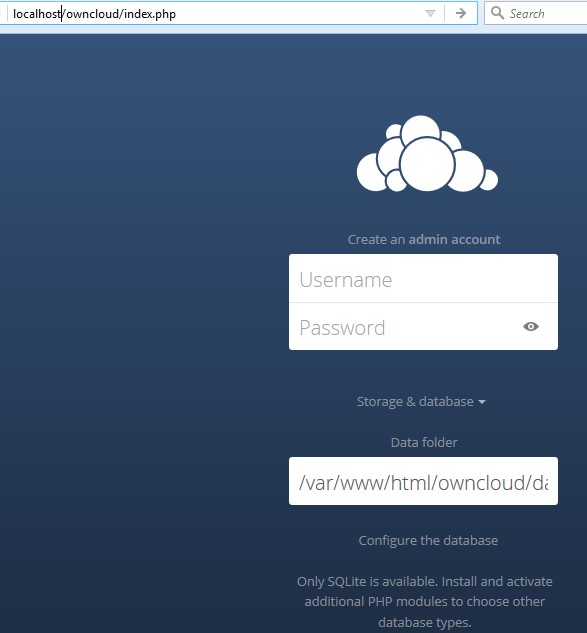
In your client computer web browsers, navigate to https://[ipaddress]/owncloud to begin the ownCloud setup process, as below diagram. The first thing you’ll need to do is change the data location to the mount point of your external drive, which can be found in the advanced options.

