
东莞市领导赴镇街督导安全生产大排查(25-29/6/2018)
因今年东莞市发生多起安全事故:
- 2018年4月12日11时许,高埗三联村一钢筋结构构筑物发生坍塌,造成1死1伤,4人被困。
- 2018年5月26日上午9时30分许,大岭山大沙村的东莞市华业鞋材有限公司发生一起有限空间气体中毒事故,造成4人死亡。
- 2018年5月26日晚上8时许,塘厦镇发生一起溺水事故,造成2人死亡。
- 2018年5月27日凌晨6时许,樟木头镇发生一起交通事故,造成2人死亡。
因此夏季安全形式严峻,东莞市领导会赴镇街督导安全生产大排查。
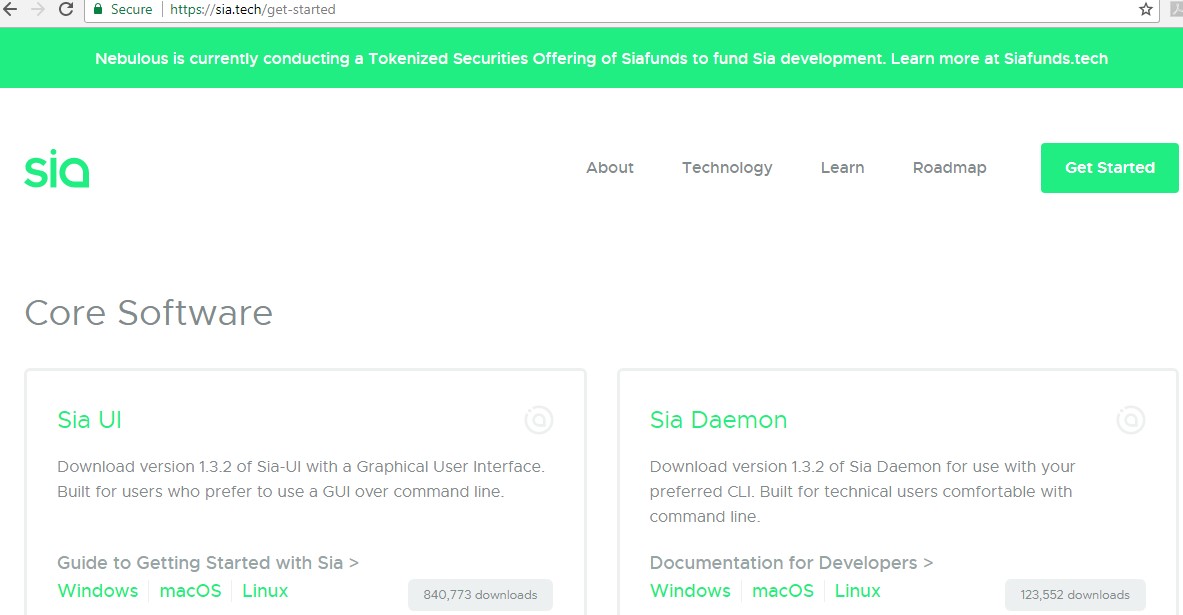
Setup of Ant Miner A3 Machine Mining with sia.tech pool
Step 1. Download sia program from https://sia.tech/get-started
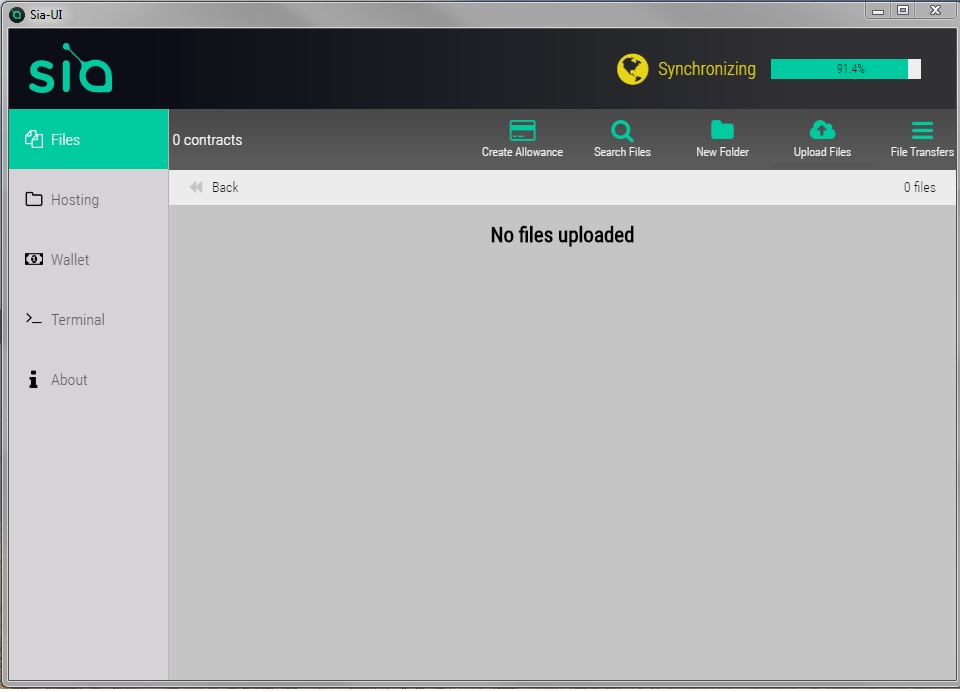
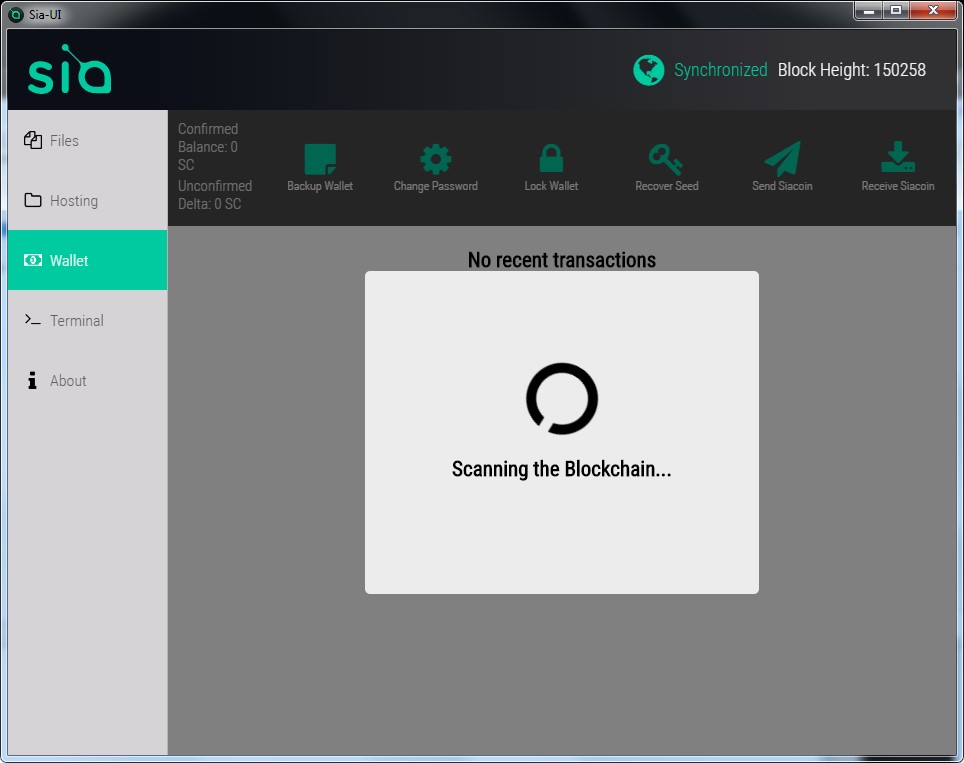
Step 2. Start the Sia-UI program, and wait for “synchronizing” done, which we may wait for one or two days, so you have better run it in a stable computer.
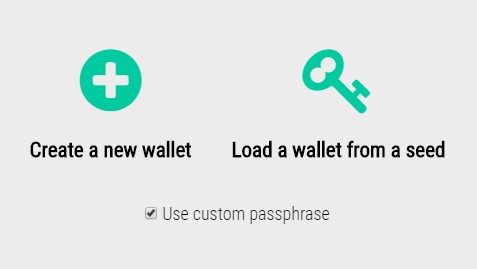
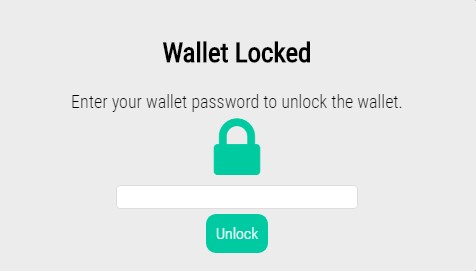
Step 3. Create a wallet, mark down the seek and passphrase, and unlock it.
Click on the Wallet tab on the left. You’ll see two options – “Create a new wallet” or “Load a wallet from a seed”. If this is your first time creating a wallet, you’ll select Create a new wallet. It is also recommended to check the box to Use custom passphrase first, and create a password for your wallet. If you don’t, your wallet password will be the same as your wallet seed, which is not ideal, especially if you plan on hosting.
The wallet will say it’s scanning the blockchain, which may take several minutes. Wait for it to complete, or go grab a snack.
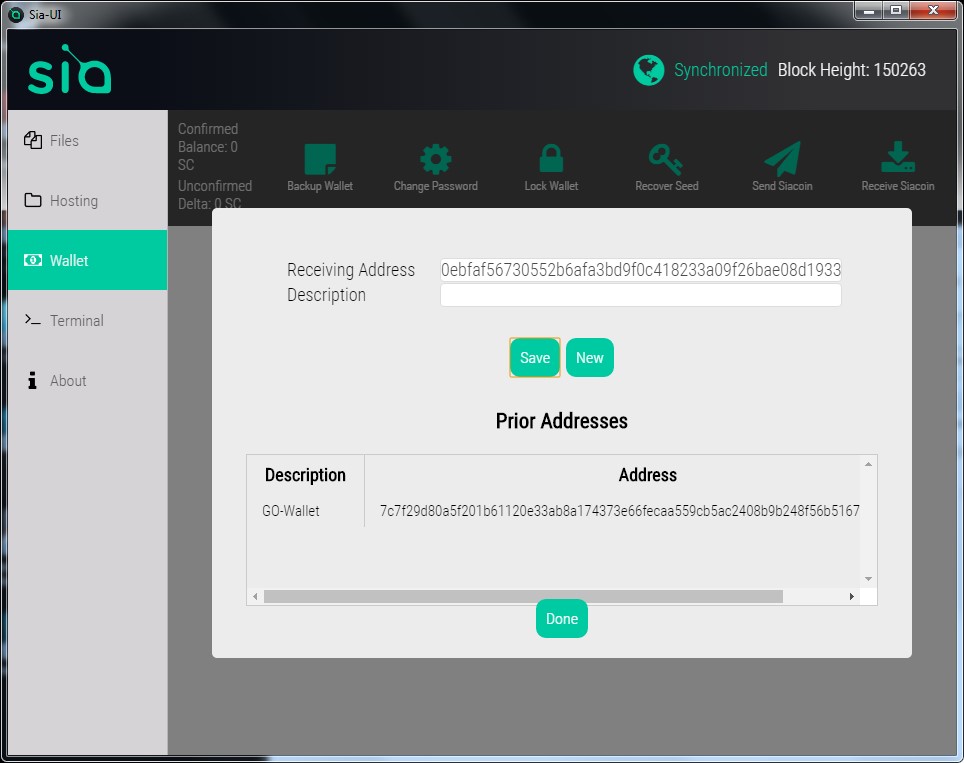
Step 4. Create a wallet address
A receiving address will be automatically generated for you in the top box, and you can give it a name in the bottom box if you want. Click Save to add it to the list of “Prior Addresses”. You can create as many addresses as you want, and they’ll all point to your wallet. Sia makes a new wallet address by default every time you click “Receive Siacoin” in order to help protect your privacy, but you can use any of your previous addresses at any time and they’ll still work.
Step 5. Backup your sia wallet
There is no option to backup the wallet in the sia-ui software! But you can backup the files by yourself!The files location is configured in the config.json file. The config.json is located in “Sia-UI-v1.2.0-win32-x64resourcesapp” folder. Open the file with text editor,you can see the “datadir” item.This item describe the backup files location! in the default the files location is in the C:userusernameAppDataRoamingSia-UI! Please do not go at manually backing up files from the Sia-UI folder as these are not guarenteed to work if placed back in a newer version of Sia-UI, above method is documented and always will work.
All you need to recover your wallet is to write down on a physical paper your seed, which is the same as your wallet password.
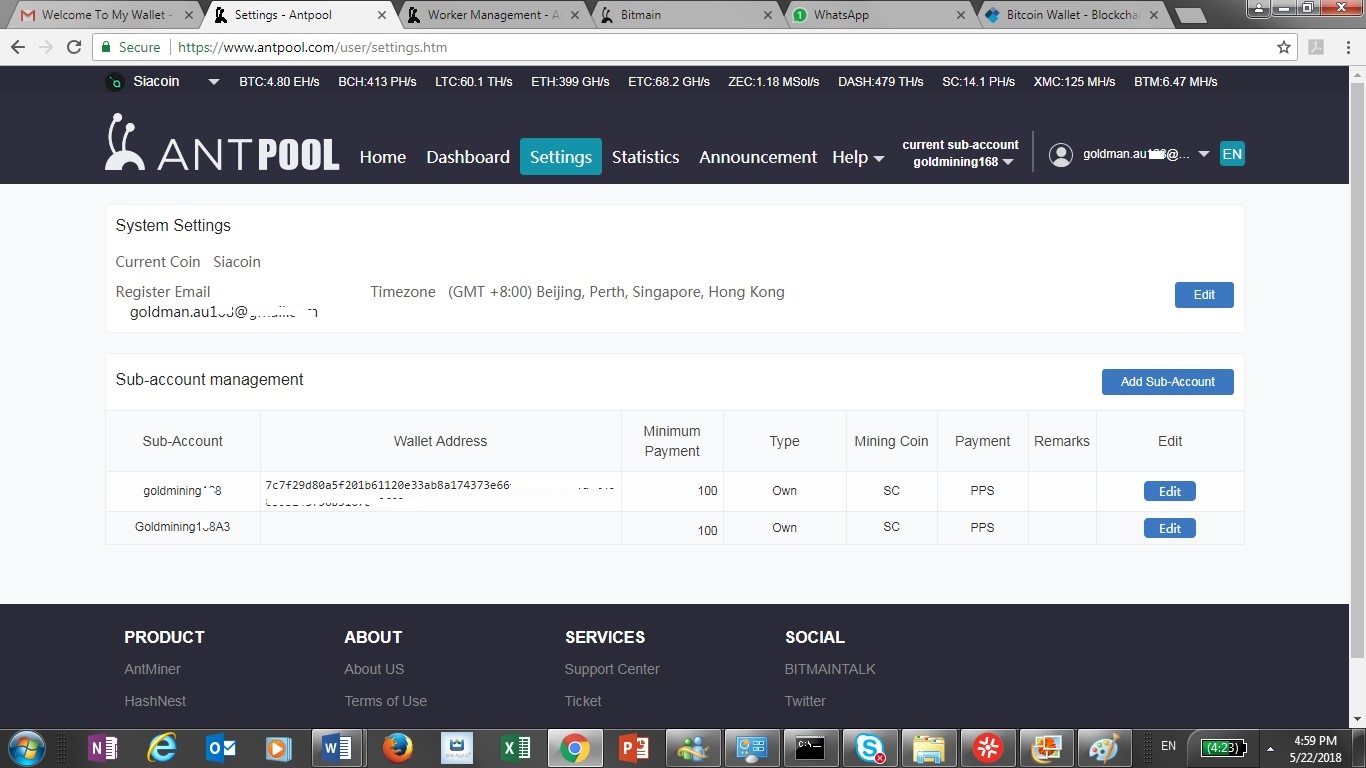
Step 6. Register account from antpool.com, and then select siacoin in the top right hand corner.
And then create account, sub-account, and worker as below:
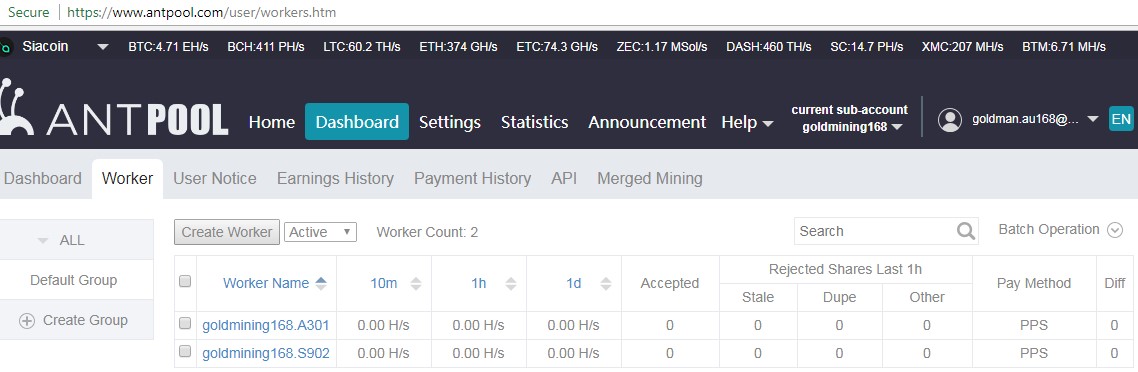
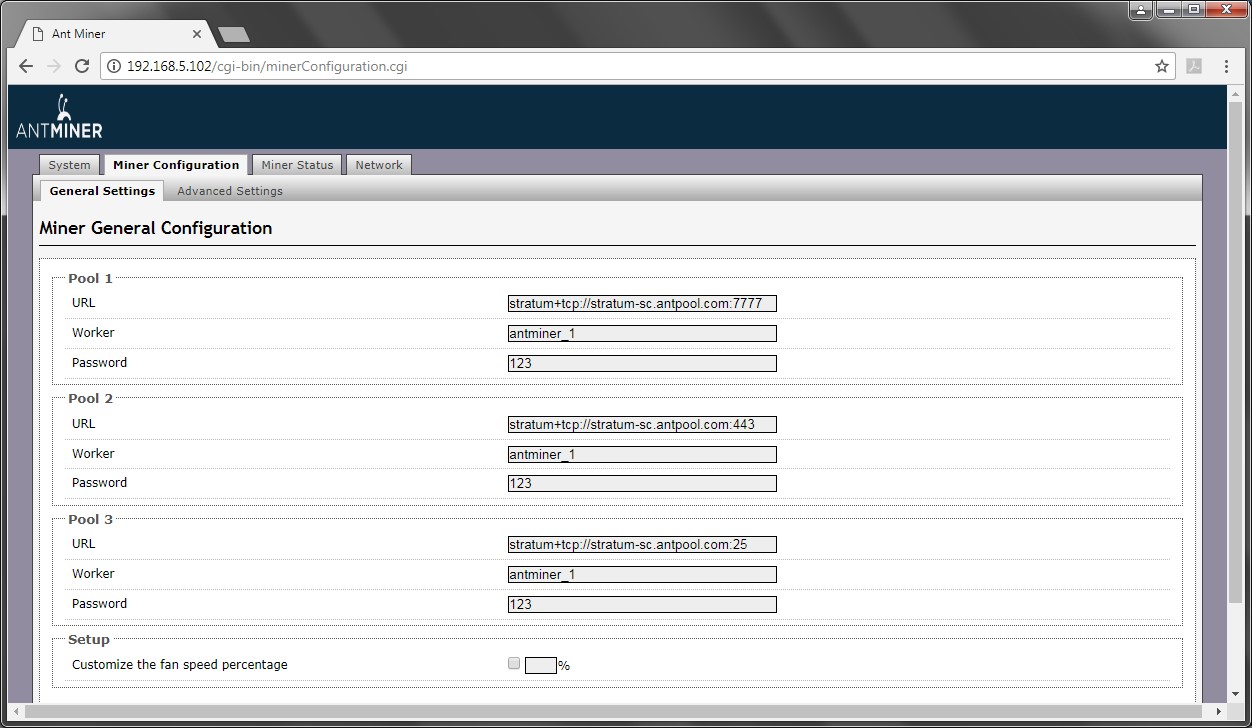
Step 7. Setup in mining machine as below:
Change from original default setting below:
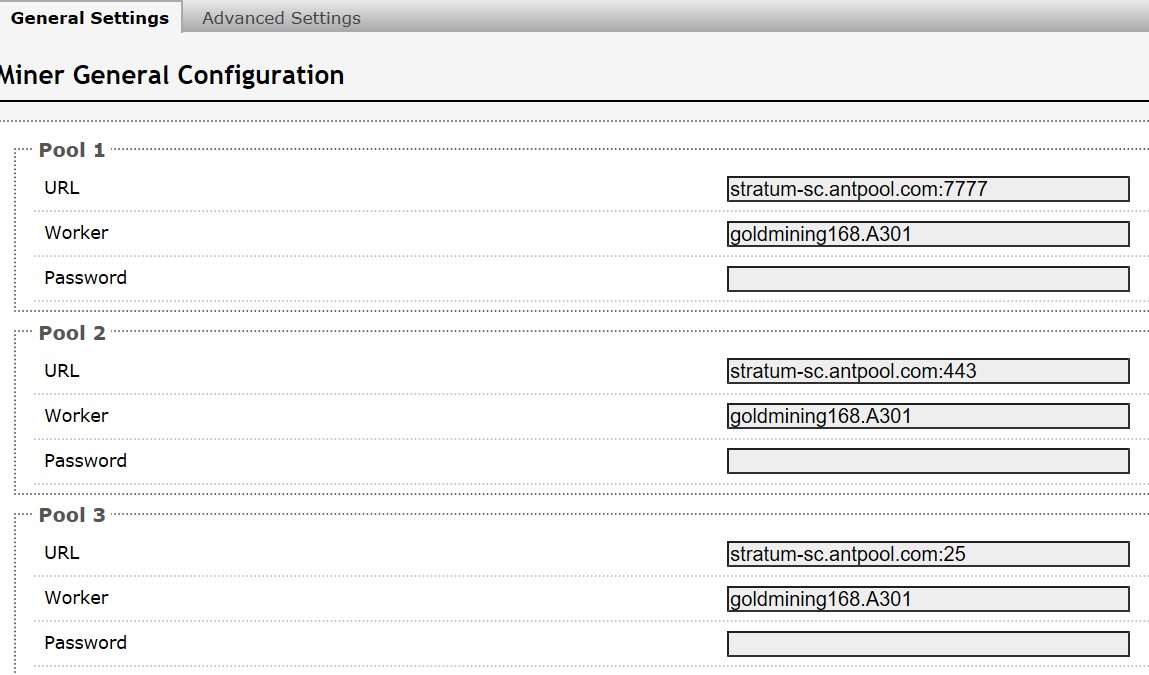
To:
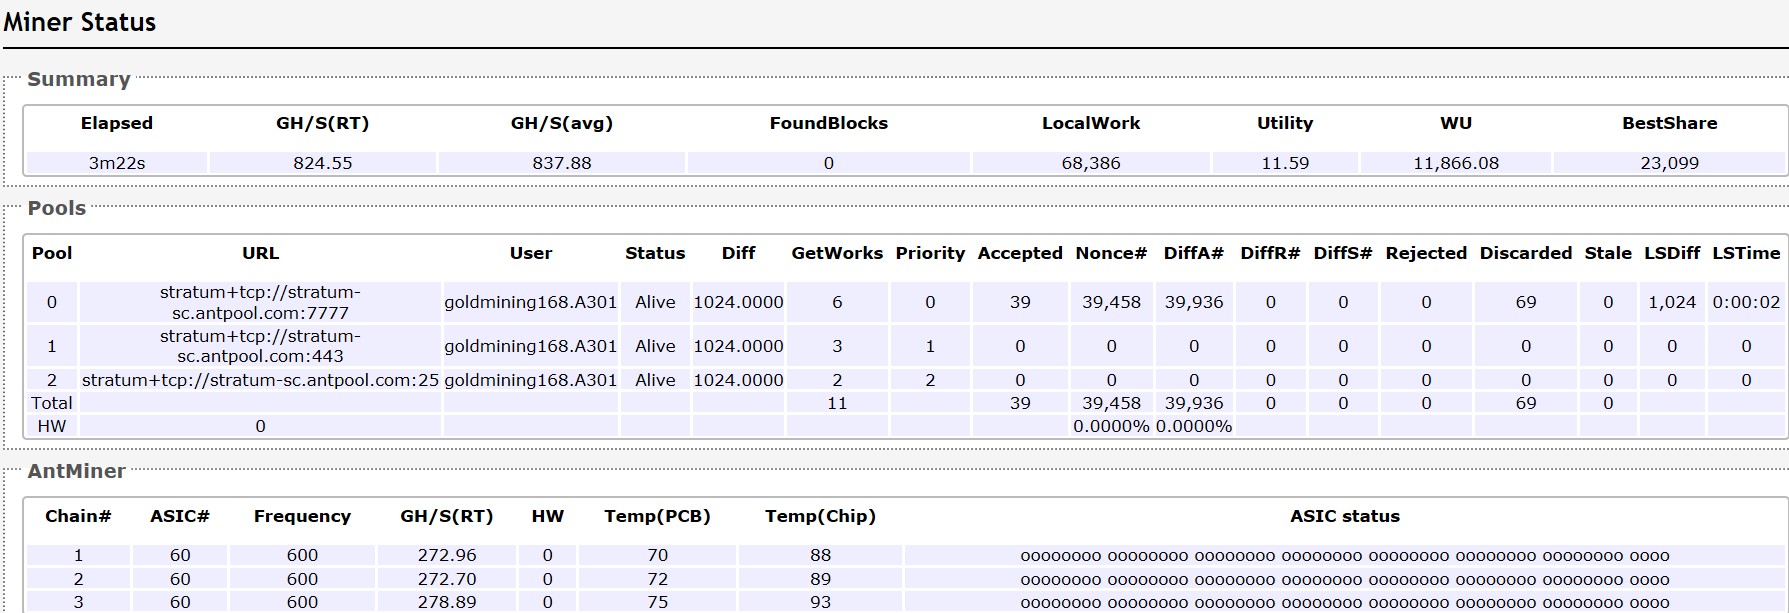
Step 8: Once you’ve started mining, you can check your stats from miner status as below example:
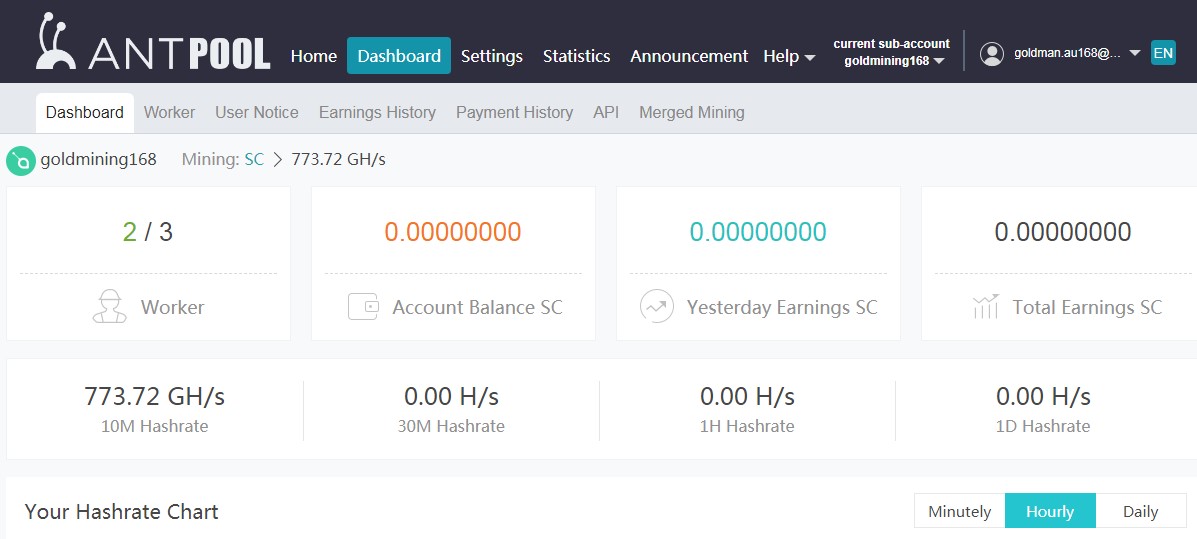
Step 9. My earning monitor screen from antpool as below:
How to Fix The procedure entry point ucrtbase.terminate is missing or could not be located
Error The procedure entry point ucrtbase.terminate could not be located in the dynamic link library api-ms-win-crt-runtime-l1-1-0.dll or The program can’t start because api-ms-win-crt-runtime-l1-1-0.dll is missing from your computer. Try reinstalling the program to fix this problem. is usually caused by corrupt or outdated Visual C++ Redist where another program has overwritten the libraries, or the program you are trying to run requires a newer version of the Visual C++. The latest one is 2017. The second most common for this issue to occur is when Windows Updates are outdated or the KB2999226 (Universal CRT) has failed. You cannot install Microsoft Visual C++ 2015 redist (runtime) unless you have Windows Update KB2999226 installed (at least on Windows 7 64-bit SP1).

Method 1: Repair Corrupt System Files
Download and run Reimage Plus to scan and restore corrupt and missing files from here, and then see if the issue is fixed if not then try the other methods listed below.
Method 2: Check for and Install Windows Updates
On Windows 10
- Click Start
- Choose Settings
- Choose Update and Security
- Choose Windows Updates
- Click Check for Updates
- If there are updates, you’ll see a message telling you that important or optional updates are available, or telling you to review important or optional updates, click the message to view the updates to install.
- In the list, enable the checkboxes for the updates Important or Optional, and then click Install.

On Windows 7
- Click Start
- Type Updates
- Choose Windows Updates
- Choose Check for Updates
- Install the Updates, and Reboot the PC.
The one we are looking for through Windows Update is the Universal CRT Update KB2999226 which can also be downloaded and installed as a stand alone package from (here).
For Windows 7 Only:
If the issue is still not resolved on Windows 7 after running the updates and install the KB2999226 manually, then follow these steps:
PRO TIP: If the issue is with your computer or a laptop/notebook you should try using the Reimage Plus Software which can scan the repositories and replace corrupt and missing files. This works in most cases, where the issue is originated due to a system corruption. You can download Reimage Plus by Clicking Here
- Hold the Windows Key and Press R. In the Run Dialog, type cmd and Click OK.
- In the command prompt window, type net stop wuauserv
- Then type ren c:windowsSoftwareDistributionWuRedir WuRedir1
![]()
Then run the Windows Update again, reboot multiple times and check to make sure that all the updates are installed.
The procedure entry point ucrtbase.terminate could not be located in the dynamic link library api-ms-win-crt-runtime-l1-1-0.dll
Modified on: Fri, 23 Jun, 2017 at 11:18 AM
When opening EasyWorship the following error appears “the procedure entry point ucrtbase.terminate could not be located in the dynamic link library api-ms-win-crt-runtime-l1-1-0.dll”.
This is a problem with a Windows library that is missing or corrupted. In many cases this can be fixed by installing the “Update for Universal C Runtime in Windows“.
Convert between xls and xlsx by python and compile python
1. To convert xls to xlsx:
$ pip install pyexcel pyexcel-xls pyexcel-xlsxRun Python Script as:
import pyexcel as p

p.save_book_as(file_name='your-file-in.xls',
               dest_file_name='your-new-file-out.xlsx')
If you do not need a program, you could install one additinal package pyexcel-cli::
$ pip install pyexcel-cli
$ pyexcel transcode your-file-in.xls your-new-file-out.xlsx
The transcoding procedure above uses xlrd and openpyxl.
2. To convert between xlsx and xls vice and versa:
import win32com.client as win32
fname = "full+path+to+xls_file"
excel = win32.gencache.EnsureDispatch('Excel.Application')
wb = excel.Workbooks.Open(fname)

wb.SaveAs(fname+"x", FileFormat = 51)    #FileFormat = 51 is for .xlsx extension
wb.Close()                               #FileFormat = 56 is for .xls extension
excel.Application.Quit()
3. Compile via py2exe
3.1. Create your setup script (setup.py)
py2exe extends Distutils with a new “command”. If you’ve installed third party Python modules then there’s a good chance you’ve seen at least one distutils command:
C:Tutorial>python setup.py install
“install” is a Distutils command that installs something (typically a Python module or package). The details Distutils needs to do that installation are contained in setup.py (and sometimes other associated files).
“py2exe” is a new Distutils command that is added when you import py2exe. To use py2exe you need to create a setup.py file to tell Distutils and py2exe what you want to do. Here’s a setup.py whose simplicity is appropriate for our sample program…
3.2. Run your setup script
The next step is to run your setup script. Make sure to give the py2exe command and expect to see lots and lots of output:
C:Tutorial>python setup.py py2exe
3.3. Test your executable
Now that the package has been created it is ready to test:
C:Tutorial>cd dist

C:Tutorialdist>hello.exe
Hello World
4. Compile via pyinstaller
[Anaconda3] C:Usersgoldmanau>pip install pyinstaller

[Anaconda3] C:Usersgoldmanau>pyinstaller --version
3.3.1

[Anaconda3] C:Usersgoldmanau>pyinstaller --onefile conv.py
418 INFO: PyInstaller: 3.3.1
418 INFO: Python: 3.5.1
418 INFO: Platform: Windows-7-6.1.7601-SP1
420 INFO: wrote C:Usersgoldmanauconv.spec
424 INFO: UPX is not available.
428 INFO: Extending PYTHONPATH with paths
['C:\Users\goldmanau', 'C:\Users\goldmanau']
428 INFO: checking Analysis
429 INFO: Building Analysis because out00-Analysis.toc is non existent
429 INFO: Initializing module dependency graph...
434 INFO: Initializing module graph hooks...
438 INFO: Analyzing base_library.zip ...
12259 INFO: running Analysis out00-Analysis.toc
14333 INFO: Caching module hooks...
14347 INFO: Analyzing C:Usersgoldmanauconv.py
14350 INFO: Processing pre-safe import module hook win32com
15341 INFO: Loading module hooks...
15342 INFO: Loading module hook "hook-pydoc.py"...
15343 INFO: Loading module hook "hook-pythoncom.py"...
15913 INFO: Loading module hook "hook-pywintypes.py"...
16460 INFO: Loading module hook "hook-win32com.py"...
16770 INFO: Loading module hook "hook-encodings.py"...
16970 INFO: Loading module hook "hook-xml.py"...
17803 INFO: Looking for ctypes DLLs
17879 INFO: Analyzing run-time hooks ...
17884 INFO: Including run-time hook 'pyi_rth_win32comgenpy.py'
17897 INFO: Looking for dynamic libraries
19407 INFO: Looking for eggs
19407 INFO: Using Python library c:usersgoldmanauappdatalocalcontinuumanac
onda3python35.dll
19408 INFO: Found binding redirects:
[]
19415 INFO: Warnings written to C:Usersgoldmanaubuildconvwarnconv.txt
19520 INFO: Graph cross-reference written to C:Usersgoldmanaubuildconvxref-
conv.html
19587 INFO: checking PYZ
19587 INFO: Building PYZ because out00-PYZ.toc is non existent
19588 INFO: Building PYZ (ZlibArchive) C:Usersgoldmanaubuildconvout00-PYZ.p
yz
21378 INFO: Building PYZ (ZlibArchive) C:Usersgoldmanaubuildconvout00-PYZ.p
yz completed successfully.
21402 INFO: checking PKG
21403 INFO: Building PKG because out00-PKG.toc is non existent
21404 INFO: Building PKG (CArchive) out00-PKG.pkg
21752 INFO: Updating manifest in C:UsersgoldmanauAppDataRoamingpyinstaller
bincache00_py35_64bitpython35.dll
21753 INFO: Updating resource type 24 name 2 language 1033
27241 INFO: Building PKG (CArchive) out00-PKG.pkg completed successfully.
27253 INFO: Bootloader c:usersgoldmanauappdatalocalcontinuumanaconda3lib
site-packagesPyInstallerbootloaderWindows-64bitrun.exe
27254 INFO: checking EXE
27255 INFO: Building EXE because out00-EXE.toc is non existent
27256 INFO: Building EXE from out00-EXE.toc
27258 INFO: Appending archive to EXE C:Usersgoldmanaudistconv.exe
27345 INFO: Building EXE from out00-EXE.toc completed successfully.

Compile program in    C:Usersgoldmanaudistconv.exe
Custom TinyWebDB Service
Creating a Custom TinyWebDB Service
TinyWebDB is an App Inventor component that allows you to store data persistently in a database on the web. Because the data is stored on the web instead of a particular phone, TinyWebDB can be used to facilitate communication between phones and apps (e.g., multi-player games).
By default, the TinyWebDB component stores data on a test service provided by App Inventor, http://appinvtinywebdb.appspot.com/ . This service is helpful for testing, but it is shared by all App Inventor users, and it has a limit of 1000 entries. If you use it, your data will be overwritten eventually.
For most apps you write, you’ll want to create a custom web service that isn’t shared with other App Inventor apps and programmers. You need not be a programmer to do so– just follow the instructions below and you’ll have your own service within minutes.
To create your own web service, follow these instructions:
- Download App Engine for Python at http://code.google.com/appengine/ . After installing it, run the GoogleAppEngineLauncher by clicking its icon.
- Download this sample code. It is a zip file containing the source code for your custom tinywebdb web service
- This code is setup to run with App Engine using Python 2.7, so you’ll need Python 2.7 on your computer. To check your version of Python, open up your Terminal and type in python. If you don’t have the right version, you can download it from here
- To make sure that App Engine is configured to use it, in App Engine Launcher, choose Preferences and then put in path to Python2.7 (On a Mac, this might be something like /usr/local/bin/python2.7 )
- Unzip the downloaded zip file. It will create a folder named customtinywebdb. You can rename it if you want.
- In the GoogleAppEngineLauncher, choose File | Add Existing Application. Browse to set the Path to the customtinywebdb folder you just unzipped. Then click the Run button. This will launch a test web service that runs on your local machine.
- You can test the service by opening a browser and entering “localhost:8080” as the URL. (NOTE: if you’ve already created a web service, the port number (8080) may be different the second time, check the table in Google App Engine Launcher to see what Port number you should use).
- You’ll see the web page interface to your web service. The end-goal of this service is to communicate with a mobile app created with App Inventor. But the service provides a web page interface to the service to help programmers with debugging. You can invoke the get and store operations by hand, view the existing entries, and also delete individual entries. NOTE: If you are having problems creating a web page, click the Logs on the App Engine screen to diagnose the error.
Congrats, you’ve now made a webpage for your app. But your app is not yet on the web, and thus not yet accessible to an App Inventor app. To get it there, you need to upload it to Google’s App Engine servers.
- In the GoogleAppEngineLauncher, choose Dashboard. Enter your Google account information and you’ll be taken to an App Engine dashboard.
- Choose Create an Application. You’ll need to specify a globally unique Application Identifier. Remember the Application identifier as you’ll need it later. Provide a name to your app and click Create Application to submit. If your Identifier was unique, you now have a new, empty app on Google’s servers.
- Open a text editor on your local computer and open the file app.yaml within the customtinywebdb folder you unzipped. Modify the first line so that the application matches the application identifier you set at Google.
- In GoogleAppEngineLauncher, choose Deploy and follow the steps for deploying your app.
- Test to see if your app is running on the web. In a browser, enter myapp.appspot.com, only substitute your application identifier for myapp. The app should look the same as when you ran it on the local test server. Only now, it’s on the web and you can access it from your App Inventor for Android app.
Your App Inventor apps can store and retrieve data using your new service. Just do the following:
- Drag in a TinyWebDB component into the Component Designer.
- Modify the ServiceURL property from the default http://appinvtinywebdb.appspot.com/ to your web service.
- Any StoreValue operations (blocks) will store data at your service, and any GetValue operations will retrieve from your service.
Information source: 1) http://appinventor.mit.edu/explore/content/custom-tinywebdb-service.html
2) https://cloud.google.com/appengine/docs/standard/python/download?hl=zh-CN
东莞实施“明厨亮灶”
东莞实施“明厨亮灶”的餐饮单位数达11899家
Source: http://www.o769.cn/baixing/Info.asp?ID=7129
民以食为天,食品安全问题总是牵动大众的神经。记者7日从东莞市食药监局获悉,目前越来越多餐饮服务单位主动把后厨“亮”给市民看,全市实施“明厨亮灶”的餐饮单位数已达11899家,覆盖全市餐饮单位逾三分之一。
“明厨亮灶”分六种类别
不少餐馆的后厨门口都贴着“厨房重地,闲人免进”的提示,厨房的卫生状况和食品加工过程并不透明。“谁知道后厨到底卫不卫生呢?所以有时外出吃饭难免会提心吊胆。”很多市民担心。
“为了创新监管模式,强化餐饮服务单位的责任意识,早在2013年,我局就在部分中小学校、幼儿园食堂等餐饮单位率先试点开展‘明厨亮灶’工作。”据市食药监局相关负责人介绍,“明厨亮灶”就是将餐饮服务单位的操作间、凉菜间、洗消间等食品加工制作的关键部位和原料清洗、切配、烹饪、餐具洗消、凉菜加工等重要环节,通过透明玻璃窗(或玻璃幕墙)、电子显示屏、隔断矮墙等方式展示给消费者,实现阳光操作、透明化管理。
据了解,广东省去年也已出台了“明厨亮灶”规范指引——按照新修订的《广东省食品安全条例》第三十二条有关规定,将餐饮“明厨亮灶”建设分为透明式、开放式、视频监控式、参观通道式、组合式、其他形式等六种类别,并结合建设“餐饮服务食品安全信息公示栏”,向消费者展示食品加工制作关键过程,接受消费者监督。
用餐不再“眼不见为净”
昨日中午,记者走进厚街万达广场发现,作为厚街食品安全示范创建对象,这里已经实现“明厨亮灶”工程全覆盖。45家餐饮服务企业,均通过视频监控或透明式厨房等方式,让用餐顾客能看到厨房内部的操作。放眼望去,很多家餐厅在门口挂出了他们的监控电视,上面播放着厨房的实时画面。
记者在一家顺德菜餐厅看到,门口的监控电视中,两个画面对准了原料清洗和切配区域,另有两个画面显示着角落与地面的状况,看起来都比较整洁。餐厅里面还有一个监控电视,这样一来,顾客在选择餐厅前和用餐过程中,都能看到厨房内部的实时情况。
带着全家老小一同用餐的顾女士说:“以前外出吃饭都看不到这些后台操作,‘眼不见为净’。现在食客能直观地看到后面的卫生状况,的确会更放心,但是我们只能看到后厨的卫生情况和厨师的操作过程,食物的用料和材质看不到,希望接下来餐饮单位能公示原材料和辅料来源。”
“食药监部门已经叫我们去开过会,对此事我既支持又担心。”南城一家餐馆的负责人认为,一是会增加企业成本,二是担心泄露一些大厨的炒菜秘方,让竞争对手钻了空子。“如果同行都‘明厨亮灶’,而我们不这样做,那竞争力就弱了很多。所以现在正在考虑,究竟要怎么改。”
学校食堂过半“明厨亮灶”
据市食药监局相关负责人透露,东莞将坚持按照“企业自愿、行业自发、政府引导、主动参与、因地制宜”的工作思路,确定一些新开办基础设施好的餐饮单位、学校食堂、大型以上餐馆及其他高风险类餐饮服务单位作为“明厨亮灶”建设的重点,以点带面,逐步推行,力争用三年时间基本完成全市餐饮服务单位“明厨亮灶”工作目标。
“目前全市已经实施‘明厨亮灶’的餐饮单位数达11899家,其中学校食堂达927家,占学校食堂总数一半以上。”该负责人表示,东莞会严把许可准入,对新开办餐饮服务单位,引导按“明厨亮灶”工程的要求指导建设;对所有餐饮服务单位换发证时,强调“明厨亮灶”作为必要条件重新进行现场核查,建成开放式厨房、使用透明玻璃隔断、采用视频传输等技术。
东莞实施“明厨亮灶”的方案:
“明厨亮灶”实施方案一是用玻璃隔断展现,实现透明厨房 通过玻璃窗口消费者可以看到餐厅后厨师傅做菜的烹饪过程!这也是明厨亮灶最早的展现方式!同时跟据食品安全信息公示牌让监控管理人员和食客及时了解到食品的采购信息。
“明厨亮灶”实施方案二是通过后厨安装高清远程监控摄像设备实时直播将厨房生态——食材选择、烹饪加工、剩菜处理、餐具消毒等所有环节,以及厨房卫生情况、厨师仪表穿着等,一一呈现给食客,保障其知情权与监督权,让他们吃得更放心、吃得更安全。
“明厨亮灶”实施方案三是通过后厨安装高清远程监控摄像设备实时直播将厨房生态——食材选择、烹饪加工、剩菜处理、餐具消毒等所有环节,以及厨房卫生情况、厨师仪表穿着等,一一呈现给食客,保障其知情权与监督权,让他们吃得更放心、吃得更安全。
“明厨亮灶”实施方案四是实现了第三的所有功能还增加了从食品食材种植环境,食材储存、厨房环境、配菜烹调加工等过程就实现了全程透明化,实时性、公开性、透明性的阳光透明厨房,让消费者更放心!
How to start mining via Antpool & BTC.com
information source: https://support.bitmain.com/hc/en-us/articles/115000211774-Connect-Antminer-S9-T9-S7-to-Pools-Antpool-BTC-com
Connect Antminer S9/T9/S7 to Pools – Antpool/BTC.com
Connect to Antpool
1.Login:https://www.antpool.com/
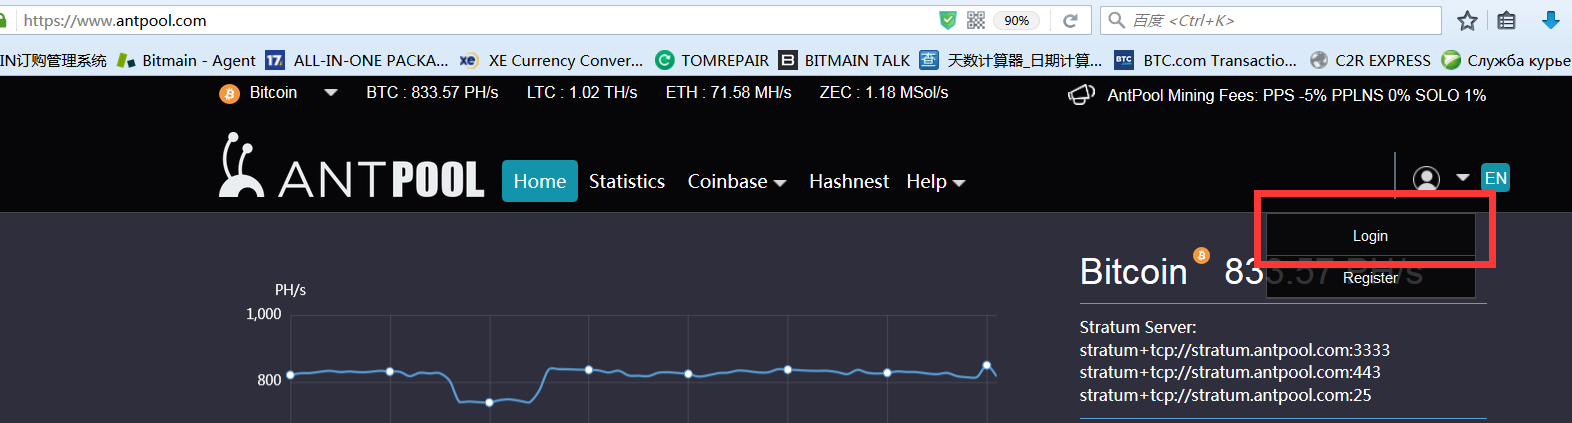
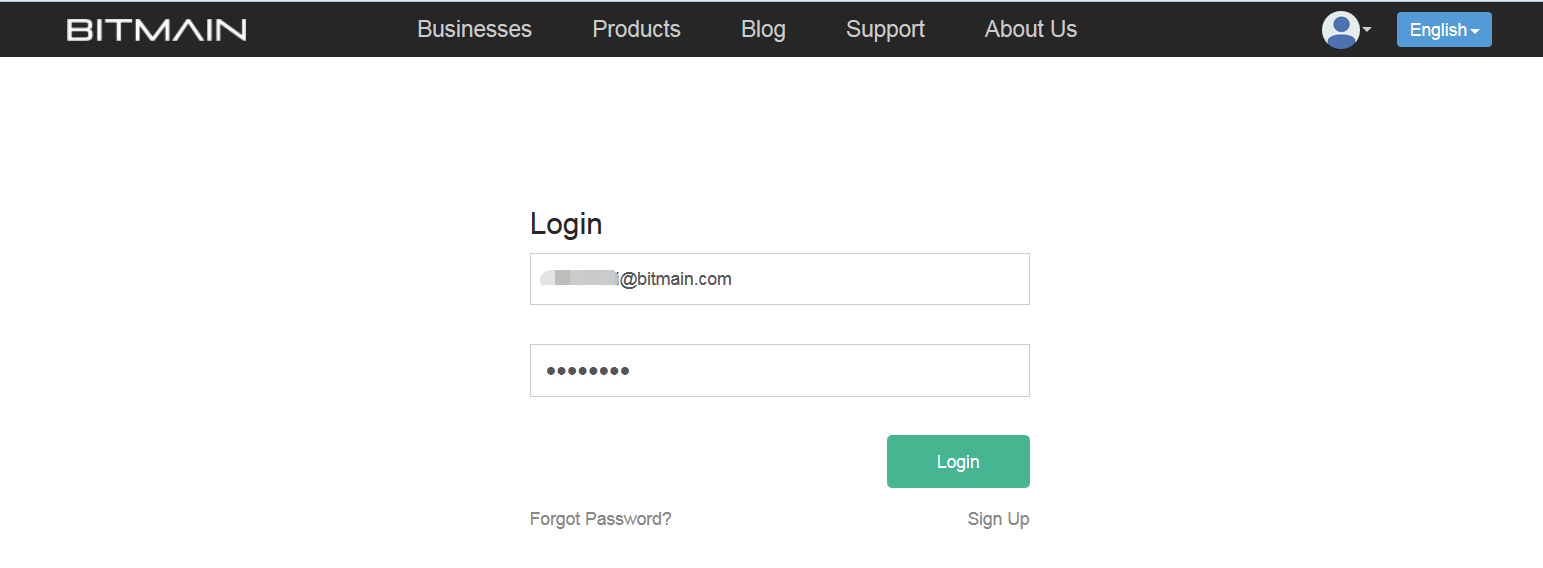
2. Enter your User ID and password for Bitmain.com to log into Antpool or register a new account.
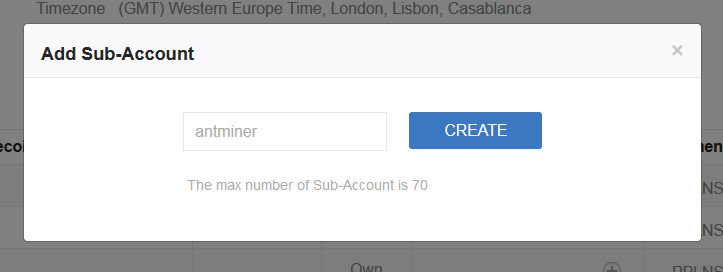
3. Click the “Bitcoin”at the upper left of the page. Go to the Settings tab and add a Sub-Account via the button on the right.
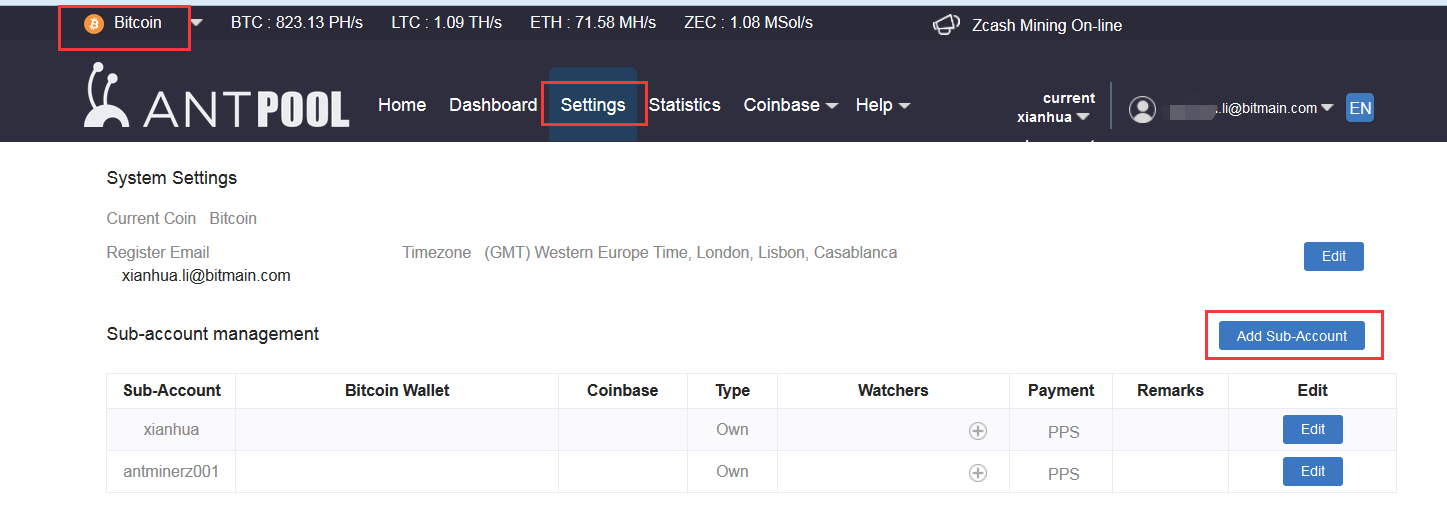
Sub-account must contain only the letters or numbers
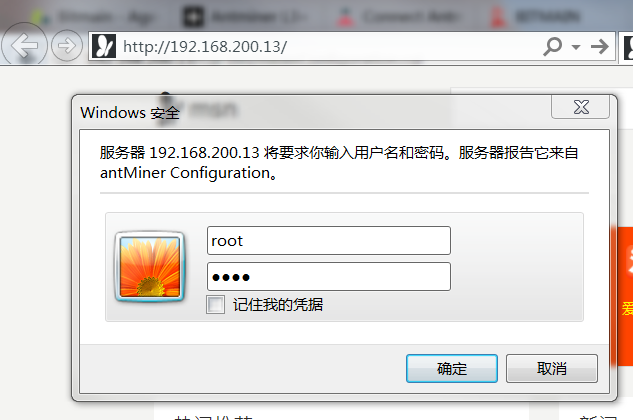
4. Enter the default IP address of the ANTMINER – Go to the login page, enter the user ID: root, password: root.
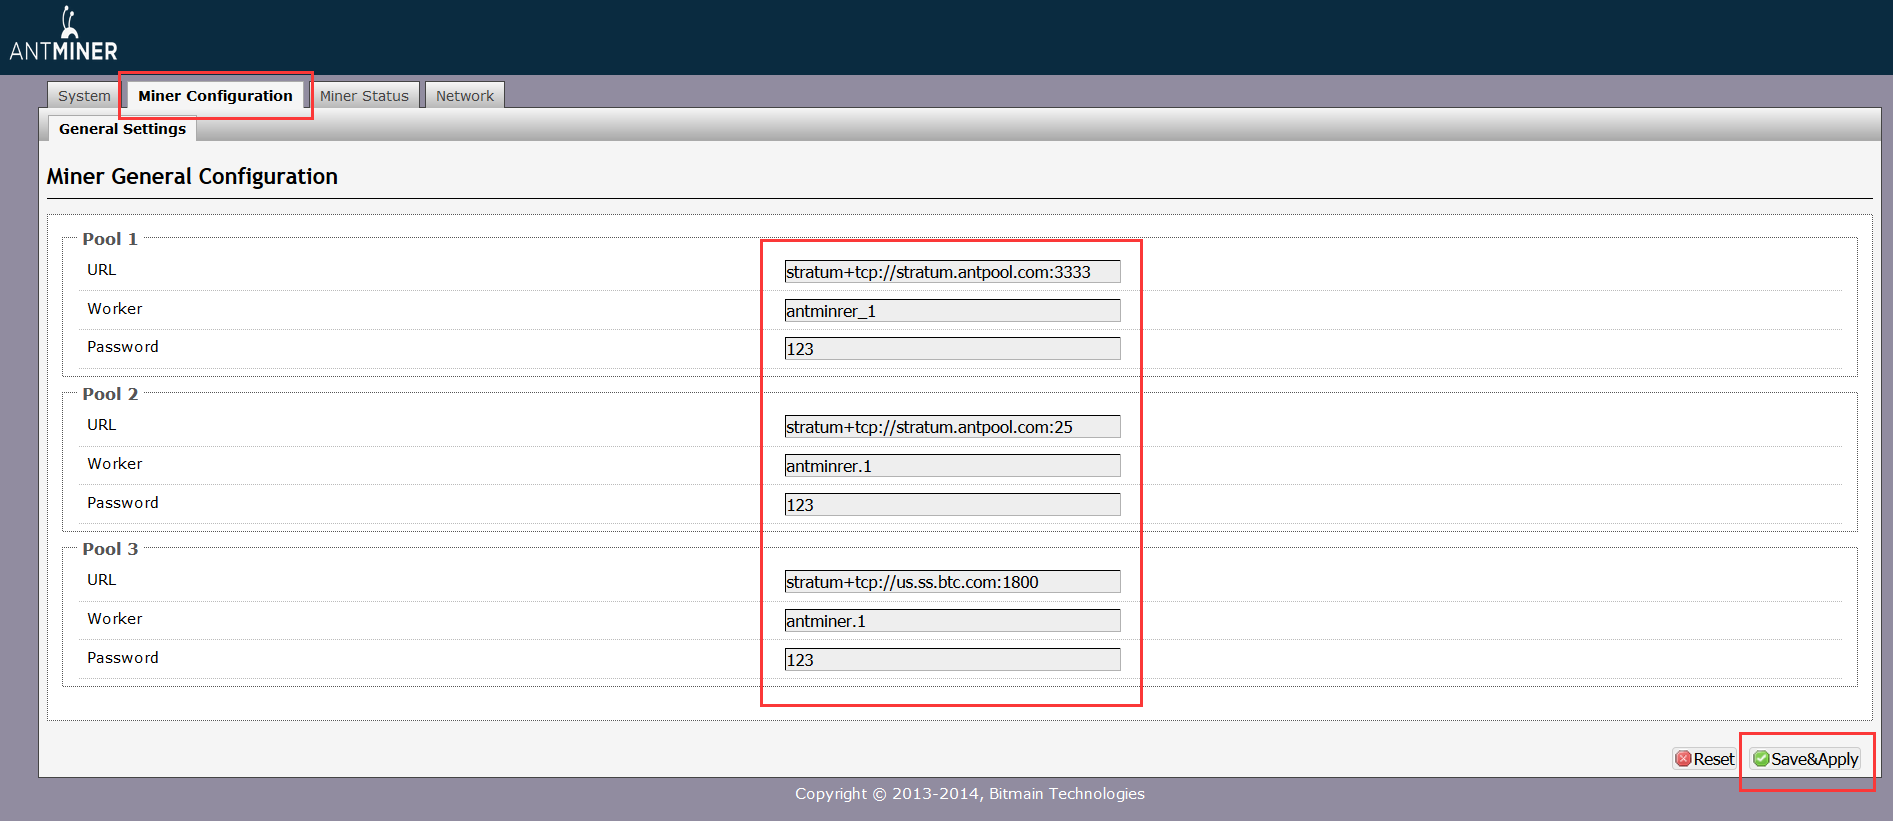
5. Click Miner Configuration, you can fill in 3 groups of mining pool. If the first group is dead, then, it will automatically pointed to the second group. You could fill first 2 groups with Antpool, the third one with BTC.com.
Below is the configuration of Antpool:
stratum+tcp://stratum.antpool.com:3333
stratum+tcp://stratum.antpool.com:443
stratum+tcp://stratum.antpool.com:25
Worker Format: sub-account.miner name
Example: If your sub-account is “antminer”, then your miners could be set up as antminer.1, antminer_1, antminer.2, etc. The miner order will be sorted by the miner name.
Password: (Blank). if you change addresses in bulk, fill it as 123.
Click Save & Apply to mine, the miners will be restart.
Connect to BTC.com
Account Registration
1. Login the home page: https://pool.btc.com
2. Click the “Sign Up Now ” button:

3. Complete the informtaion required and create a new account:

Sub-Account Configuration
1. Click the user name on the top right and choose create sub-account:

2. Fill the blanks and complete creating sub-account:

Miner Configuration
1. Node Selection
There is network delay when users connecting miners to different nodes in different area. Selecting the nearest nodes can provide the most stable connection.
North China Mining Address
    stratum+tcp://cn.ss.btc.com:1800
    stratum+tcp://cn.ss.btc.com:443
    stratum+tcp://cn.ss.btc.com:25
South China Mining Address
    stratum+tcp://us.ss.btc.com:1800
    stratum+tcp://us.ss.btc.com:443
    stratum+tcp://us.ss.btc.com:25
America Mining Address
    stratum+tcp://us.ss.btc.com:1800
    stratum+tcp://us.ss.btc.com:443
    stratum+tcp://us.ss.btc.com:25
Europe Mining Address
    stratum+tcp://us.ss.btc.com:1800
    stratum+tcp://us.ss.btc.com:443
    stratum+tcp://us.ss.btc.com:25
2. Miner Setting
Format: sub-account.miner name
Example: If your sub-account is “btcminer”, then your miners could be set up as btcminer.001, btcminer.002, etc. The miner order will be sorted by the miner name. Password: (Blank). if you change addresses in bulk, fill it as 123.
3. Miner Conection Setting
Type the IP address of miners into the address bar with a web browser under the local area network. The default account is: username ‘root’, password ‘root’.

Sub-Account Management
1. After signing up on BTC pool, uses can establish multiple sub-accounts for different needs.
Click the current sub-account on top right corner:

2. Users can edit every sub-account on this page, such as modifying address and setting alert:

Information Modification
Click “settings” button on top right of the website, you can modify your account and address as follows:

Payment Confirmation
Payment Time
BTC Pool settles all the earnings of last day at UTC 00:00 and sends the payment in 2 hours.
Confirmation Time
The confirmation of TX takes time on Bitcoin Network. The time could be 1 minute or up to 2 hours, which depends on the network status. BTC Pool promises that users receive the payment in the shortest time.
Quality Management Concept – Quality vs Grade & Accuracy vs Precision
Difference between Quality and Grade
Quality and grade is difference. Quality as a delivered performance or result is “the degree to which a set of inherent characteristics fulfill requirements” (ISO 9000). Grade as a design intent is a category assigned to deliverables having the same functional use but different technical characteristics. While a quality level that fails to meet quality requirements is always a problem, a low grade of quality may not be a problem. For example:
- It may not be a problem if a suitable low-grade software product (one which a limited number of features) is a high quality (no obvious defects, readable manual). In this example, the product would be appropriate for its general purpose of use.
- It may be a problem if a high-grade software product (one which numerous features) is of low quality (many defects, poorly organized user documentation). In essence, its high-grade feature set would prove ineffective and/or inefficient due to its low quality.
Difference between Accuracy and Precision
The project management team should determine the appropriate levels of accuracy and precision for use in the quality management plan. Precision is a measure of exactness. Accuracy is an assessment of correctness. For example, if the measured value of an item is very close to the true value of the characteristic being meansured. the measurement is more accurate. An illustration of this concept is the comparison of archery targets. Arrows clustered tightly in one area of the target, even if they are not clustered in the bull’s eye, are considered to have high precision. Targets where the arrows are more spread out but equidistant from the bull’s eye are considered to have the same degree of accuracy. Targets were the arrows are both tightly grouped and within the bull’s eye are considered to be both accurate and precise. Precise measurements are not necessary accurate measurements, are accurate measurements are not necessarily precise measurements.
Excel CMS plugin demonstration
Example of using a free-of-charge “Excel CMS” plugin to display an excel file in wordpress as below. If you want to get more info about this “Excel CMS” plugin, please visit their website.
[wp_excel_cms name=”Sales Commission”]