Introduction
django CMS is a modern web publishing platform built with Django, the web application framework “for perfectionists with deadlines”. Django CMS offers out-of-the-box support for the common features you’d expect from a CMS, but can also be easily customised and extended by developers to create a site that is tailored to their precise needs. The following will show you how step by step of Django CMS installation, and also with screen dump examples.
Installation Steps
start a virtual environment under Raspberry Pi
1. sudo pip install virtualenv
2. virtualenv env
3. sourse env/bin/activate
Install Djangocms-Installer and create a project
1. pip install djangocms-installer
2. djangocms -p project project
Use default value for most questions
select lang = en, fr, de
Use default username : pi then input your password
Start CMS Application
1. cd project
j2. python manage.py runserver
3. You can browse the CMS web site via link http://127.0.0.1:8000/
Select a CMS template from Start Bootstrap
1. http://startbootstrap.com/template-overviews/modern-business/ –> download
2. copy css, font-awesome, fonts, js directories from download to project/project/static
3. copy full-width.html to project/project/templates directory
4. Edit line in settings.py
…
CMS_TEMPLATES = (
## Customize this
(‘fullwidth.html’, ‘Fullwidth’),
(‘sidebar_left.html’, ‘Sidebar Left’), –> Delete
(‘sidebar_right.html’, ‘Sidebar Right’) –> Delete
)
…
5. Delete ./templates/sidebar_left.html sidebar_right.html
6. Edit the full-width.html file as below:
{% load cms_tags menu_tags sekizai_tags staticfiles %}
<!DOCTYPE html>
<html lang=”{{ LANGUAGE_CODE }}”>
<head>
<meta charset=”utf-8″>
<meta http-equiv=”X-UA-Compatible” content=”IE=edge”>
<meta name=”viewport” content=”width=device-width, initial-scale=1″>
<meta name=”description” content=”{% page_attribute ‘meta_description’ %}”>
<meta name=”author” content=””>
<title>{% page_attribute ‘page_title’ %}CMS</title>
<!– Bootstrap Core CSS –>
<link href=”{% static “css/bootstrap.min.css” %}” rel=”stylesheet”>
<!– Custom CSS –>
<link href=”{% static “css/modern-business.css” %}” rel=”stylesheet”>
<!– Custom Fonts –>
<link href=”{% static “font-awesome/css/font-awesome.min.css” %}” rel=”stylesheet” type=”text/css”>
….
<![endif]–>
{% render_block “css” %}
</head>
<body>
{% cms_toolbar %}
<!– Navigation –>
….
{% show_menu 0 100 100 100 %} and delete lines as below:
<div class=”collapse navbar-collapse” id=”bs-example-navbar-collapse-1″>
<ul class=”nav navbar-nav navbar-right”>
{% show_menu 0 100 100 100 %}
</ul>
</div>
<!– /.navbar-collapse –>
….
<!– jQuery –>
<script src=”{% static “js/jquery.js” %}”></script>
<!– Bootstrap Core JavaScript –>
<script src=”{% static “js/bootstrap.min.js” %}”></script>
<% render_block “js” %}
</body>
Change the line <a class=”navbar-brand” href=”index.html”>Start Bootstrap</a>
To <a class=”navbar-brand” href=”/”>New CMS Name</a>
7. Rename base.html to base-bak.html
Rename full-width.html base.html
8. Restart the server and test.
Screen Dump of Installation
pi@gopi1:~ $ pip install virtualenv
pi@gopi1:~ $ virtualenv env
New python executable in /home/pi/env/bin/python
Installing setuptools, pip, wheel…done.
pi@gopi1:~ $ source env/bin/activate
(env) pi@gopi1:~ $ pip install djangocms-installer
Collecting djangocms-installer
Downloading djangocms_installer-0.8.8-py2.py3-none-any.whl (56kB)
100% |████████████████████████████████| 61kB 714kB/s
Requirement already satisfied (use –upgrade to upgrade): argparse in /usr/lib/python2.7 (from djangocms-installer)
Collecting dj-database-url>=0.4 (from djangocms-installer)
Collecting six (from djangocms-installer)
Using cached six-1.10.0-py2.py3-none-any.whl
Requirement already satisfied (use –upgrade to upgrade): pip in ./env/lib/python2.7/site-packages (from djangocms-installer)
Collecting tzlocal (from djangocms-installer)
Collecting pytz (from tzlocal->djangocms-installer)
Using cached pytz-2016.4-py2.py3-none-any.whl
Installing collected packages: dj-database-url, six, pytz, tzlocal, djangocms-installer
Successfully installed dj-database-url-0.4.1 djangocms-installer-0.8.8 pytz-2016.4 six-1.10.0 tzlocal-1.2.2
(env) pi@gopi1:~ $ djangocms -p project project
Database configuration (in URL format) [default sqlite://localhost/project.db]:
django CMS version (choices: 2.4, 3.0, 3.1, 3.2, stable, develop) [default stable]:
Django version (choices: 1.4, 1.5, 1.6, 1.7, 1.8, 1.9, stable) [default stable]:
Activate Django I18N / L10N setting; this is automatically activated if more than language is provided (choices: yes, no) [default yes]:
Install and configure reversion support (choices: yes, no) [default yes]:
Languages to enable. Option can be provided multiple times, or as a comma separated list. Only language codes supported by Django can be used here: en, fr
Optional default time zone [default Asia/Hong_Kong]:
Activate Django timezone support (choices: yes, no) [default yes]:
Activate CMS permission management (choices: yes, no) [default yes]:
Use Twitter Bootstrap Theme (choices: yes, no) [default no]:
Use custom template set [default no]:
Load a starting page with examples after installation (english language only). Choose “no” if you use a custom template set. (choices: yes, no) [default no]:
Creating the project
Please wait while I install dependencies
Dependencies installed
Creating the project
Operations to perform:
Synchronize unmigrated apps: project, staticfiles, messages, djangocms_admin_style, sitemaps, sekizai, treebeard
Apply all migrations: djangocms_file, reversion, djangocms_inherit, sessions, admin, djangocms_column, djangocms_text_ckeditor, sites, auth, djangocms_video, menus, contenttypes, djangocms_picture, djangocms_googlemap, djangocms_style, djangocms_link, cms, djangocms_teaser
Synchronizing apps without migrations:
Creating tables…
Running deferred SQL…
Installing custom SQL…
Running migrations:
Rendering model states… DONE
Applying contenttypes.0001_initial… OK
Applying auth.0001_initial… OK
Applying admin.0001_initial… OK
Applying contenttypes.0002_remove_content_type_name… OK
Applying auth.0002_alter_permission_name_max_length… OK
Applying auth.0003_alter_user_email_max_length… OK
Applying auth.0004_alter_user_username_opts… OK
Applying auth.0005_alter_user_last_login_null… OK
Applying auth.0006_require_contenttypes_0002… OK
Applying sites.0001_initial… OK
Applying cms.0001_initial… OK
Applying cms.0002_auto_20140816_1918… OK
Applying cms.0003_auto_20140926_2347… OK
Applying cms.0004_auto_20140924_1038… OK
Applying cms.0005_auto_20140924_1039… OK
Applying cms.0006_auto_20140924_1110… OK
Applying cms.0007_auto_20141028_1559… OK
Applying cms.0008_auto_20150208_2149… OK
Applying cms.0008_auto_20150121_0059… OK
Applying cms.0009_merge… OK
Applying cms.0010_migrate_use_structure… OK
Applying cms.0011_auto_20150419_1006… OK
Applying cms.0012_auto_20150607_2207… OK
Applying cms.0013_urlconfrevision… OK
Applying cms.0014_auto_20160404_1908… OK
Applying djangocms_column.0001_initial… OK
Applying djangocms_file.0001_initial… OK
Applying djangocms_file.0002_auto_20151202_1551… OK
Applying djangocms_file.0003_remove_related_name_for_cmsplugin_ptr… OK
Applying djangocms_file.0004_set_related_name_for_cmsplugin_ptr… OK
Applying djangocms_googlemap.0001_initial… OK
Applying djangocms_inherit.0001_initial… OK
Applying djangocms_inherit.0002_auto_20150622_1244… OK
Applying djangocms_link.0001_initial… OK
Applying djangocms_link.0002_auto_20140929_1705… OK
Applying djangocms_link.0003_auto_20150212_1310… OK
Applying djangocms_link.0004_auto_20150708_1133… OK
Applying djangocms_link.0005_auto_20151003_1710… OK
Applying djangocms_link.0006_remove_related_name_for_cmsplugin_ptr… OK
Applying djangocms_link.0007_set_related_name_for_cmsplugin_ptr… OK
Applying djangocms_picture.0001_initial… OK
Applying djangocms_picture.0002_auto_20151018_1927… OK
Applying djangocms_style.0001_initial… OK
Applying djangocms_style.0002_set_related_name_for_cmsplugin_ptr… OK
Applying djangocms_teaser.0001_initial… OK
Applying djangocms_text_ckeditor.0001_initial… OK
Applying djangocms_text_ckeditor.0002_remove_related_name_for_cmsplugin_ptr… OK
Applying djangocms_text_ckeditor.0003_set_related_name_for_cmsplugin_ptr… OK
Applying djangocms_video.0001_initial… OK
Applying djangocms_video.0002_set_related_name_for_cmsplugin_ptr… OK
Applying menus.0001_initial… OK
Applying reversion.0001_initial… OK
Applying reversion.0002_auto_20141216_1509… OK
Applying sessions.0001_initial… OK
Creating admin user
Username (leave blank to use ‘pi’):
Email address: goldman.au168@gmail.com
Password:
Password (again):
Superuser created successfully.
All done!
Get into “/home/pi/cmsproj” directory and type “python manage.py runserver” to start your project
(env) pi@gopi1:~ $ cd project
(env) pi@gopi1:~/project $ ls
manage.py media project project.db requirements.txt static
(env) pi@gopi1:~/project $ python manage.py runserver
Performing system checks…
System check identified no issues (0 silenced).
May 08, 2016 – 15:05:32
Django version 1.8.13, using settings ‘project.settings’
Starting development server at http://127.0.0.1:8000/
Quit the server with CONTROL-C.
New revision!!!! RELOAD!
28495694-7c4f-409e-9605-c499bf16e97a (<type ‘str’>)
-> None (<type ‘NoneType’>)
reverse(‘my_test_app_view’): Reverse for ‘my_test_app_view’ with arguments ‘()’ and keyword arguments ‘{}’ not found. 0 pattern(s) tried: []
reverse(‘my_test_app_view’): Reverse for ‘my_test_app_view’ with arguments ‘()’ and keyword arguments ‘{}’ not found. 0 pattern(s) tried: []
[08/May/2016 15:05:33] “GET /admin/ HTTP/1.1” 302 0
[08/May/2016 15:05:34] “GET /en/admin/ HTTP/1.1” 302 0
[08/May/2016 15:05:35] “GET /en/admin/login/?next=/en/admin/ HTTP/1.1” 200 3107
[08/May/2016 15:05:35] “GET /admin/ HTTP/1.1” 302 0
[08/May/2016 15:05:35] “GET /en/admin/ HTTP/1.1” 302 0
[08/May/2016 15:05:35] “GET /en/admin/login/?next=/en/admin/ HTTP/1.1” 200 3107
[08/May/2016 15:05:36] “GET /static/admin/css/base.css HTTP/1.1” 200 14049
[08/May/2016 15:05:36] “GET /static/admin/css/base.css HTTP/1.1” 200 14049
[08/May/2016 15:05:36] “GET /static/admin/css/login.css HTTP/1.1” 200 940
[08/May/2016 15:05:36] “GET /static/djangocms_admin_style/js/jquery.ui.touch-punch.min.js HTTP/1.1” 200 0
[08/May/2016 15:05:36] “GET /static/djangocms_admin_style/css/djangocms-admin.css HTTP/1.1” 200 151181
[08/May/2016 15:05:36] “GET /static/djangocms_admin_style/js/base-admin.js HTTP/1.1” 200 2910
[08/May/2016 15:05:36] “GET /static/djangocms_admin_style/js/drag-touch-support.js HTTP/1.1” 200 1200
[08/May/2016 15:05:36] “GET /static/admin/css/login.css HTTP/1.1” 200 940
[08/May/2016 15:05:37] “GET /static/djangocms_admin_style/fonts/django-admin-iconfont.woff?v=3.2.0 HTTP/1.1” 200 10612
[08/May/2016 15:07:16] “POST /en/admin/login/?next=/en/admin/ HTTP/1.1” 302 0
[08/May/2016 15:07:17] “GET /en/admin/ HTTP/1.1” 200 7525
[08/May/2016 15:07:17] “GET /static/admin/css/base.css HTTP/1.1” 304 0
[08/May/2016 15:07:17] “GET /static/admin/css/dashboard.css HTTP/1.1” 200 434
[08/May/2016 15:07:17] “GET /static/admin/css/dashboard.css HTTP/1.1” 200 434
[08/May/2016 15:07:17] “GET /static/djangocms_admin_style/css/djangocms-admin.css HTTP/1.1” 304 0
[08/May/2016 15:07:17] “GET /static/djangocms_admin_style/js/base-admin.js HTTP/1.1” 304 0
[08/May/2016 15:07:17] “GET /static/djangocms_admin_style/js/drag-touch-support.js HTTP/1.1” 304 0
[08/May/2016 15:07:17] “GET /static/djangocms_admin_style/js/jquery.ui.touch-punch.min.js HTTP/1.1” 304 0
[08/May/2016 15:07:17] “GET /static/djangocms_admin_style/img/icon_arrow_right.png HTTP/1.1” 200 15812
^C(env) pi@gopi1:~/project $ ls
manage.py media project project.db requirements.txt static
(env) pi@gopi1:~/project $ cd project
(env) pi@gopi1:~/project/project $ ls
__init__.py settings.py static urls.py wsgi.py
__init__.pyc settings.pyc templates urls.pyc wsgi.pyc
(env) pi@gopi1:~/projectj/project $ cd /home/allusers/startboot*
(env) pi@gopi1:/home/allusers/startbootstrap-modern-business-1.0.5 $ ls
404.html contact.html index.html portfolio-4-col.html
about.html css js portfolio-item.html
bin faq.html LICENSE pricing.html
blog-home-1.html font-awesome portfolio-1-col.html README.md
blog-home-2.html fonts portfolio-2-col.html services.html
blog-post.html full-width.html portfolio-3-col.html sidebar.html
(env) pi@gopi1:/home/allusers/startbootstrap-modern-business-1.0.5 $ cp -r css /home/pi/project/project/static
(env) pi@gopi1:/home/allusers/startbootstrap-modern-business-1.0.5 $ cp -r font-awesome /home/pi/project/project/static
(env) pi@gopi1:/home/allusers/startbootstrap-modern-business-1.0.5 $ cp -r fonts /home/pi/project/project/static
(env) pi@gopi1:/home/allusers/startbootstrap-modern-business-1.0.5 $ cp -r js /home/pi/project/project/static
(env) pi@gopi1:/home/allusers/startbootstrap-modern-business-1.0.5 $ cp full-width.html /home/pi/project/project/templates
(env) pi@gopi1:/home/allusers/startbootstrap-modern-business-1.0.5 $ cd /home/pi/project/project/templates
(env) pi@gopi1:~/project/project/templates $ ls
base.html fullwidth.html sidebar_right.html
full-width.html sidebar_left.html
(env) pi@gopi1:~/project/project/templates $ ls -l
total 24
-rw-r–r– 1 pi pi 1122 May 8 15:01 base.html
-rwxr-xr-x 1 pi pi 6589 May 8 15:13 full-width.html
-rw-r–r– 1 pi pi 191 May 8 15:01 fullwidth.html
-rw-r–r– 1 pi pi 308 May 8 15:01 sidebar_left.html
-rw-r–r– 1 pi pi 308 May 8 15:01 sidebar_right.html
(env) pi@gopi1:~/project/project/templates $ vi full-width.html
(env) pi@gopi1:~/project/project/templates $ mv base.html base-bak.html
(env) pi@gopi1:~/project/project/templates $ mv full-width.html base.html
(env) pi@gopi1:~/project/project/templates $ cd ..
(env) pi@gopi1:~/project/project $ ls
__init__.py settings.py static urls.py wsgi.py
__init__.pyc settings.pyc templates urls.pyc wsgi.pyc
(env) pi@gopi1:~/project/project $ vi settings.py
(env) pi@gopi1:~/project/project $ cd templates
(env) pi@gopi1:~/project/project/templates $ ls
base-bak.html base.html fullwidth.html sidebar_left.html sidebar_right.html
(env) pi@gopi1:~/project/project/templates $ vi fullwidth.html
(env) pi@gopi1:~/project/project/templates $ cd ..
(env) pi@gopi1:~/project/project $ cd ..
(env) pi@gopi1:~/project $ python manage.py runserver
Performing system checks…
System check identified no issues (0 silenced).
May 08, 2016 – 15:33:06
Django version 1.8.13, using settings ‘project.settings’
Starting development server at http://127.0.0.1:8000/
Quit the server with CONTROL-C.
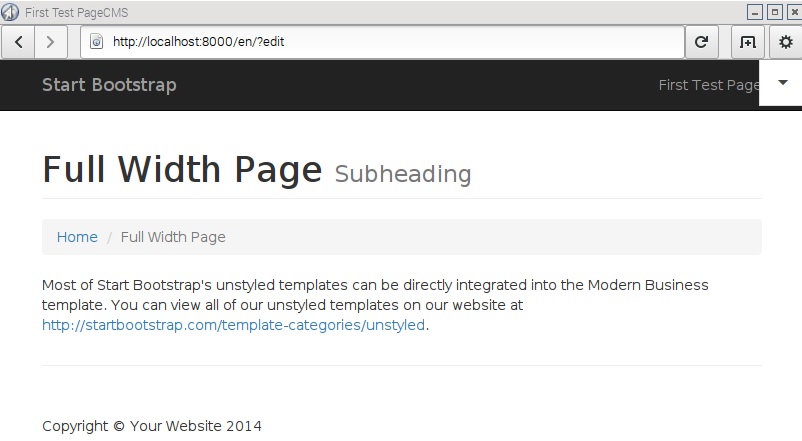
Screen Dump Result
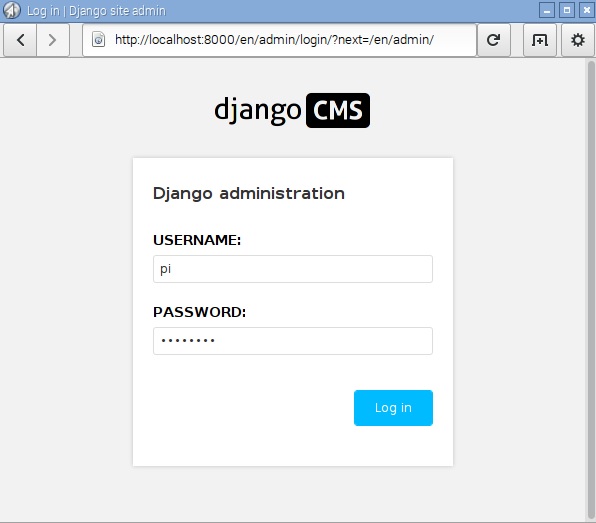
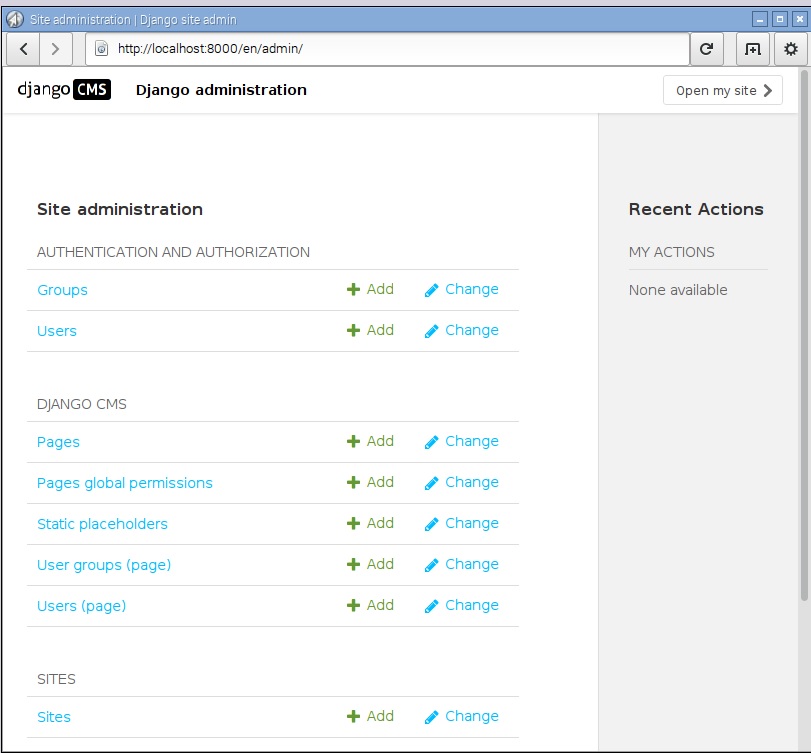
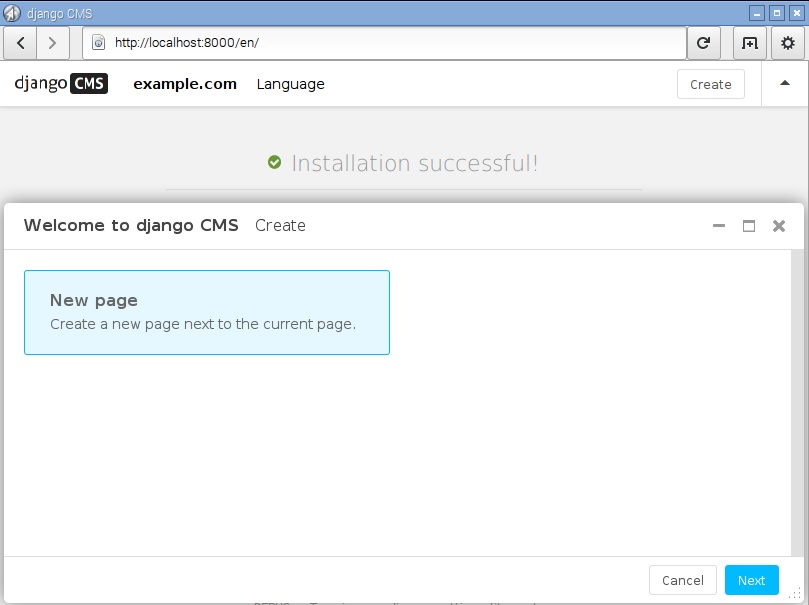
After succeeded installation, you can browse the django CMS via link http://127.0.0.1:8000 as below screen dump results.
BONUS:
If you make any change, you can run the following command:
python manage.py makemigrations
python manage.py migrate
Useful Add-On Plug-in:
pip install aldryn-style
pip uninstall djangocms-style
pip install aldryn-bootstrap3

