
Introduction
Concepts approach
- High Availability level.
- High stability level.
- Scalable in memory space and server size.
- The hard disk space is independent of the instance’s size , it can be set according to your needs and increase if you desires.
- It offers “double” security since, in addition to the default firewall, AWS Security Groups are available, these restrict the ports you prefer.
How to migrate WordPress?
- CPanel account
- WordPress application
- AWS account
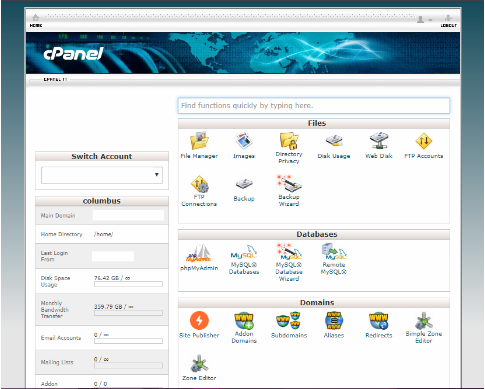
1. The first step is to get the compressed directory and the database. The compressed directory, where you’re going to find WordPress, must be as a .tar.gz file; and the database would be in .sql format. To obtain the compressed directory of WordPress (document root) and the database, you can go to “Backup” section in CPanel and select the files you want to export.
After you have the database and the compressed document root on your computer, it is time to start with the creation of the EC2 instance and RDS (database server) on AWS.
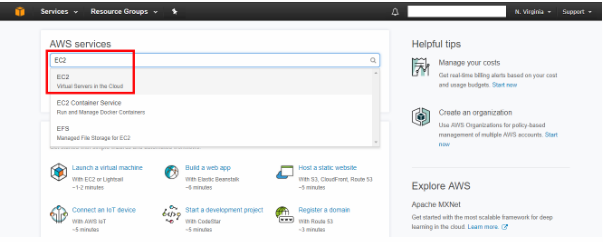
2. Once you had logged in your AWS account, you must create the EC2 instance:
Services > EC2 > Instances > “Launch Instance”
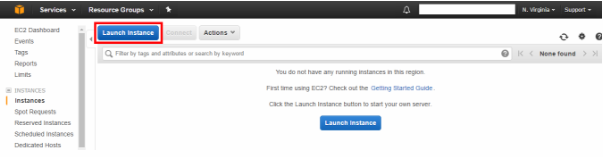
After this step, you will be able to configure its size, volume size, network (VPC), etc.
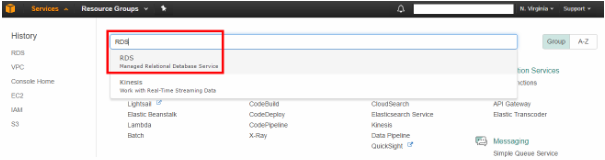
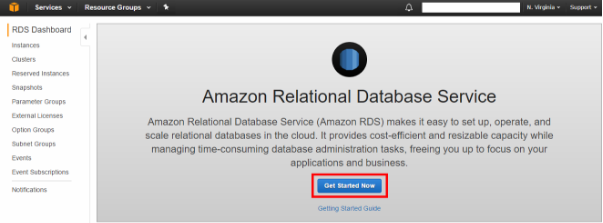
3. You can create and configure RDS to your database in:
Services > RDS > Instances > “Launch DB instance” or “Get started Now”
4. Now you will be able to configure it, I recommend you to use MySQL like database manager because it is the most commonly used and a WordPress doesn’t need services or specialized features.
5. The next step is to test RDSconnection, create user and database with the wp-config.php file information of the original WordPress and import the database.
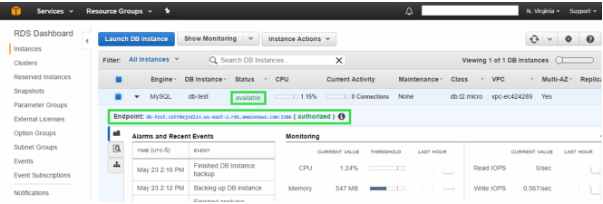
6. Afterwards, you’ll transfer the compressed document root to EC2 instance and uncompress it in /var/www/ directory preferably. Next, you need to edit the new wp-config.php file with the correct credentials and DB host (RDS endpoint, you can see it in:
Services > RDS > Instances > Select your RDS > in the displayed information you can see the ENDPOINT
7. Thereafter, will be necessary:
7.1 Update the packages.
sudo apt update
7.2 Install Nginx, PHP and PHP-FPM.
sudo apt install nginx php7.0 php7.0-common php7.0-curl php7.0-mysql php7.0-mcrypt php7.0-fpm
7.3 Configure the vhost.
server {
        listen 443;
        server_name dominio.com www.dominio.com;

        root /var/www/dominio.com;
        index index.php index.html;

        access_log /var/log/nginx/dominio-access.log;
        error_log /var/log/nginx/dominio-error.log;

        location / {
                try_files $uri $uri/ /index.php?$args;
                index index.php index.html;
        }

        location ~* .(jpg|jpeg|gif|css|png|js|ico|html)$ {
                access_log off;
                expires max;
        }

        location ~ .php$ {
                fastcgi_split_path_info ^(.+.php)(/.+)$;
                fastcgi_pass unix:/var/run/php7.0-fpm.sock;
                fastcgi_index index.php;
                include fastcgi_params;
                fastcgi_param SCRIPT_FILENAME $document_root$fastcgi_script_name;
        }
}
7.4 Add the following line on /etc/hosts file in your computer/laptop (change 123.123.123.123 to public IP of your instance).
123.123.123.123 dominio.com
7.5 Test the site (example).
Why is important to migrate CPanel to AWS?
- AWS is so easy to use for everyone to quickly and securely host applications in the Cloud.
- It enables you to select the operating system, programming language, web application platform, database, and other services you need.
- It is cost-effective, you pay only for what you need.
- Your WordPress would be reliable.
- AWS utilizes an end-to-end approach to secure and harden the infrastructure.
- Total control and the ability to configure the EC2 instance.
- It allows the database optimization.
Conclusion
We’ve decided the best for you and your WordPress is to migrate from CPanel to AWS. As a result, the migrated WordPress could be configured depending on the site’s needs, but the most important thing is that having Nginx as the web server would make your site faster. The EC2 instance gives you total control of the site because it is not shared and doesn’t have any invasive control panel. The next steps are to optimize the EC2 instance in your WordPress, harden the WordPress, improve the page speed of Google and automate backups.
Information Source: https://cloudacademy.com/amazon-web-services/how-to-install-and-run-wordpress-on-aws-course/